This summer we built a simple treehouse in the woods near our house. Following is a list of materials and some pictures that we took during construction.
Disclaimer
Building is dangerous. It involves power tools, lifting heavy things, and if you do it wrong someone can get really hurt. You should also check you local codes to make sure you are ok to start.
Treehouse Ideas
As we started looking at ideas, I found a ton of very elaborate plans. There is even a tv show about building treehouses. We didn’t watch the show since I wanted to keep kid expectations in check. We wanted to build this in under a week so we had plenty of time to use it, and although I wanted my son to help, I was really doing the major construction by myself.
Overall I wanted to make sure we had something safe that at least a few kids (and adults if allowed) could enjoy at the same time. We have a lot of really big trees on our property, so I wanted to make sure you could look all the way up in to the treetops. I didn’t want my construction to damage them. To begin I thought of building on one or two trees like these sites show.
http://www.wikihow.com/Build-a-Treehouse
http://www.instructables.com/id/How-to-build-a-treehouse/
Looking through these and a several others, I learned that building in a tree requires a solid tree and heavy duty hardware. If you use two trees, you really need to let the second tree move. So good designs solidly attach the beams to the first tree and then brace the cross pieces on the second. Those braces should have metal over the wood that lets the cross pieces slide as the trees move.
As I read more, I decided not to attach to our trees. I looked for something that didn’t have to sway with the trees. I found a really cool freestanding design. It looked sturdier, and like something I could pull off in a reasonable amount of time. It could easily fit in a clearing near a few of our big trees. This design also didn’t require digging post holes or using quickcrete, and that would save me some time.
http://www.theclassicarchives.com/how-to-guides/free-tree-house-wood-plans
Treehouse Design
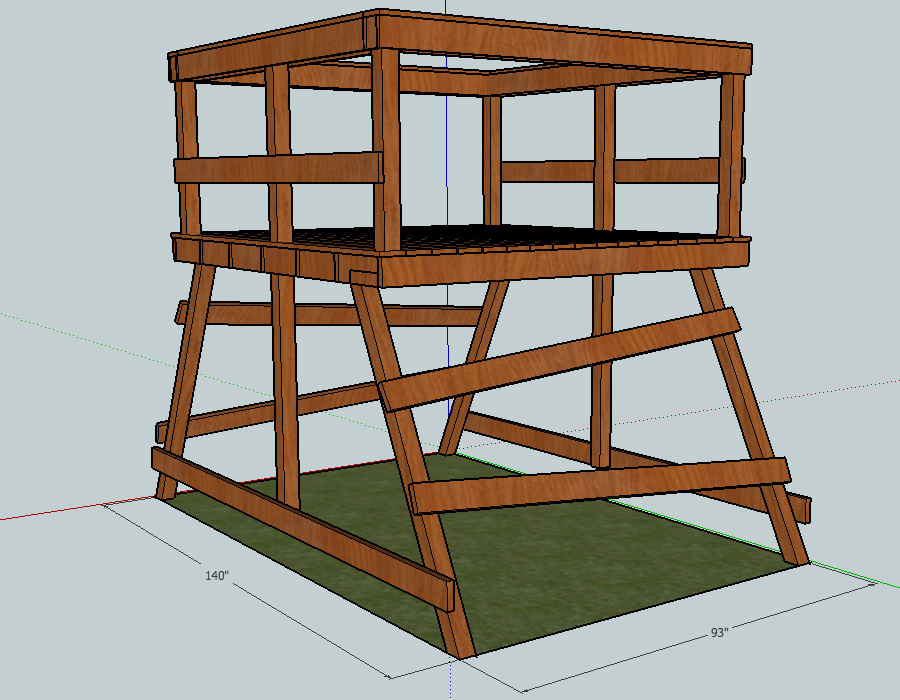
To refine my ideas I used a free 3d design program called “Google Sketchup Make.” My design included a platform about 6 ft from the ground like in the freestanding design above. I did cut the platform size to 8 ft x 8 ft. My thinking is that this is plenty big for kids to play on and it will hold a small tent or hammock. I know that I can lift 8 ft boards, and that it would be hard for me to lift the structure if it had 12 ft boards.
As I started building, I was planning to add a ladder. My helper found it easy to climb the side supports, so we pulled that from our initial build plan.
The two types of wood we considered were treated pine lumber or cedar. I did consider making the whole thing out of cedar because it is a lot lighter than pressure treated lumber. Cedar is more expensive. It was also tough to get the pieces I needed. My local lumber supplier didn’t have it on hand. So we decided to use pressure treated lumber. If you choose to use it wear a mask as you cut boards. It is really bad to inhale the dust. Also you may have to pre-drill a lot of the screw holes to keep it from cracking. On the plus side it is really light and does smell really nice as you build. It also can be painted or stained right away. Pressure treated lumber has to dry out before it will take as much paint or stain as you would want.
Treehouse Tools and Materials
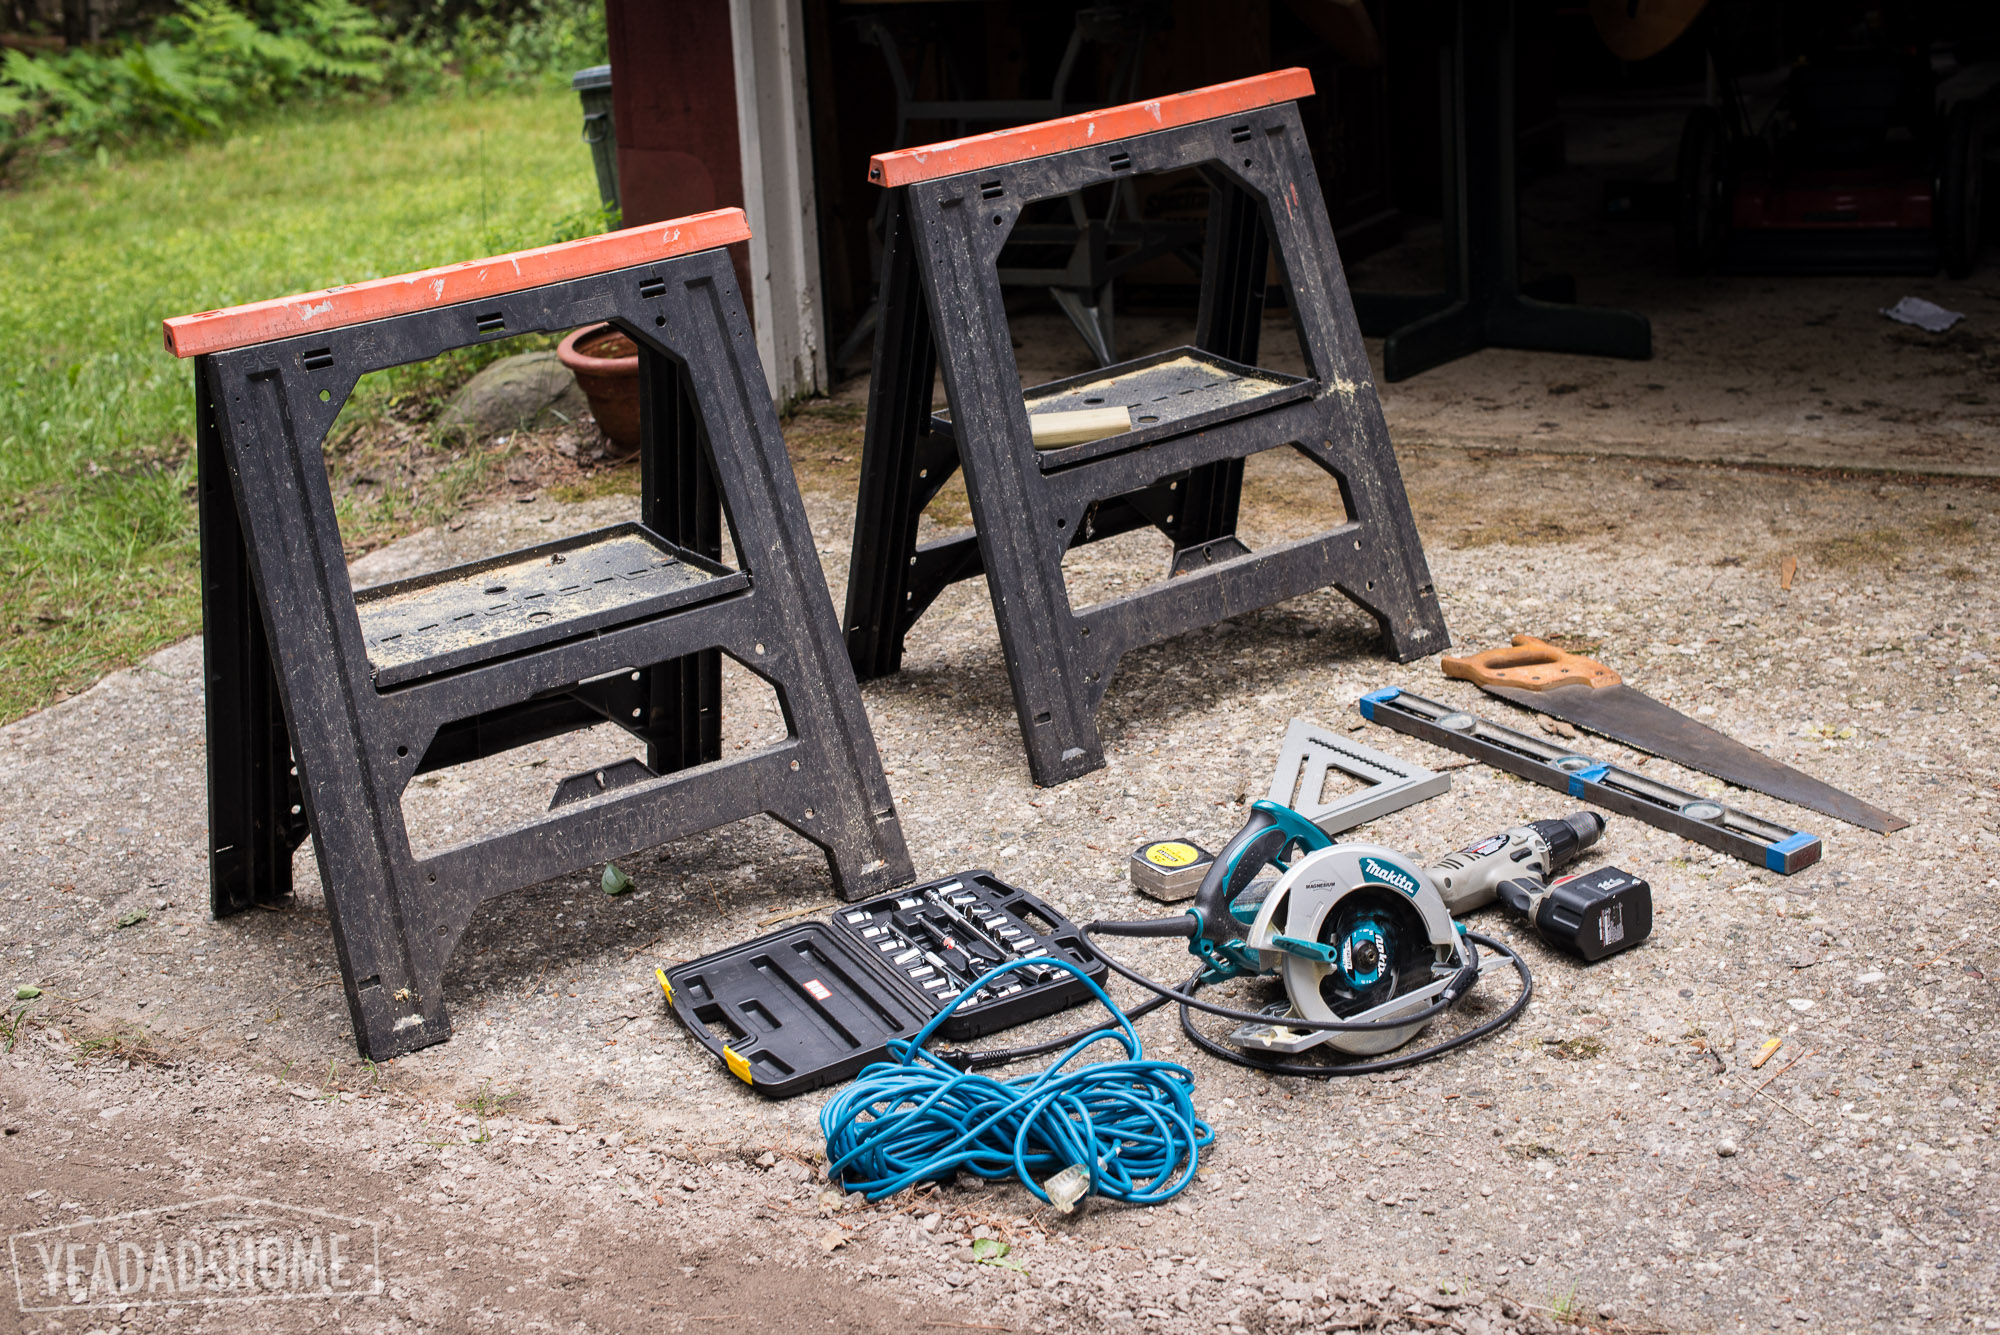
For the project, I definitely needed these tools:
- Circular saw
- Extension cord
- Hand saw
- Cordless drill with a few batteries
- A 1/2 inch drill bit that is 6 inches long
- Two saw horses
- Socket set
- A hammer
- Level
- Builder’s square
- Tape measure
- Square shovel
The only tool I wished I had, but didn’t for this project was a miter saw. It would have been a lot easier to cut the 4×4 pieces. My circular saw got me about half way through those, and I finished with the hand saw.
An optional tool was a jigsaw. I used it to cut the deck boards at the ends of the platform. If I didn’t have this, I would have just cut those boards into a few pieces using straight cuts.
Hardware
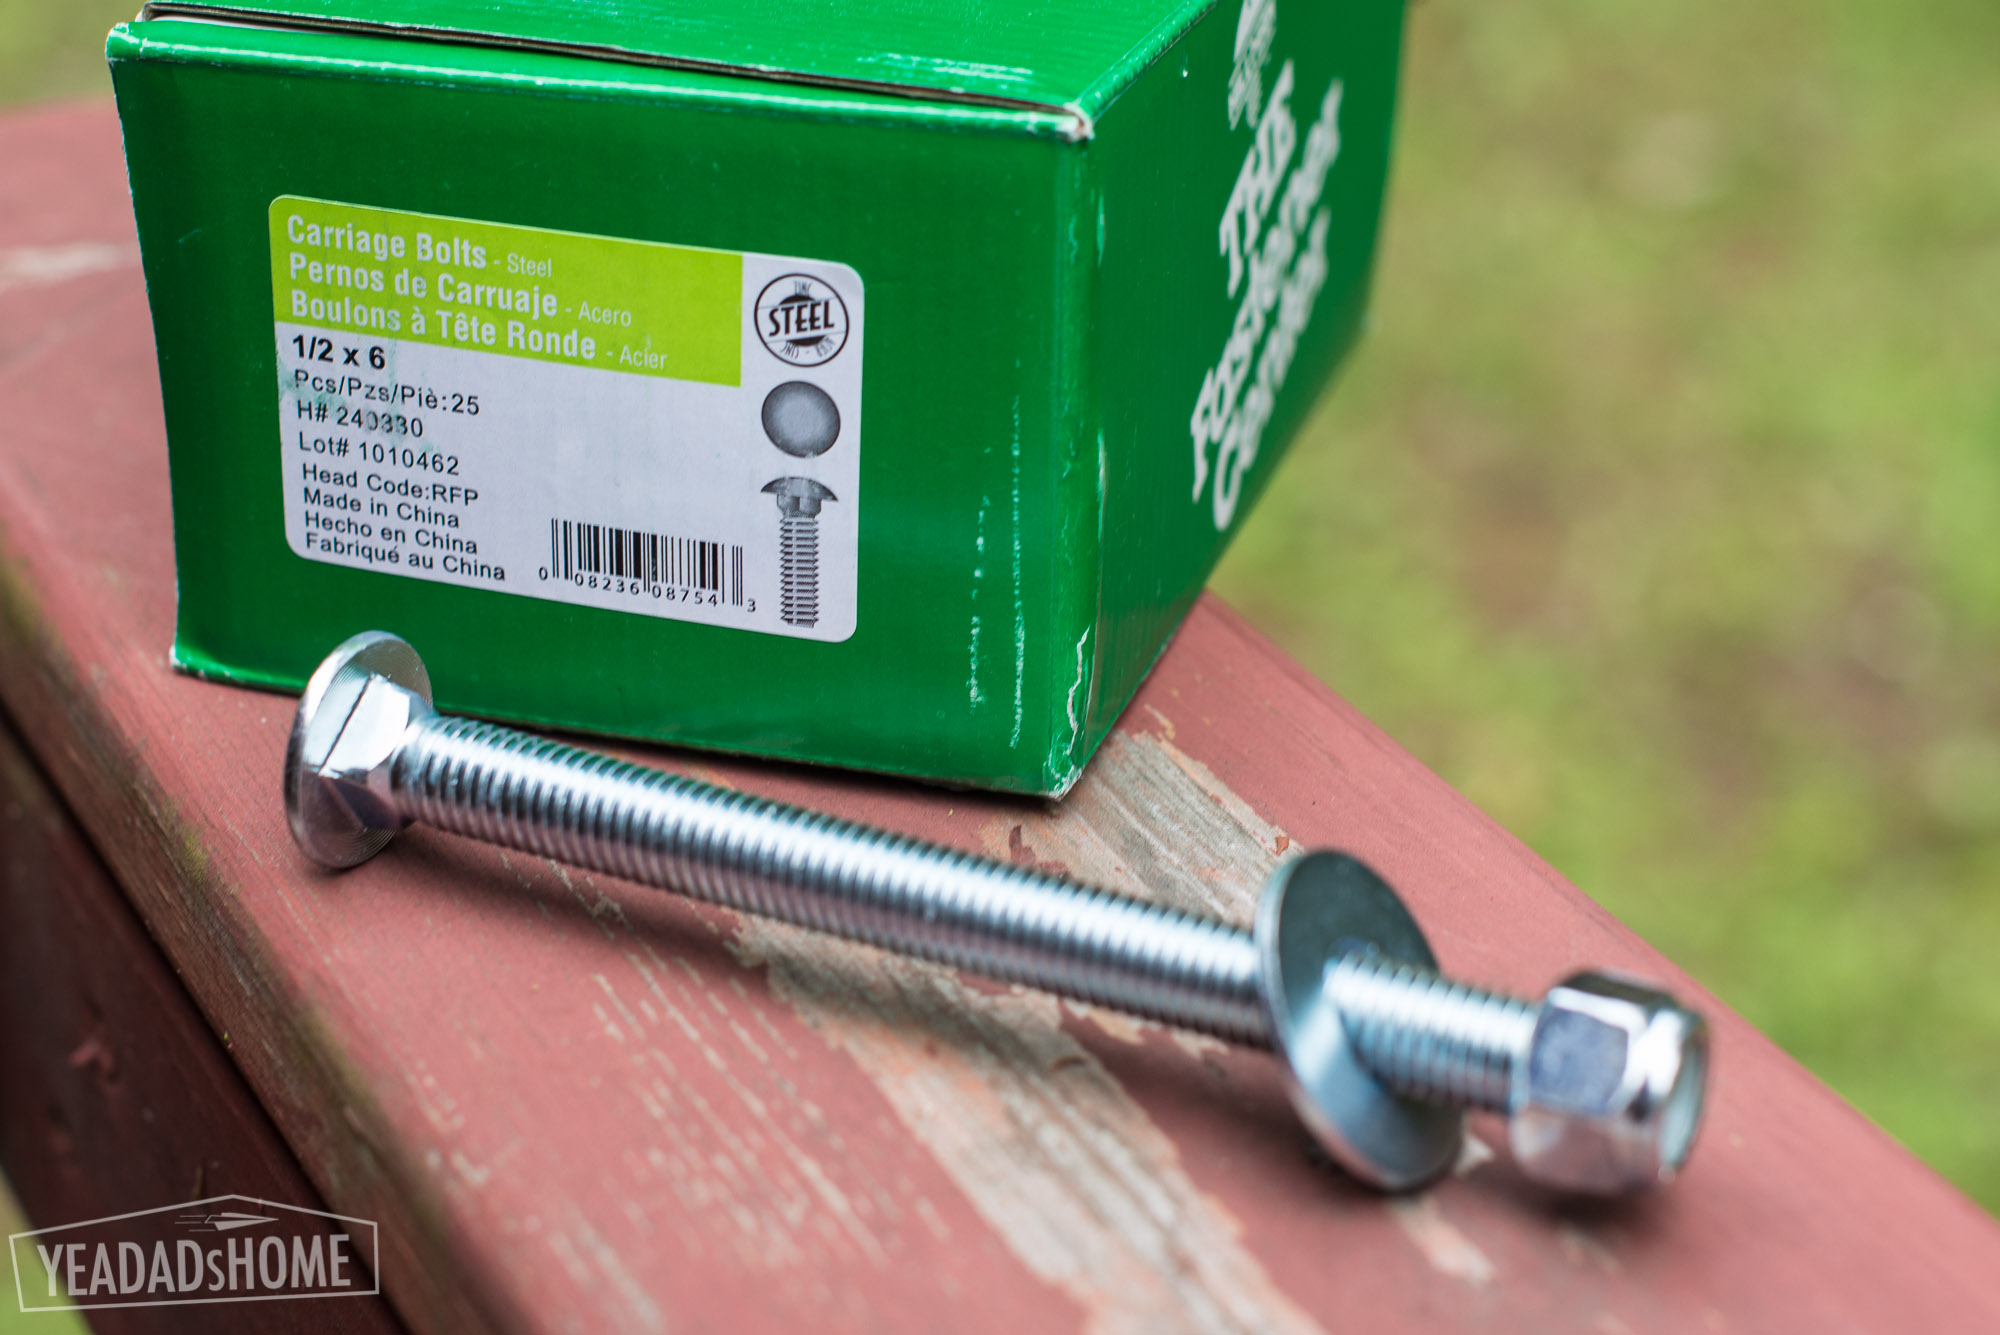
12 ½ in x 6 inch, stainless carriage bolts (for the legs and side posts)
12 stainless washers
12 stainless locking nuts
50 grk structural screws (for structural attachments)
3 lbs deck screws (only for attaching deck boards)

Pressure Treated Lumber
2×6 8ft – 13 pieces
4×4 8ft – 8 pieces
2×6 12 ft – 2 pieces
1×6 8ft deck board – 30 pieces
Cinder Blocks
8 x 16 x 4 inch solid blocks – 4 pieces
Total Cost
$500 = $400 lumber + $100 hardware
Getting the Lumber
For my project I was lucky that I found a local lumber yard that would deliver and pick good boards for me. From what I have read, this isn’t always easy to do. Before I found that lumber yard, I thought about getting a delivery from one of the big stores. The more I read their reviews though, the less I liked that option. It sounds like some pick the knurliest pieces for that kind of delivery. Another option I considered was renting a truck for the day, picking the wood myself, and hauling it home. If I hadn’t found the place I did, I would have spent a full day moving lumber. I would have gotten some other things that don’t fit in my car too, but still I saved a bunch of time by working with a local lumber company.
Building the Treehouse
Day 1
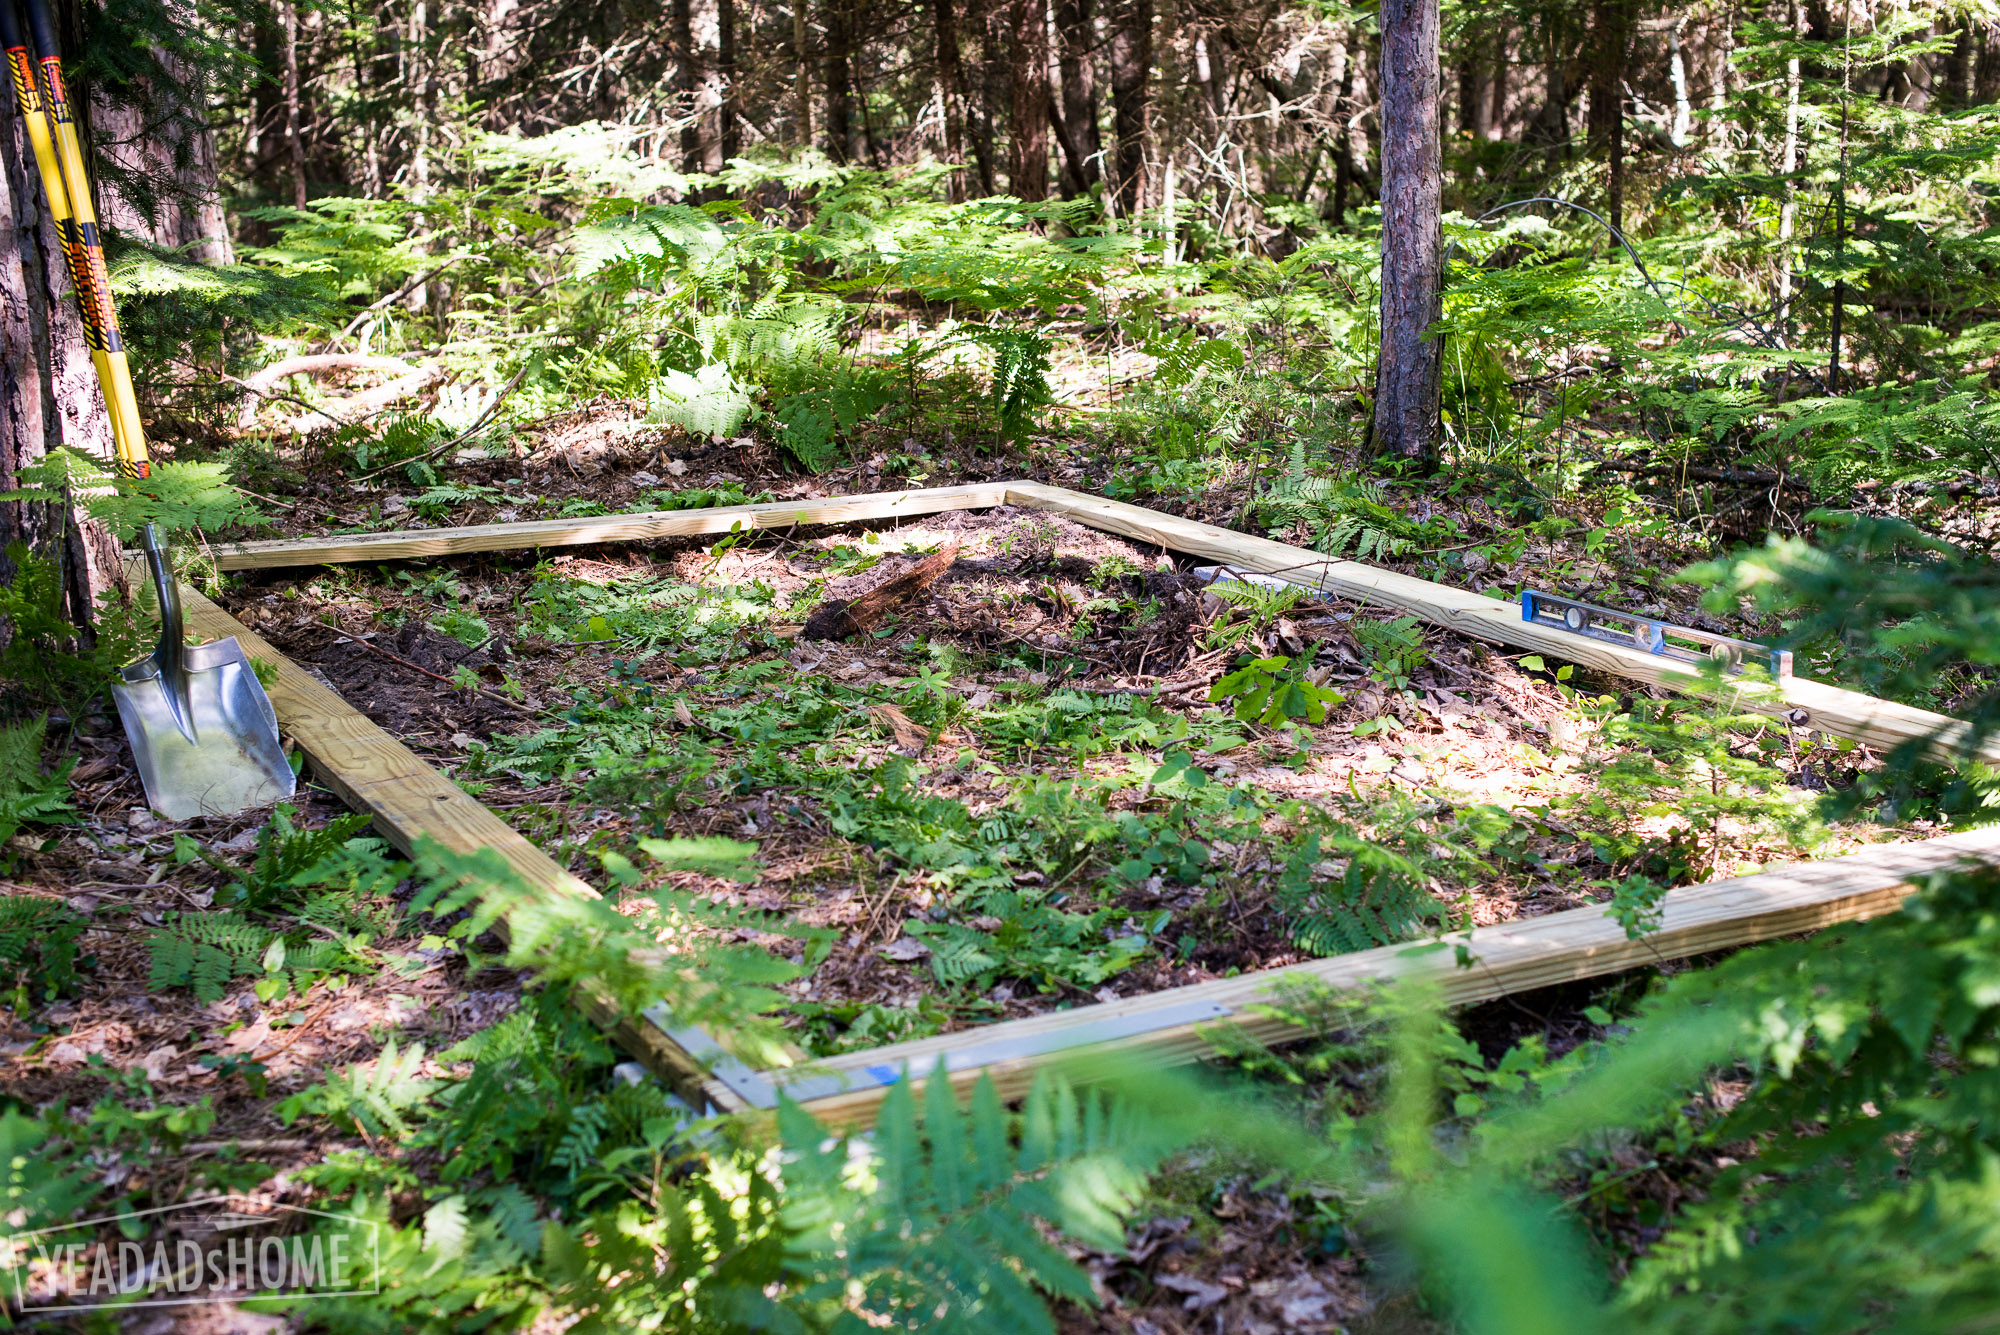
Our first day we picked up materials. Choose a site. Then we laid out and leveled the block where the feet would rest.
To set the blocks. I used a few 12 foot and 8 foot boards to size up a 8×12 ft rectangle. I used a square shovel to dig holes for each that would level the blocks out. We have fairly sandy soil, and it had rained quite a bit, so this was pretty easy. You might need another tool if your ground is harder.
Day 2
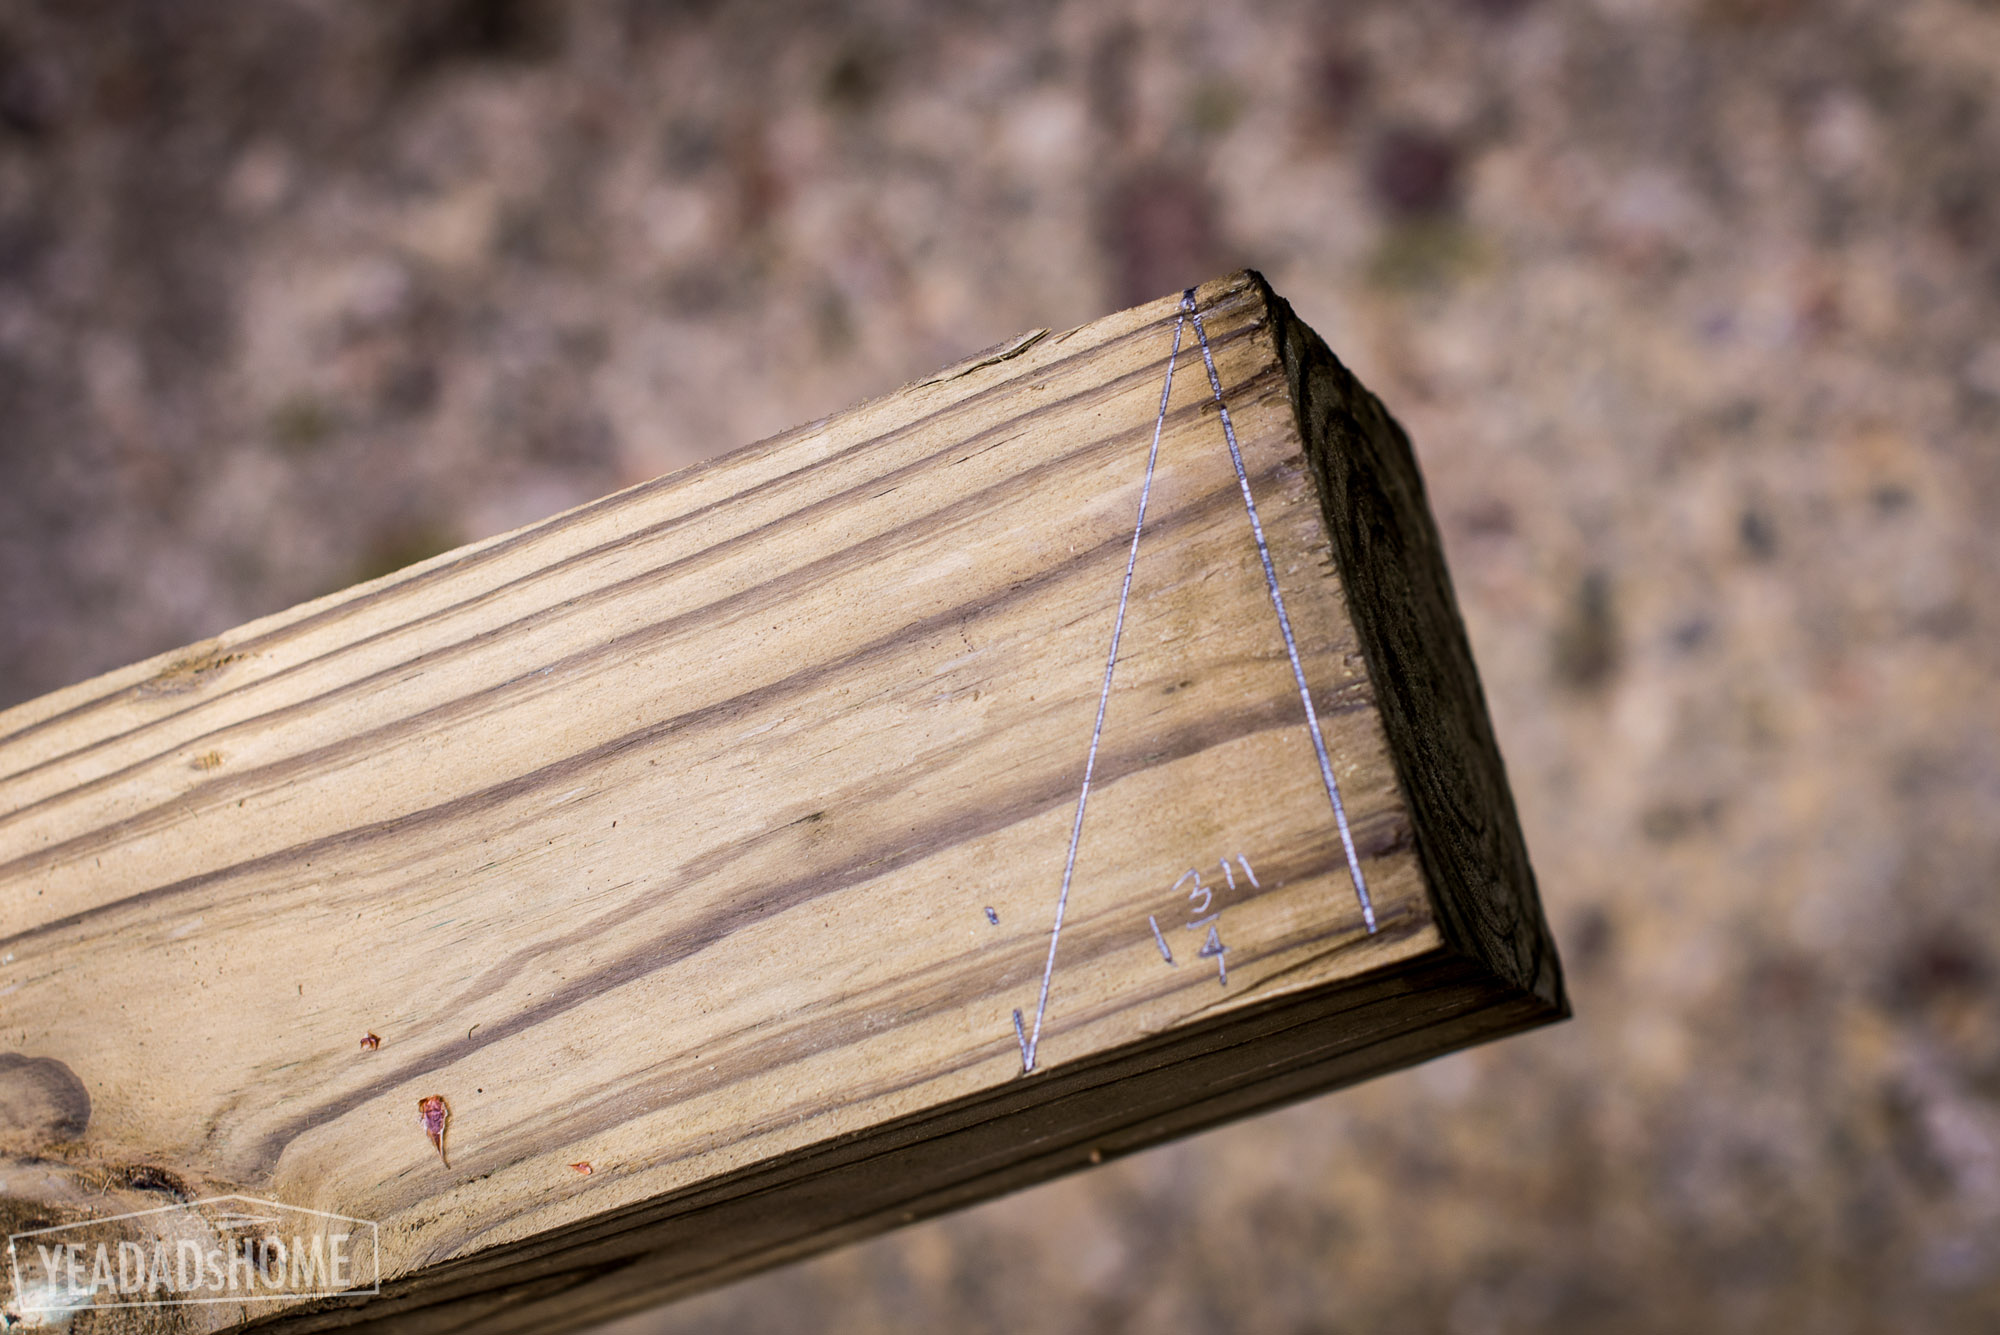
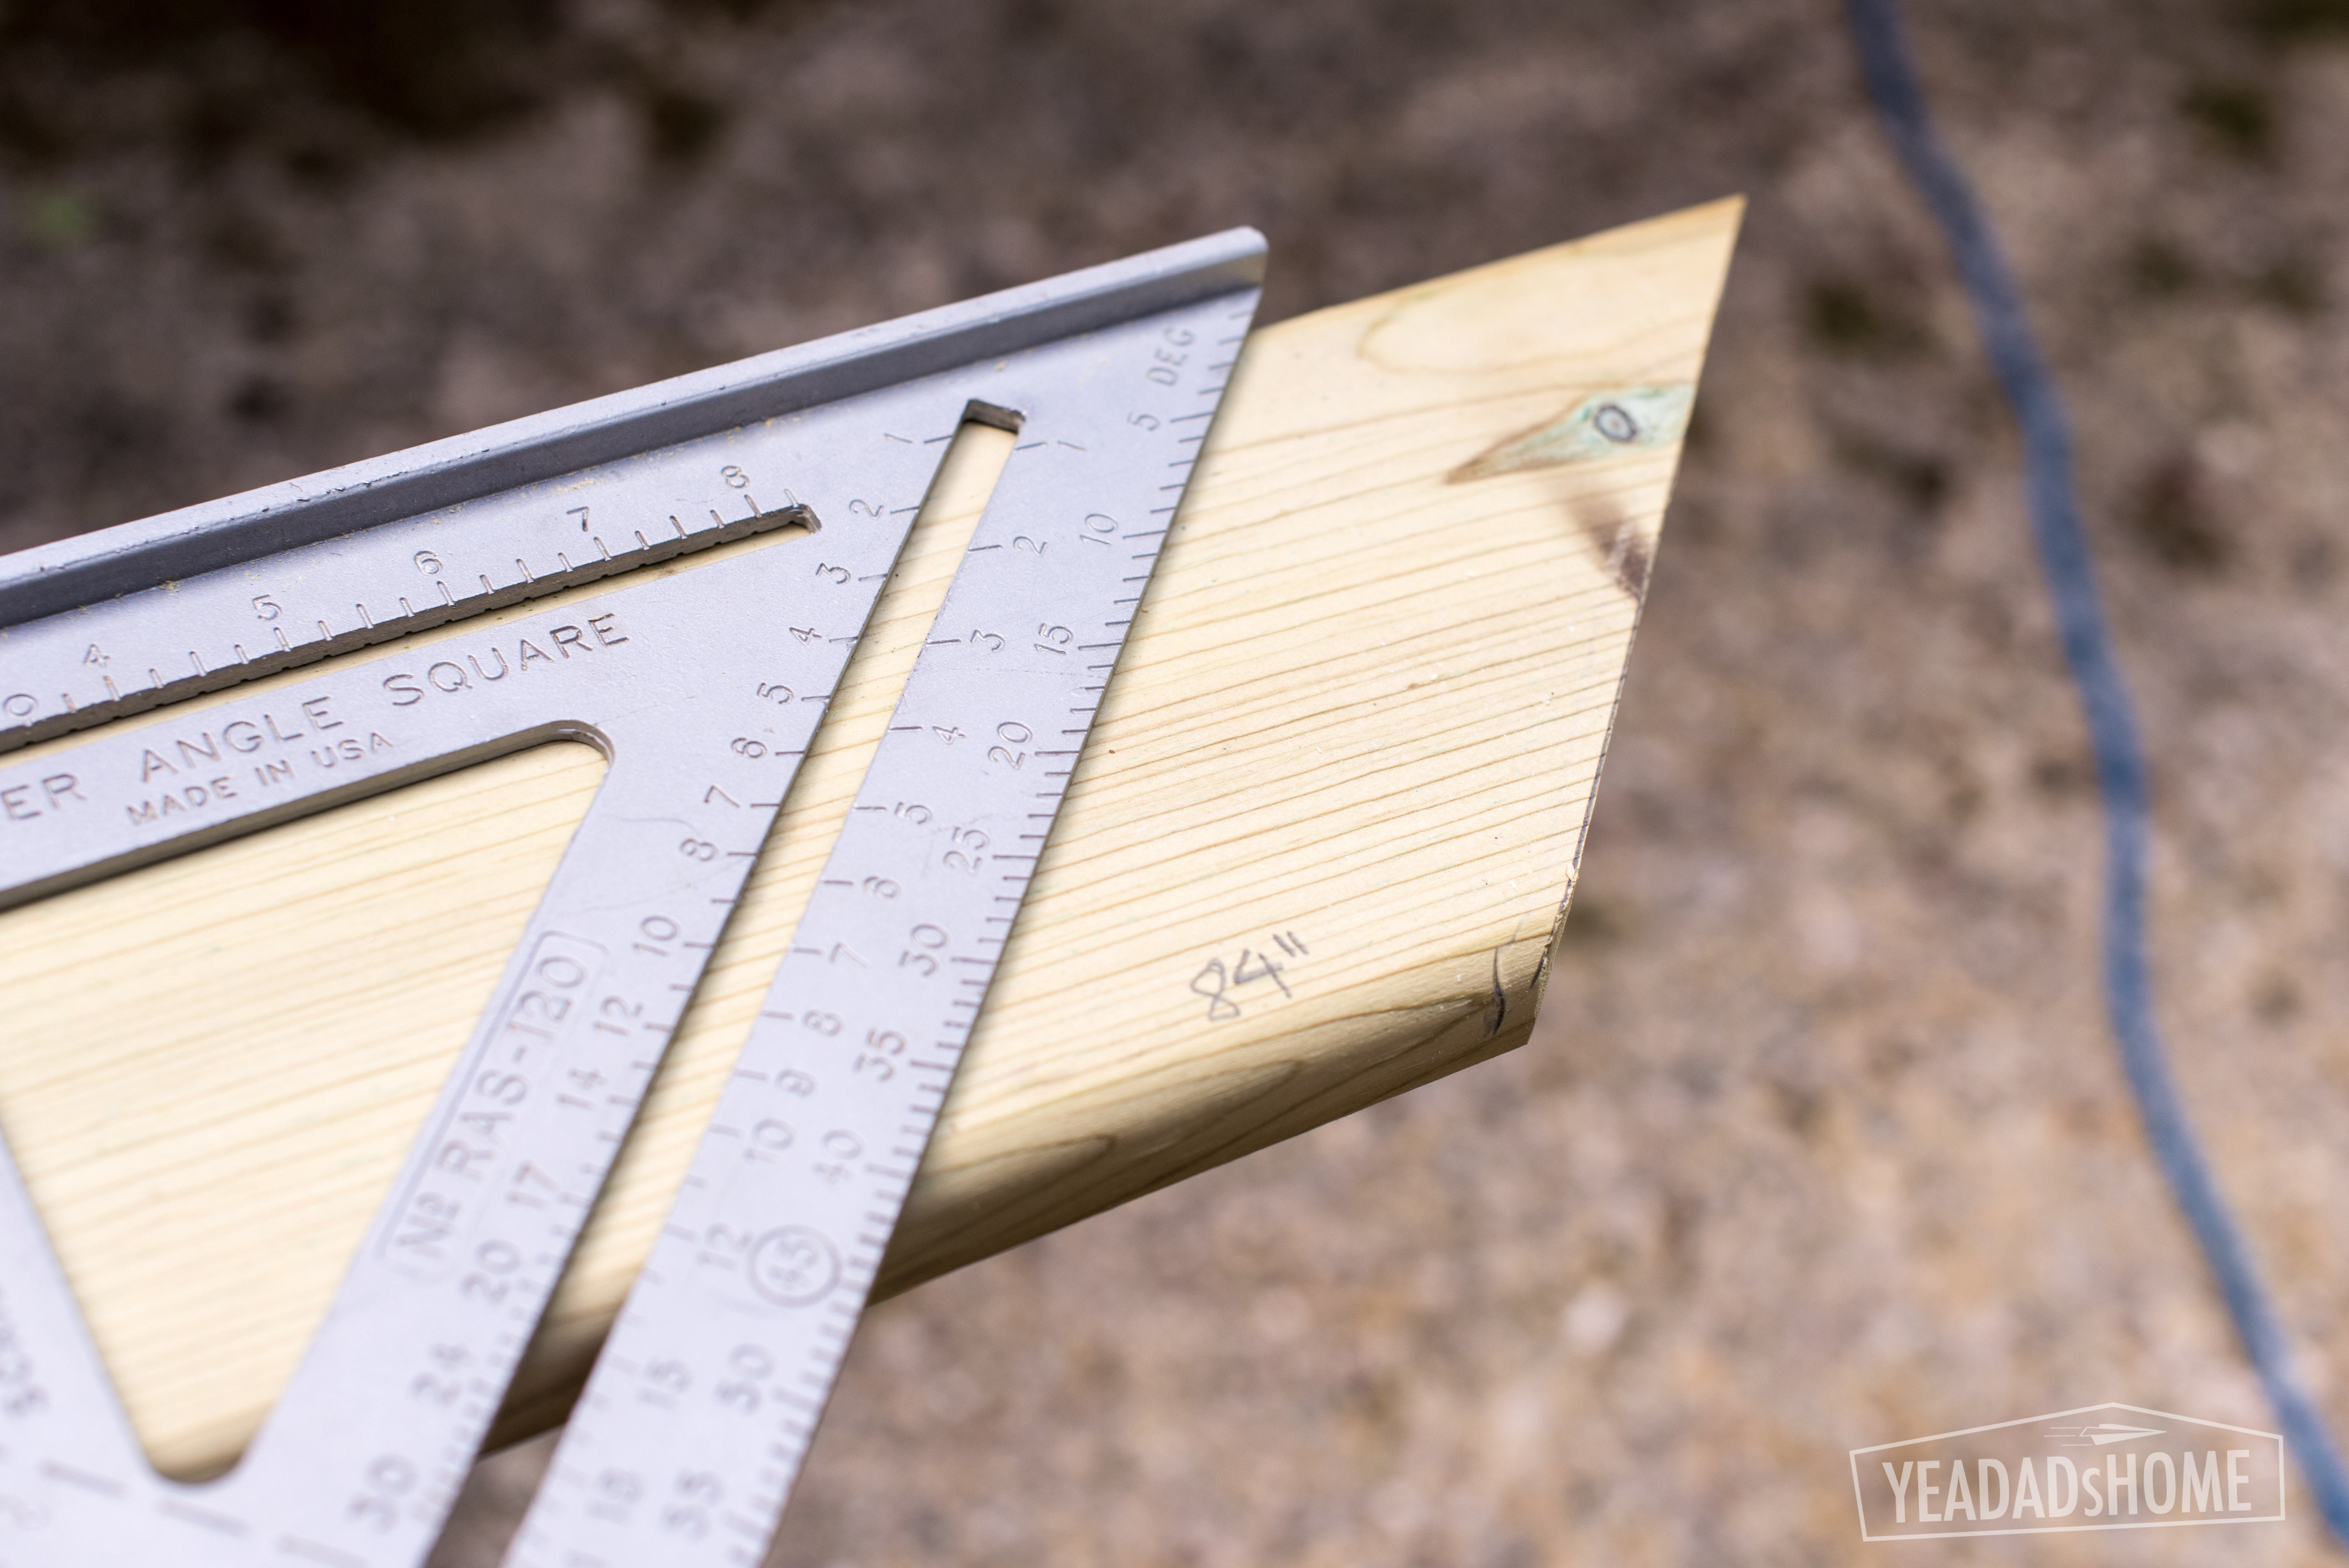
To cut the legs, I measured 76 inches along 4 of the 4x4s and then marked a line that angles 1.75 inches from that mark.
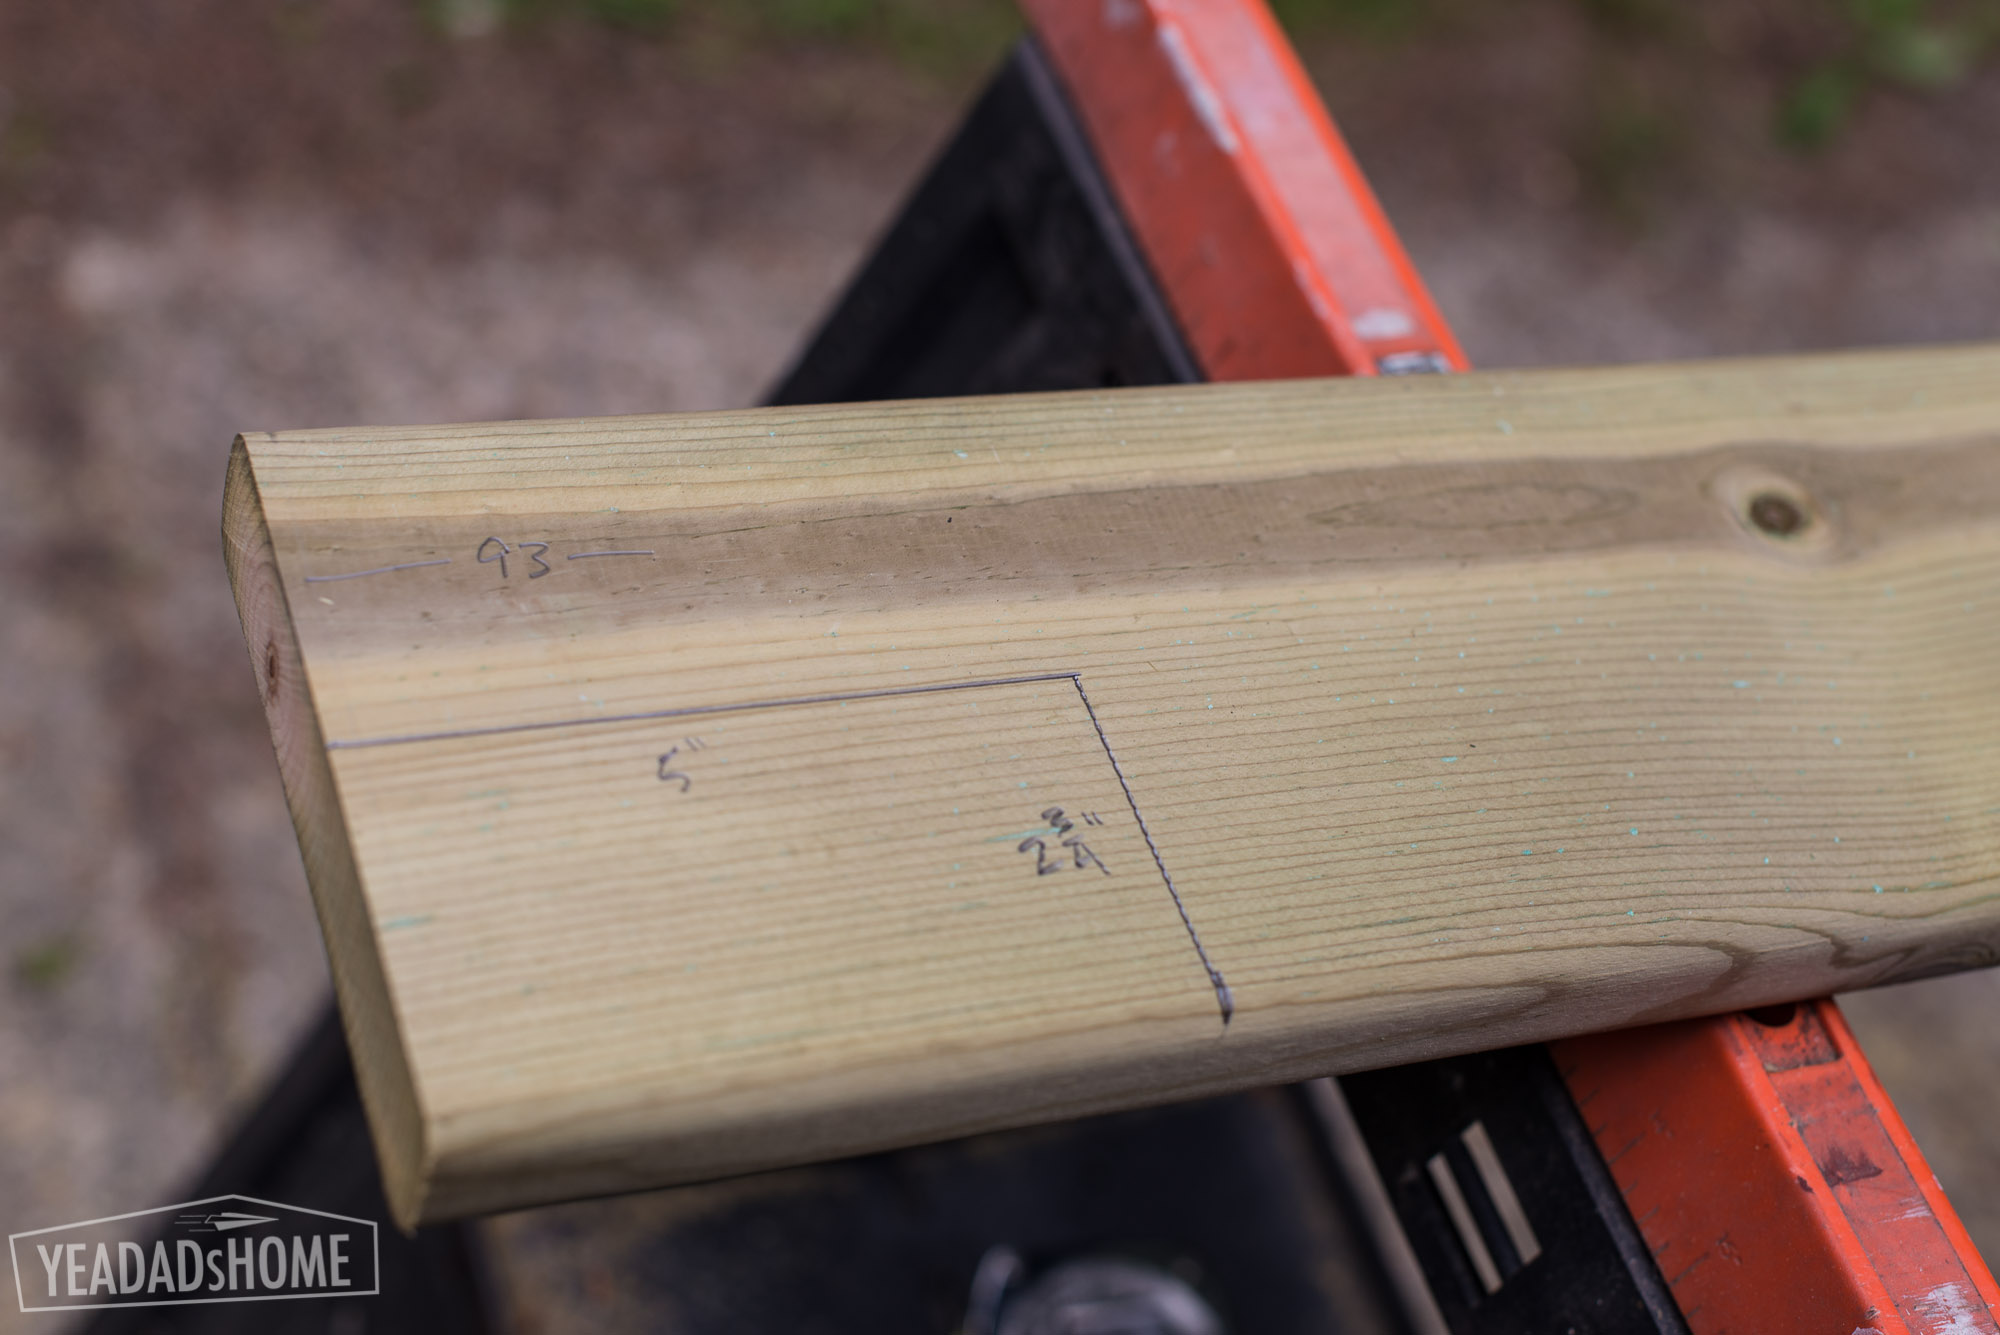
The platform measured 96 inches square, so we had two 2×6 pieces that measured 96 inches. The other joists were 93 inches.


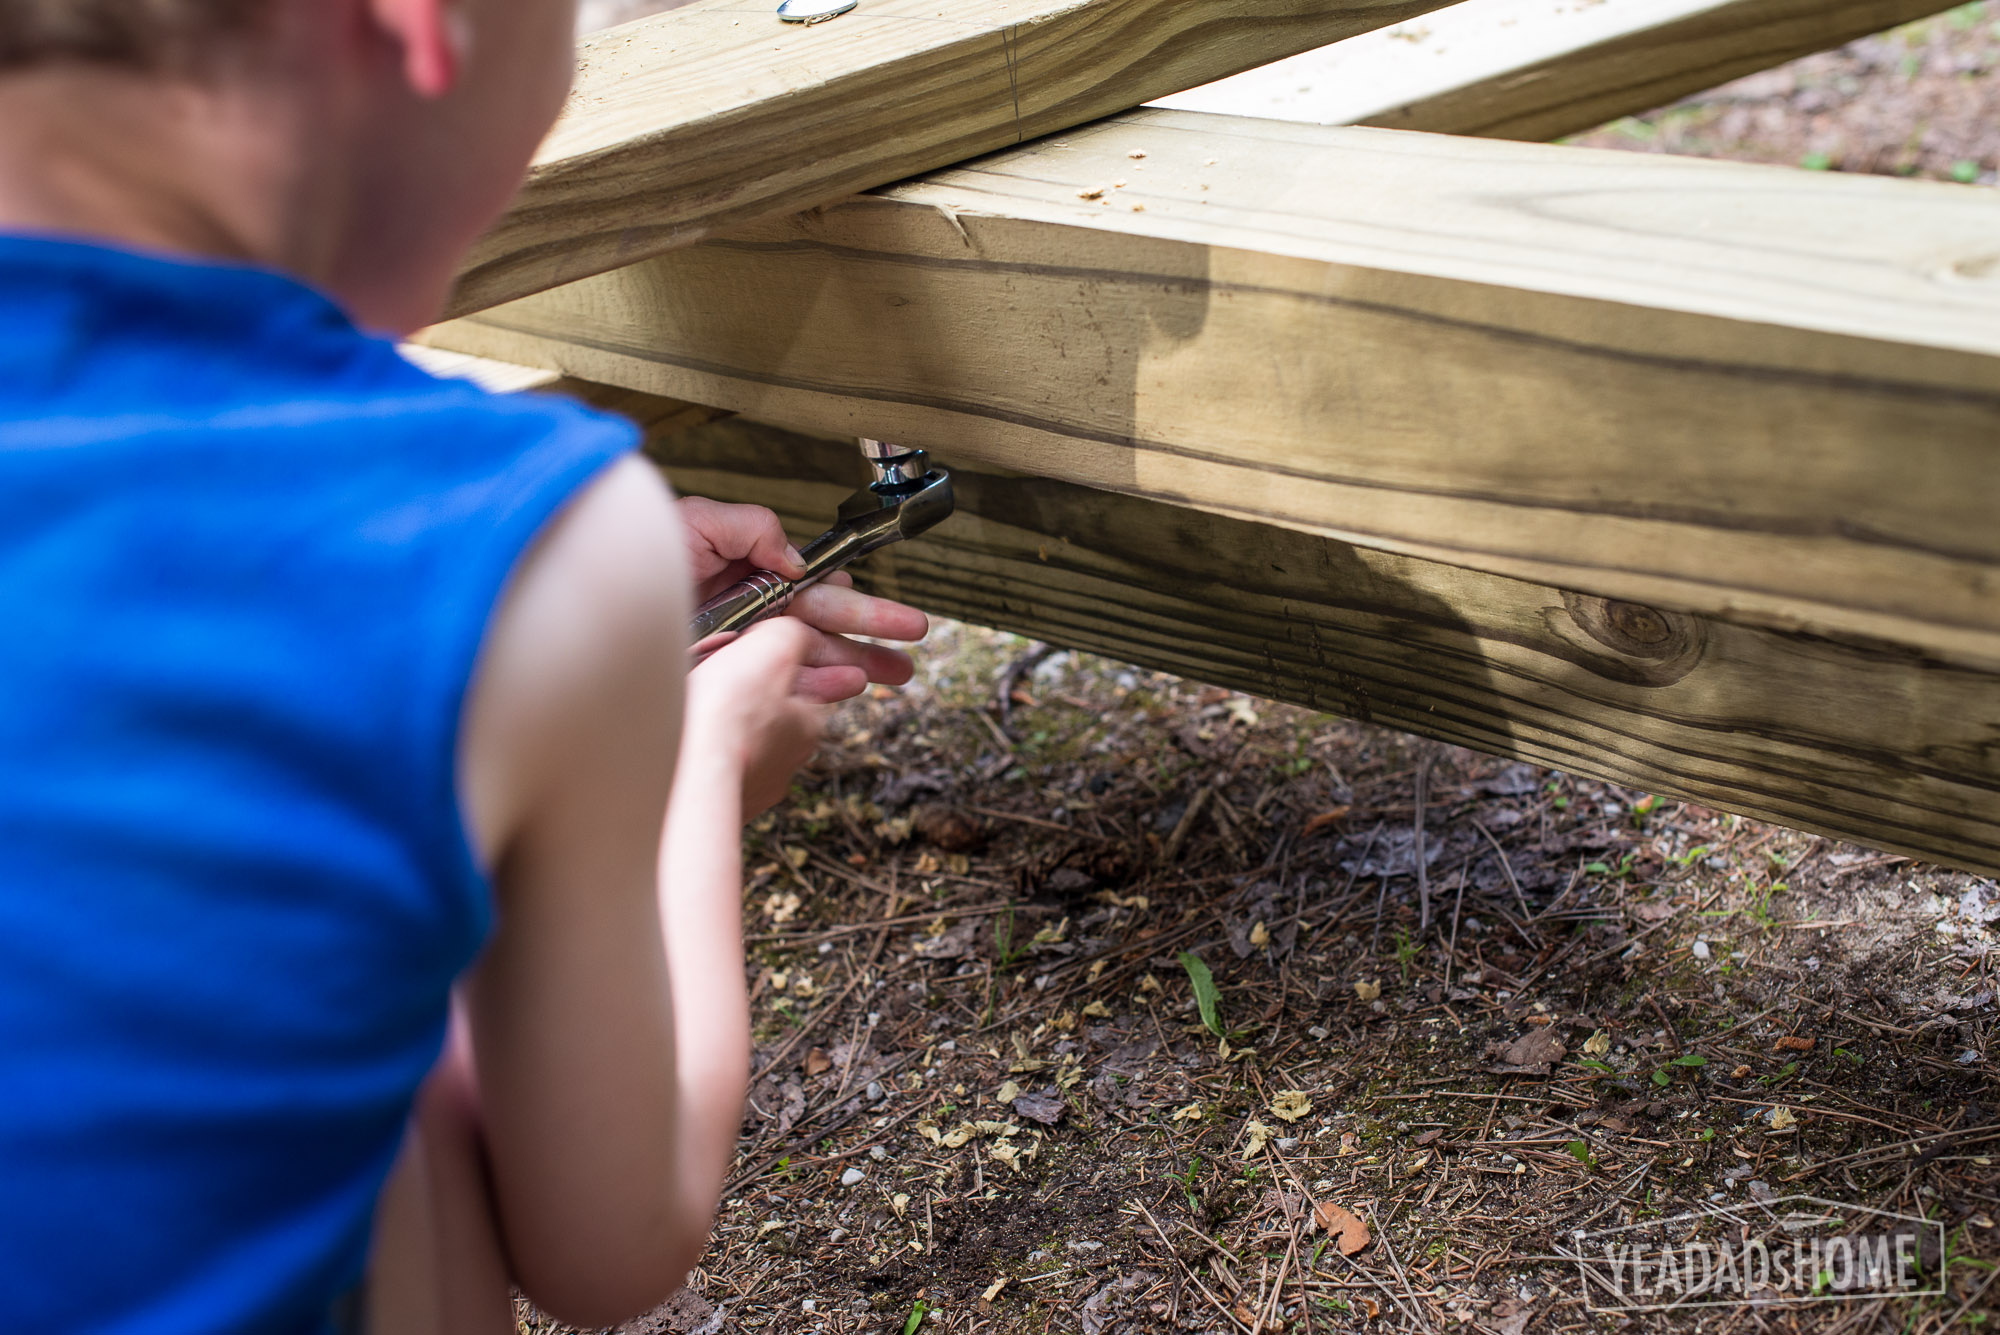
To make sure I got the legs and treehouse ends exactly the same, we set the on top of each other. I screwed the boards together and then drilled holes for the bolts. We used a hammer to set the carriage bolts into place and then the socket set to tighten then nuts.
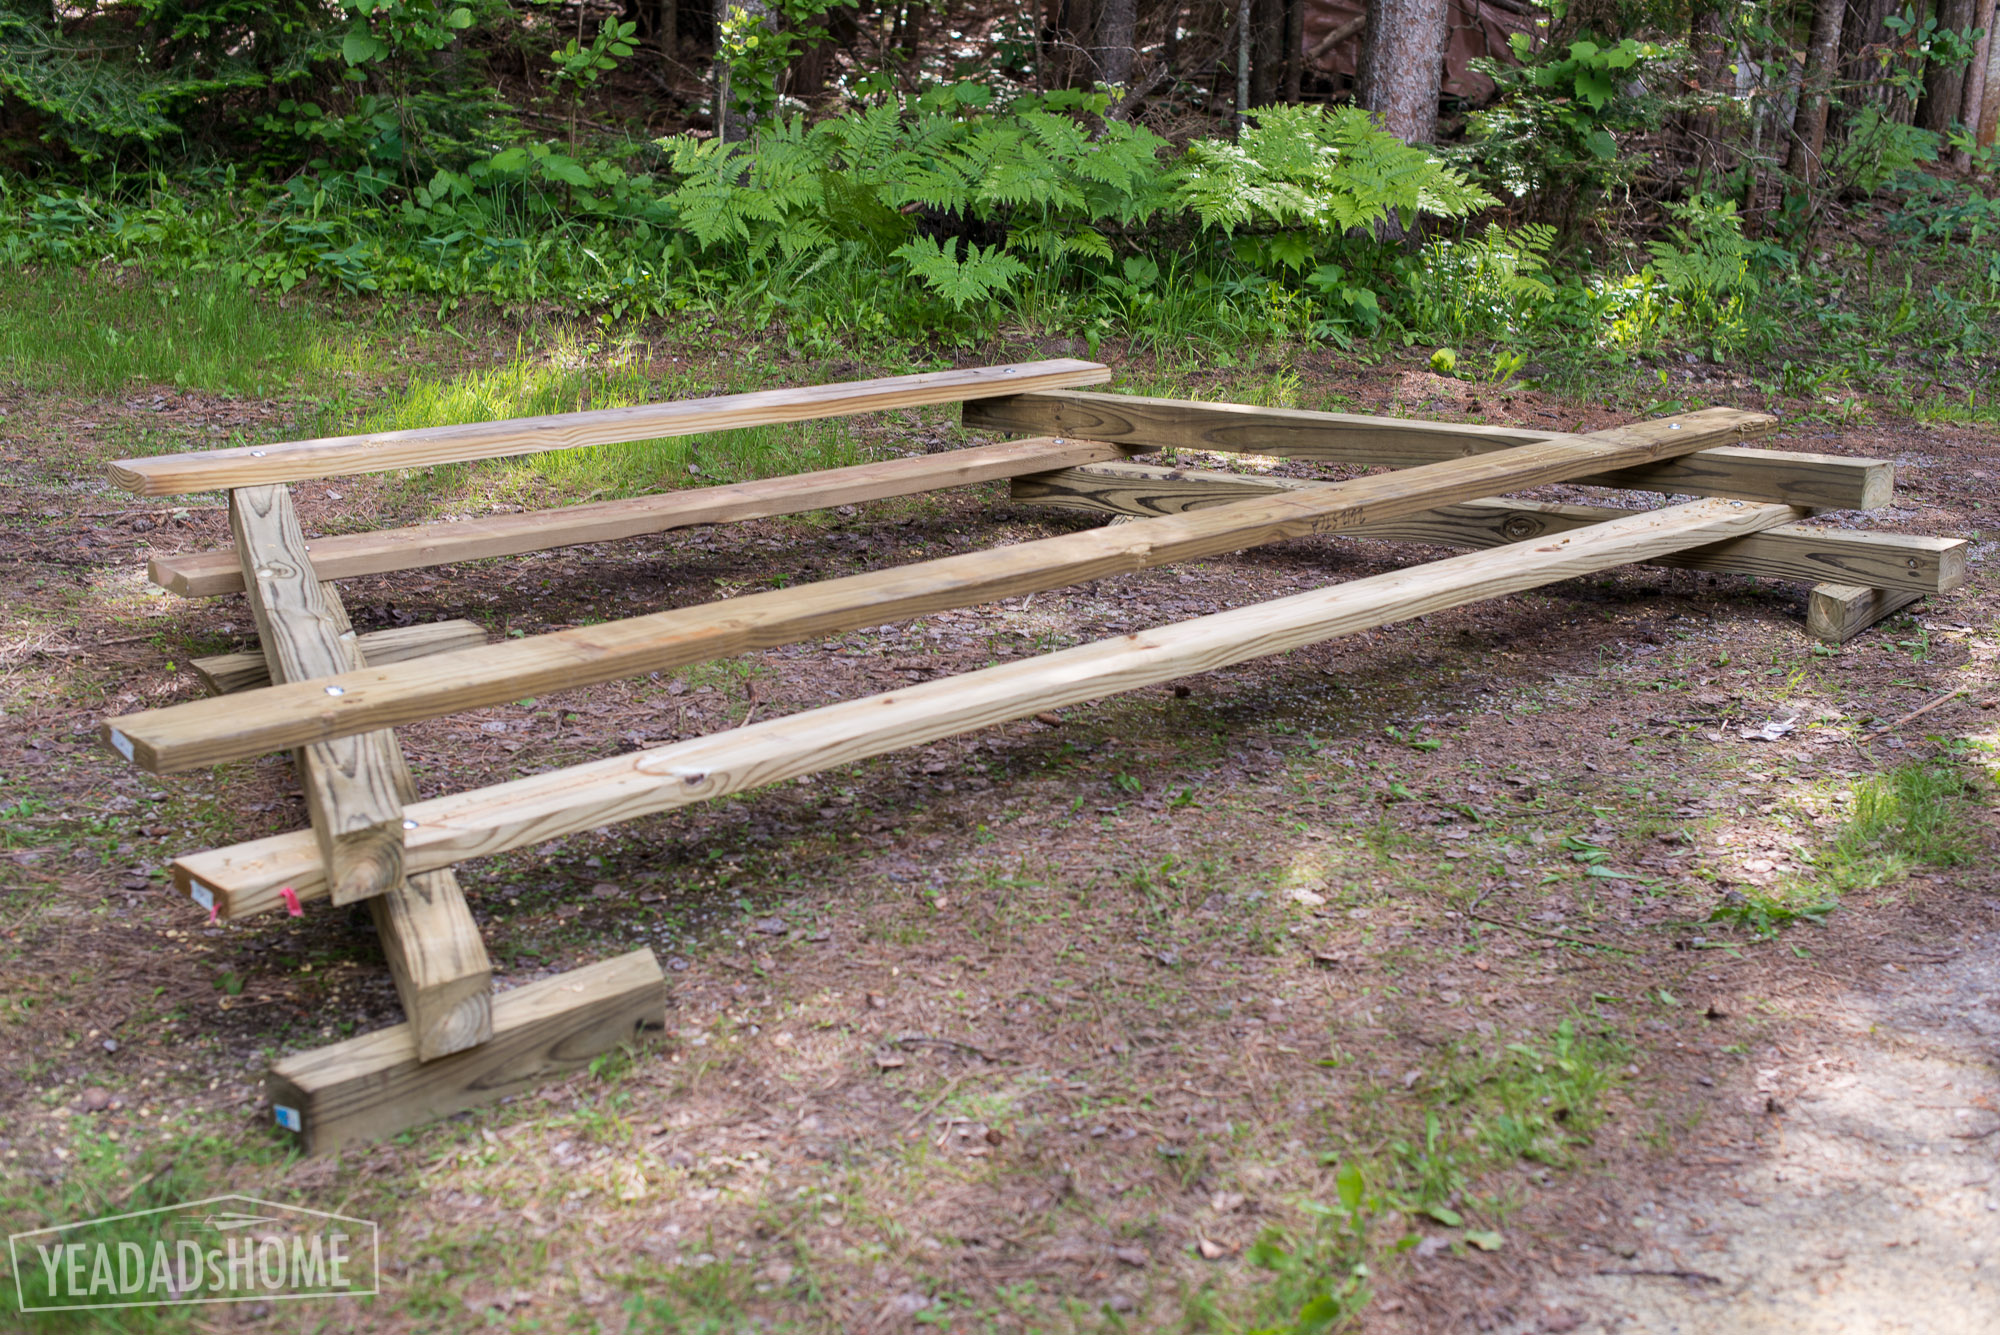
Day 3
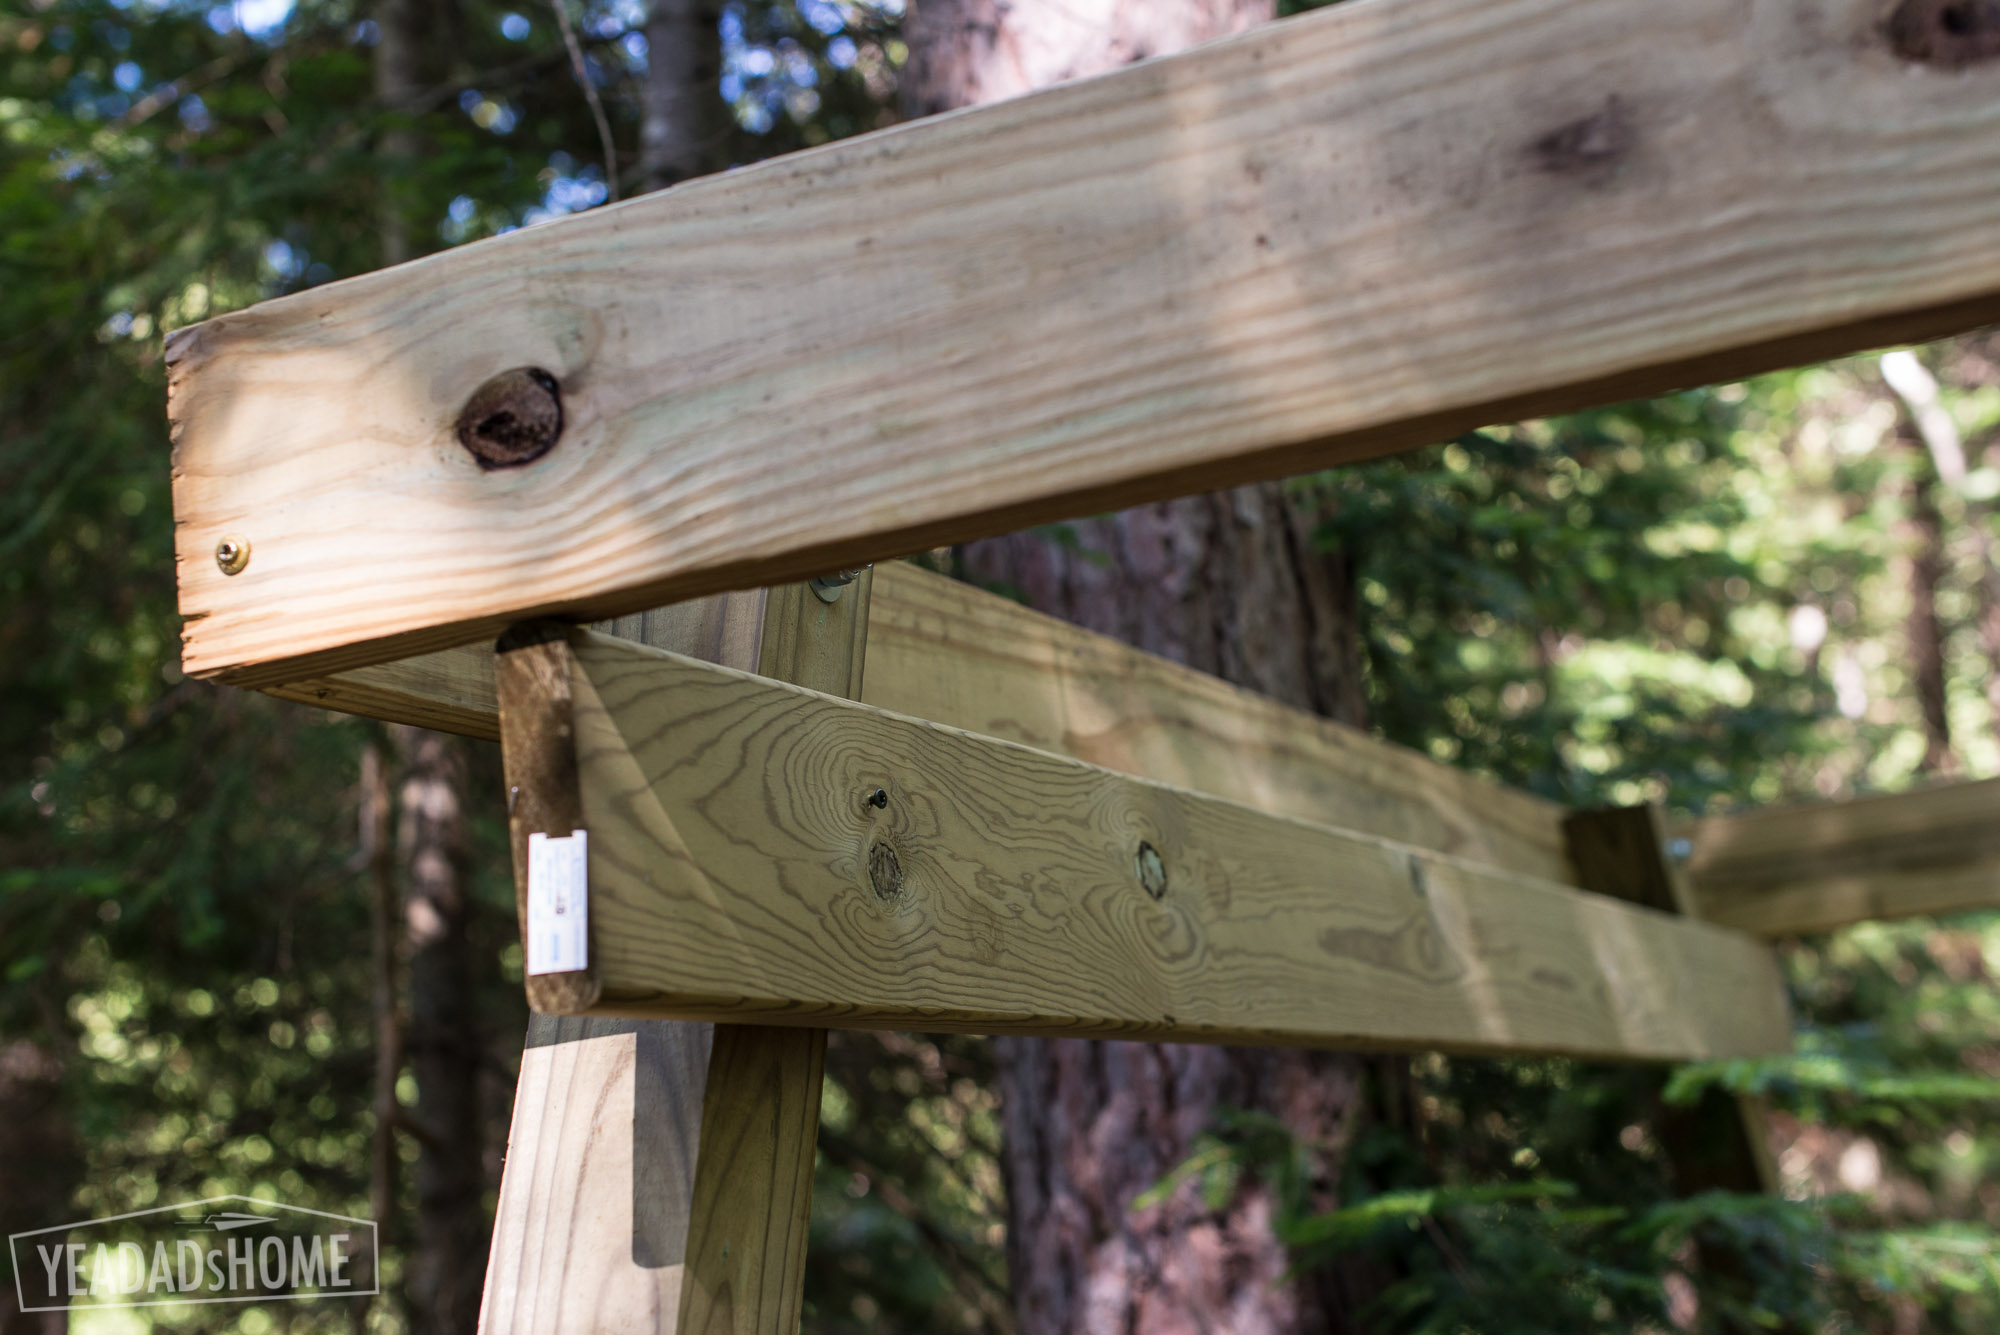
The ends are the first wooden pieces to go into place. I used an extra pieces of lumber to prop them up on the cinder blocks, and then I added the side supports on the angled side. The side supports were 8 foot long 2×6 boards. I didn’t cut those, but I did mark 93 inches on them, and used that measurement to line up the outside edge of the legs on the end pieces.
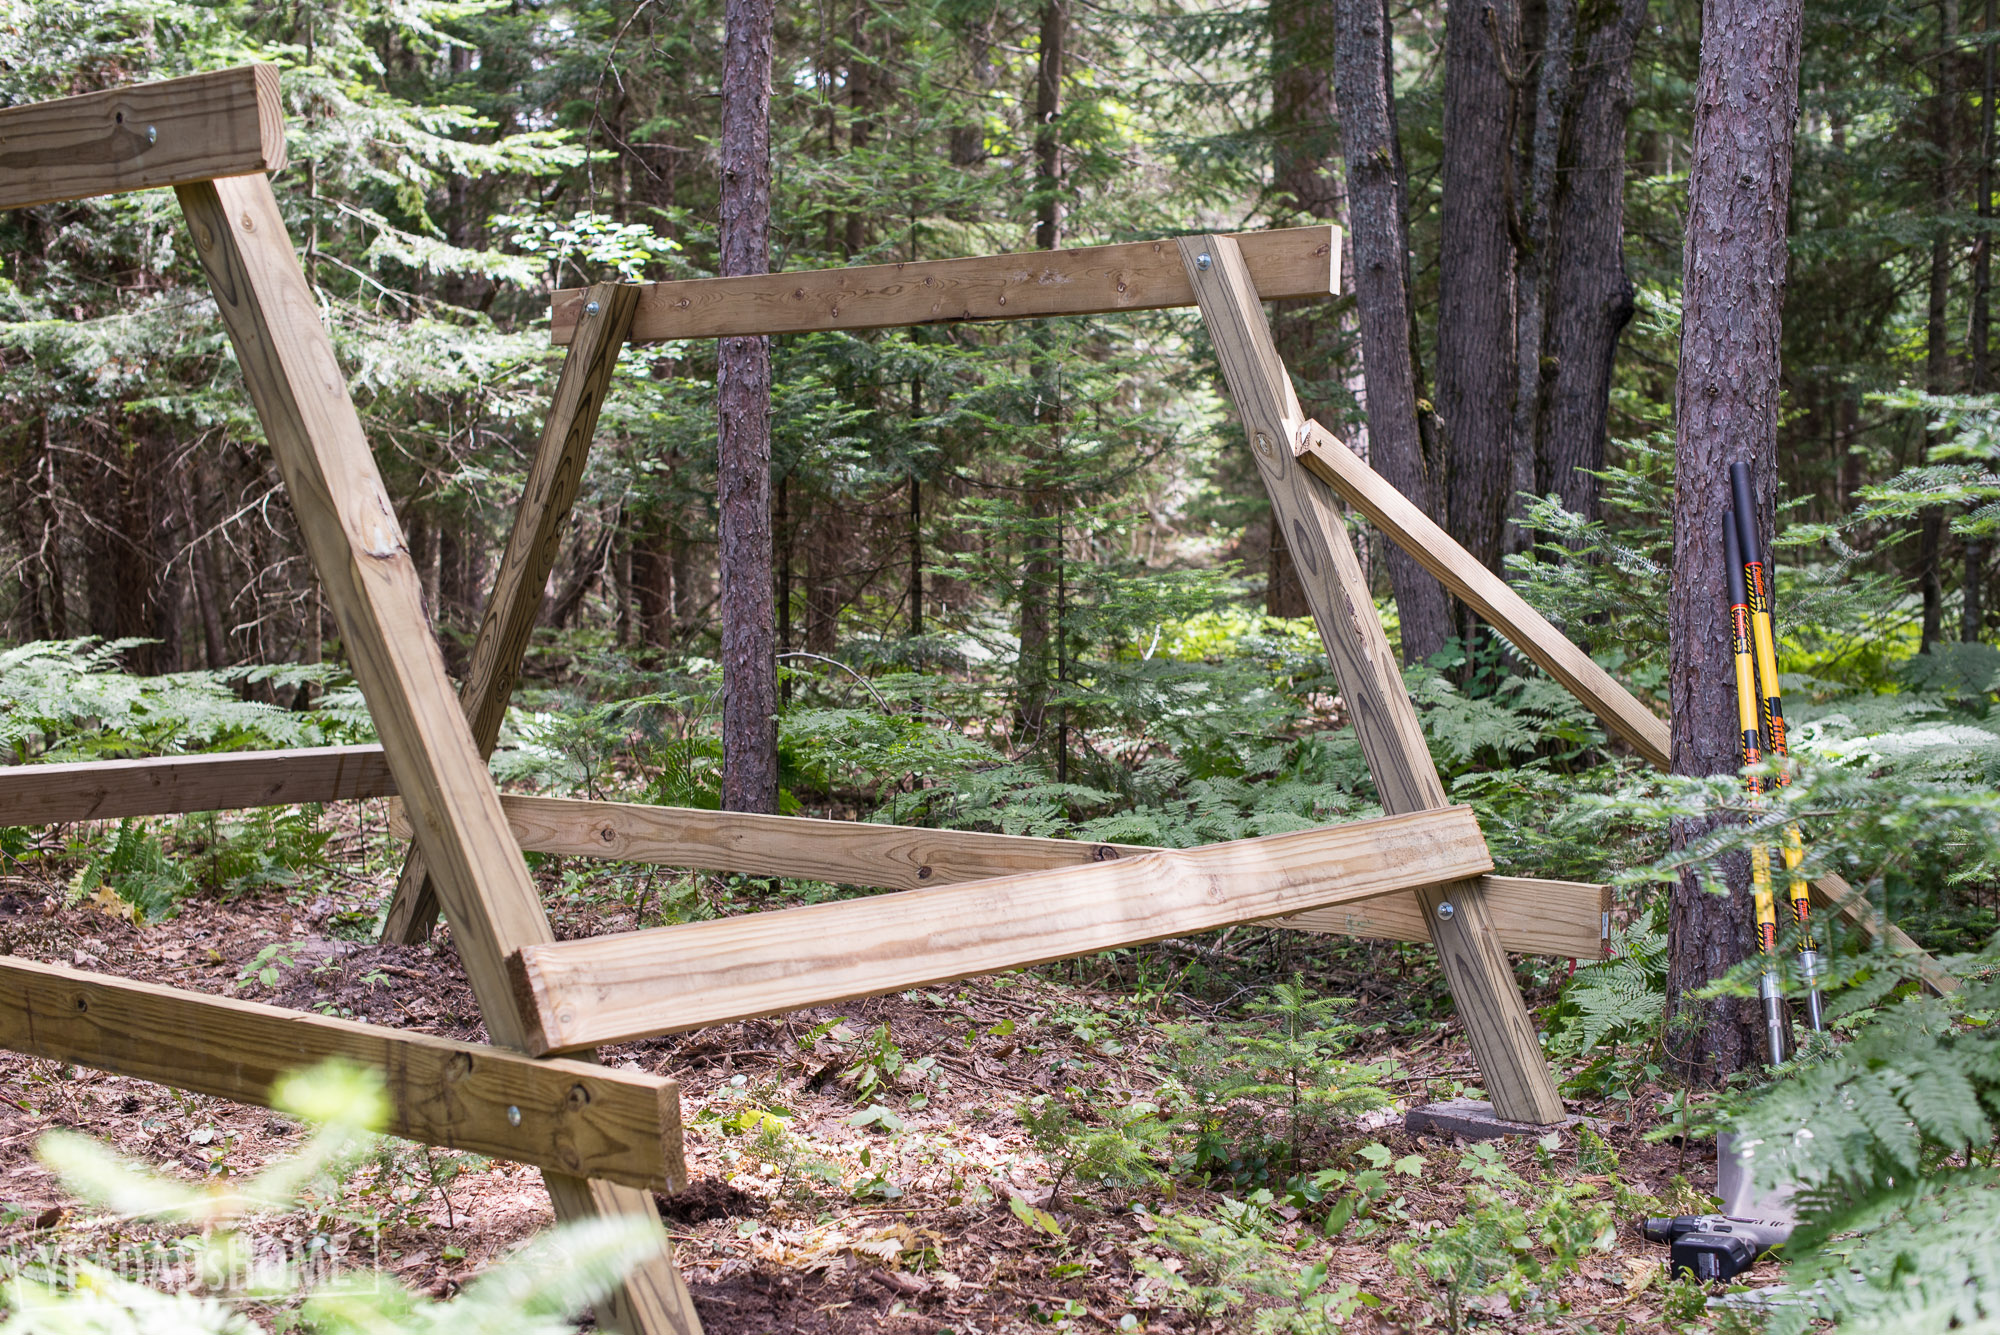
Then I added the joists. In my plan legs were attached to two of the 93 inch pieces, and I then set the joists 15 inches from each end and then 15.75 inches apart. Here is a picture of that layout:

I attached a deck board under the 2×6 pieces to help set the joists in place. If I wasn’t building on my own, I wouldn’t have needed that temporary piece.
We set the deck boards on the platform, and secured them with a few of the 3 inch deck screws.
Day 4
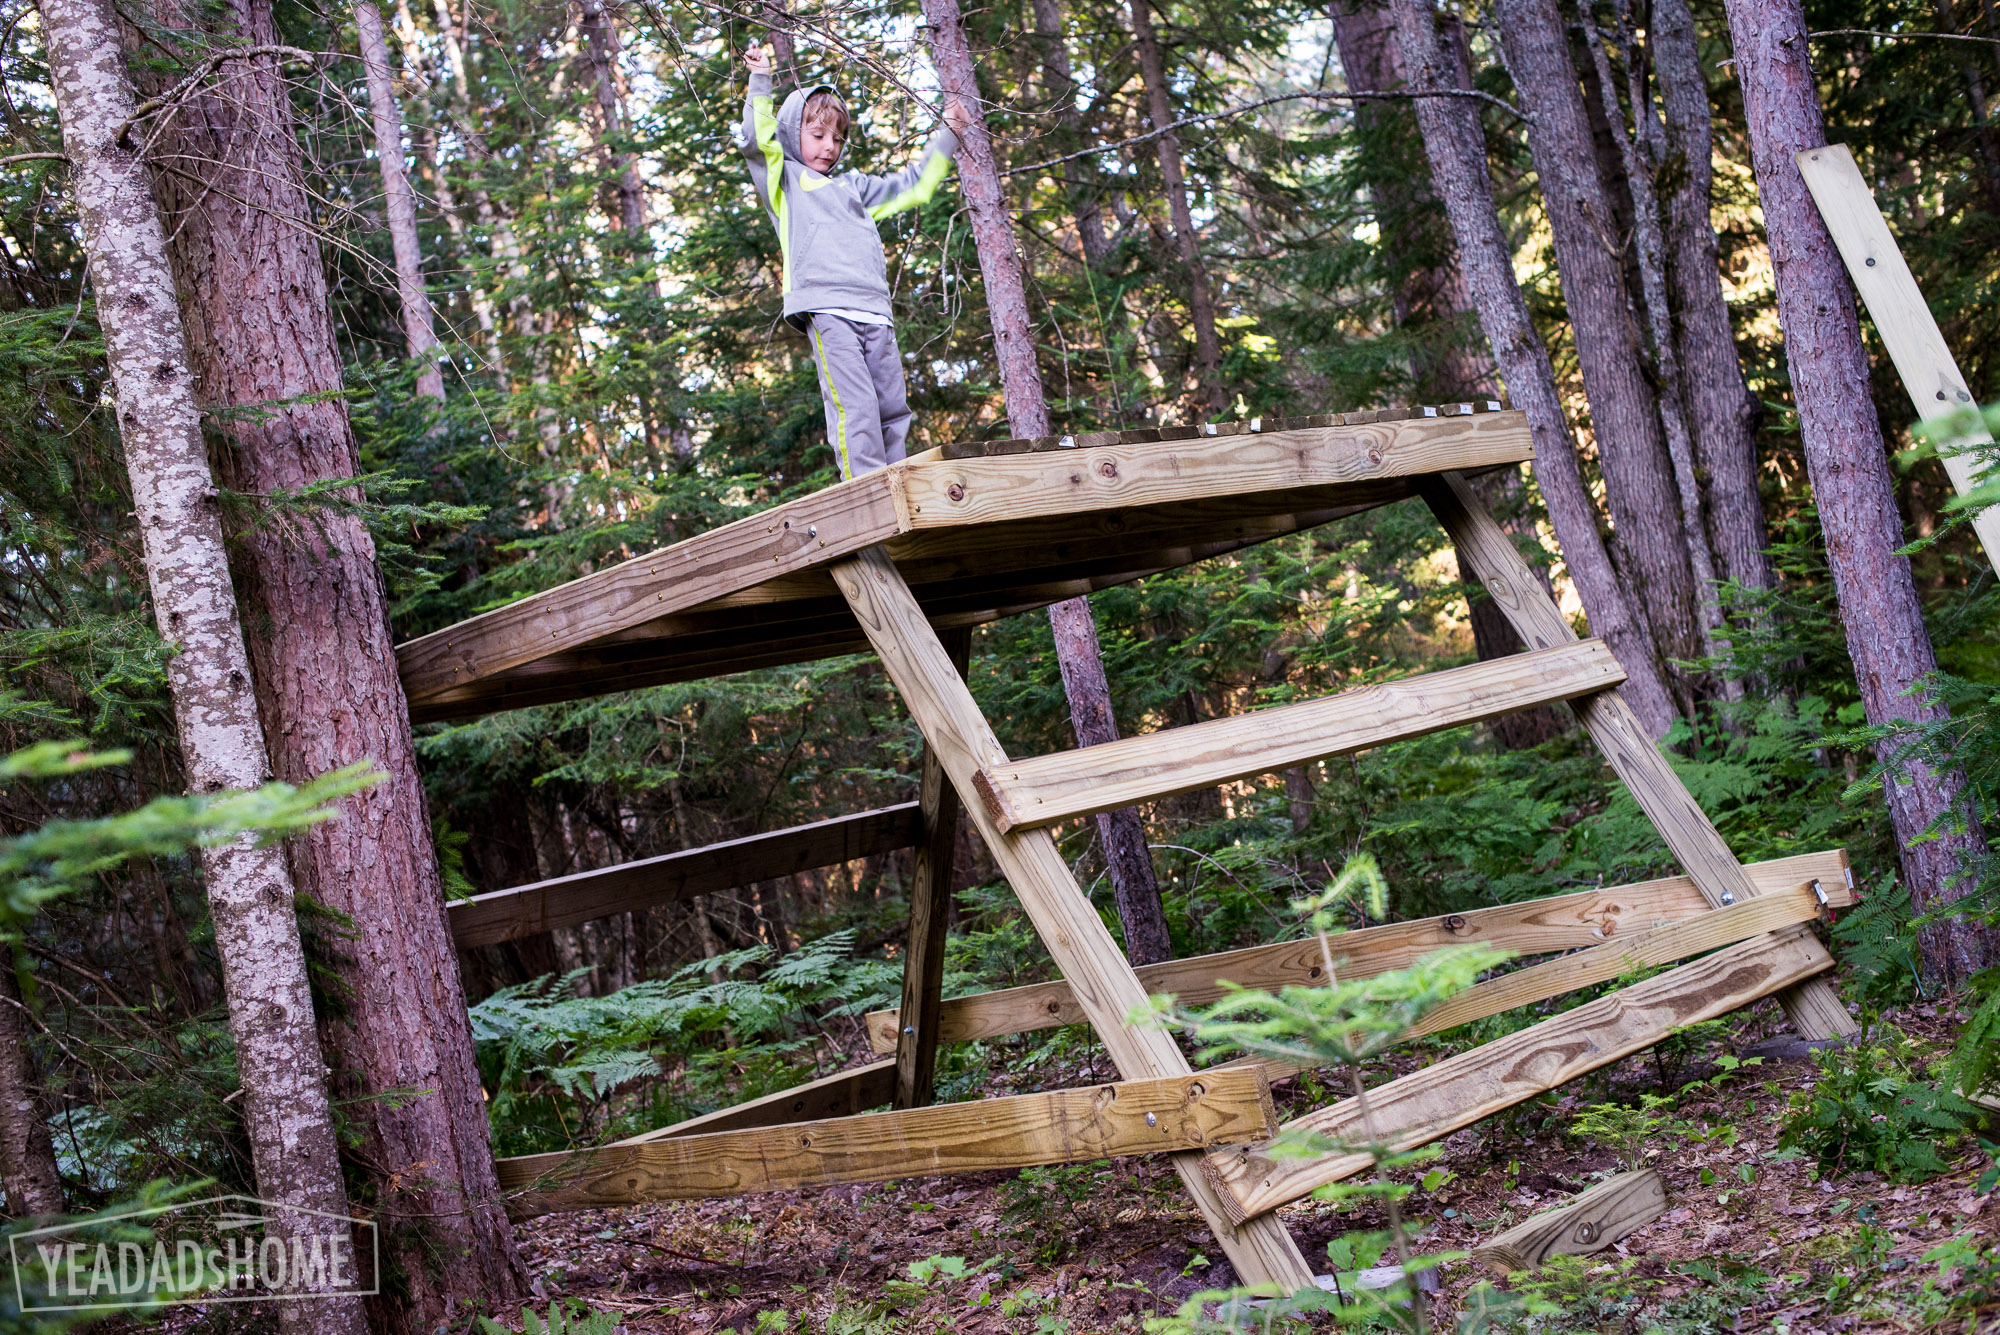
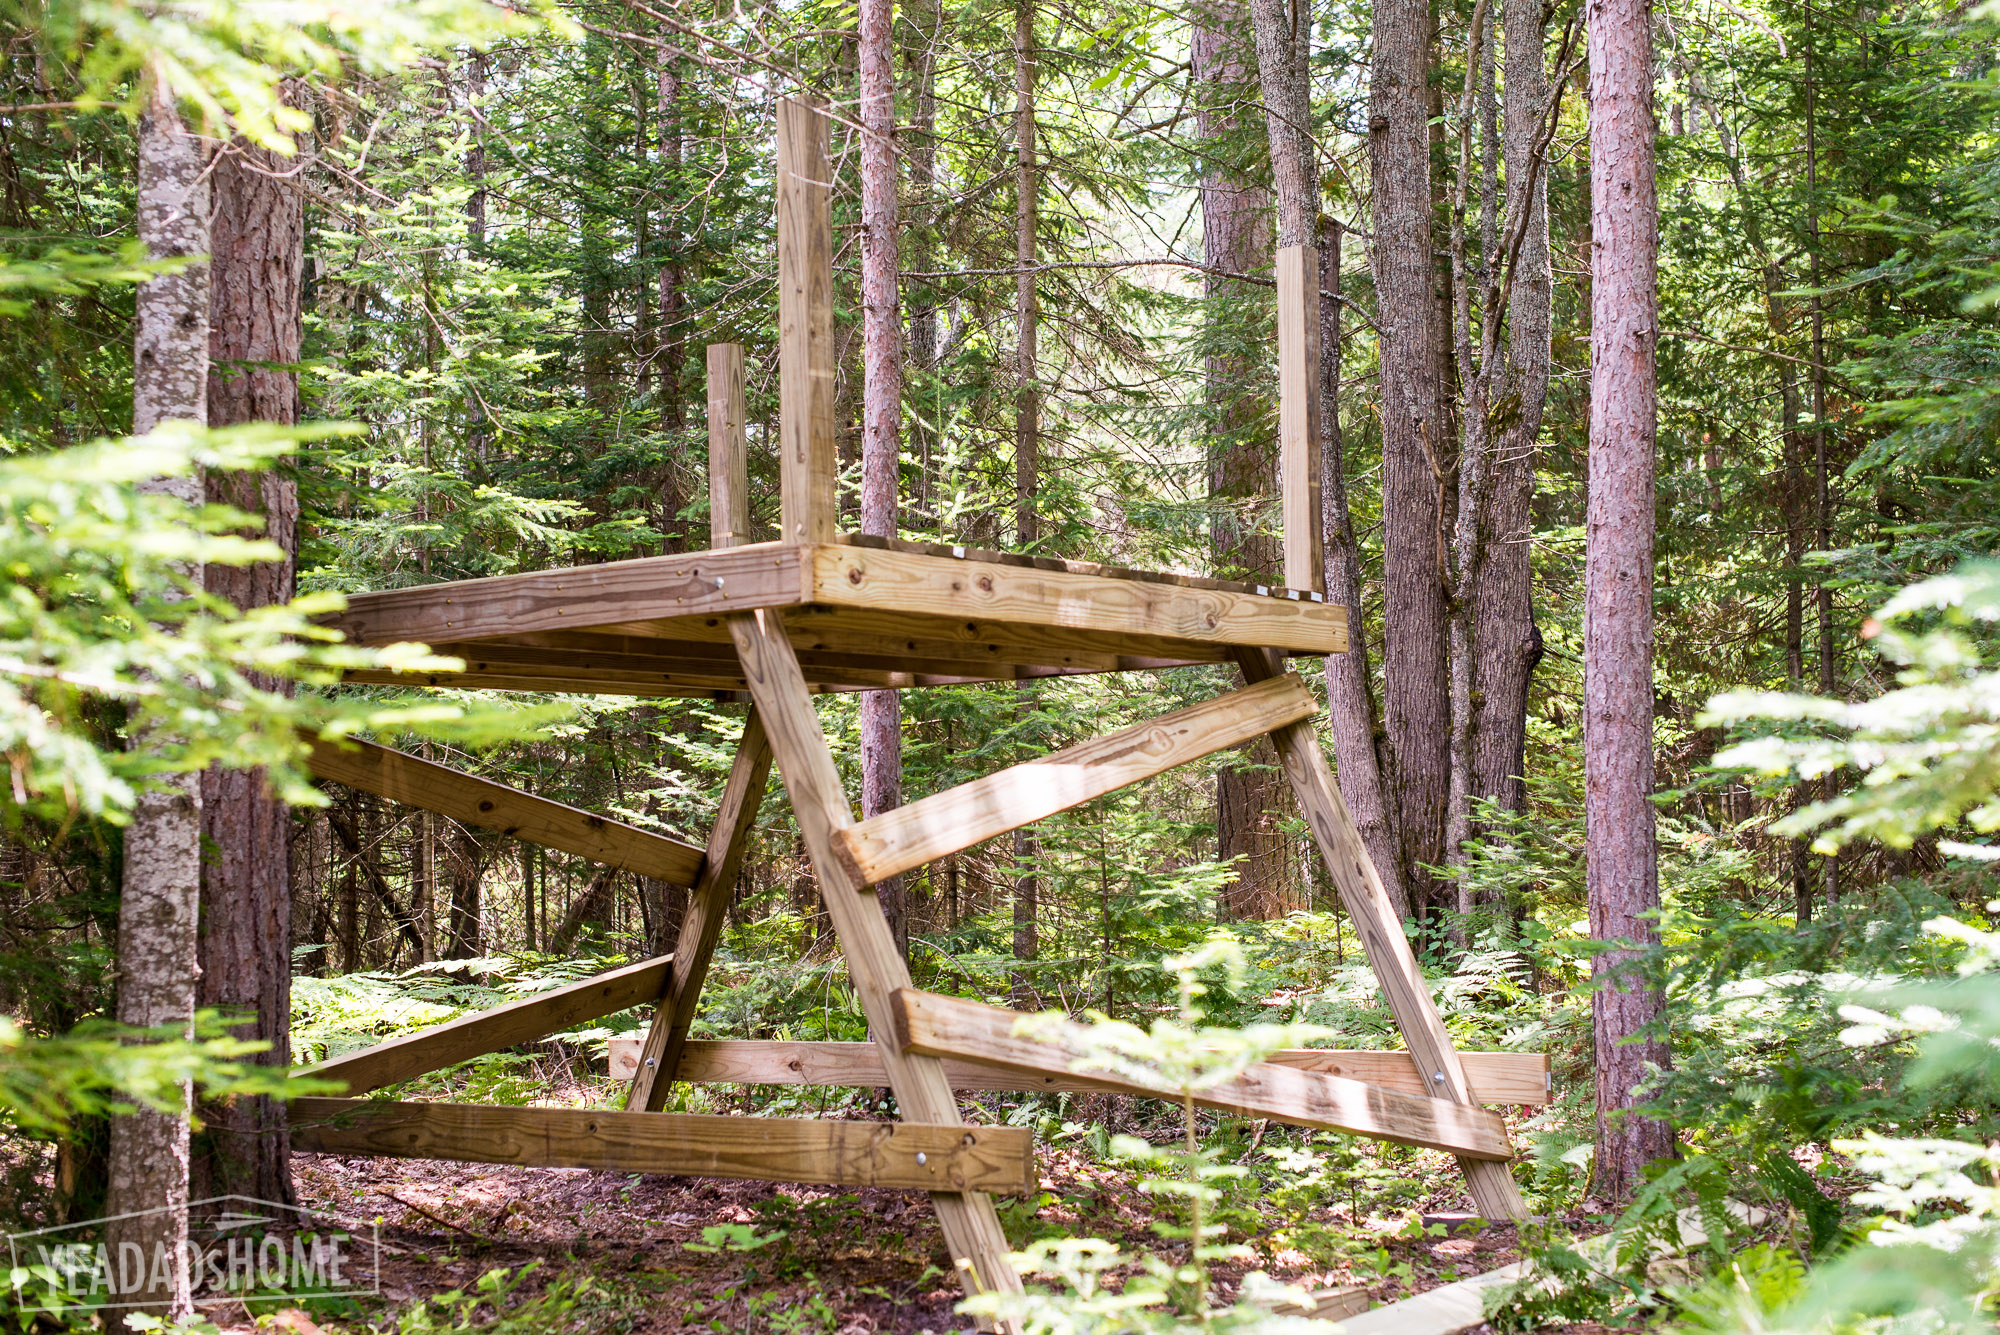
Angling the side supports added stability. Then we added the railings. To keep things simple I cut the 4×4 pieces in half, so each was 48 inches. Then I attached them so that they sat 42 inches above the top of the 2×6 floor structure.
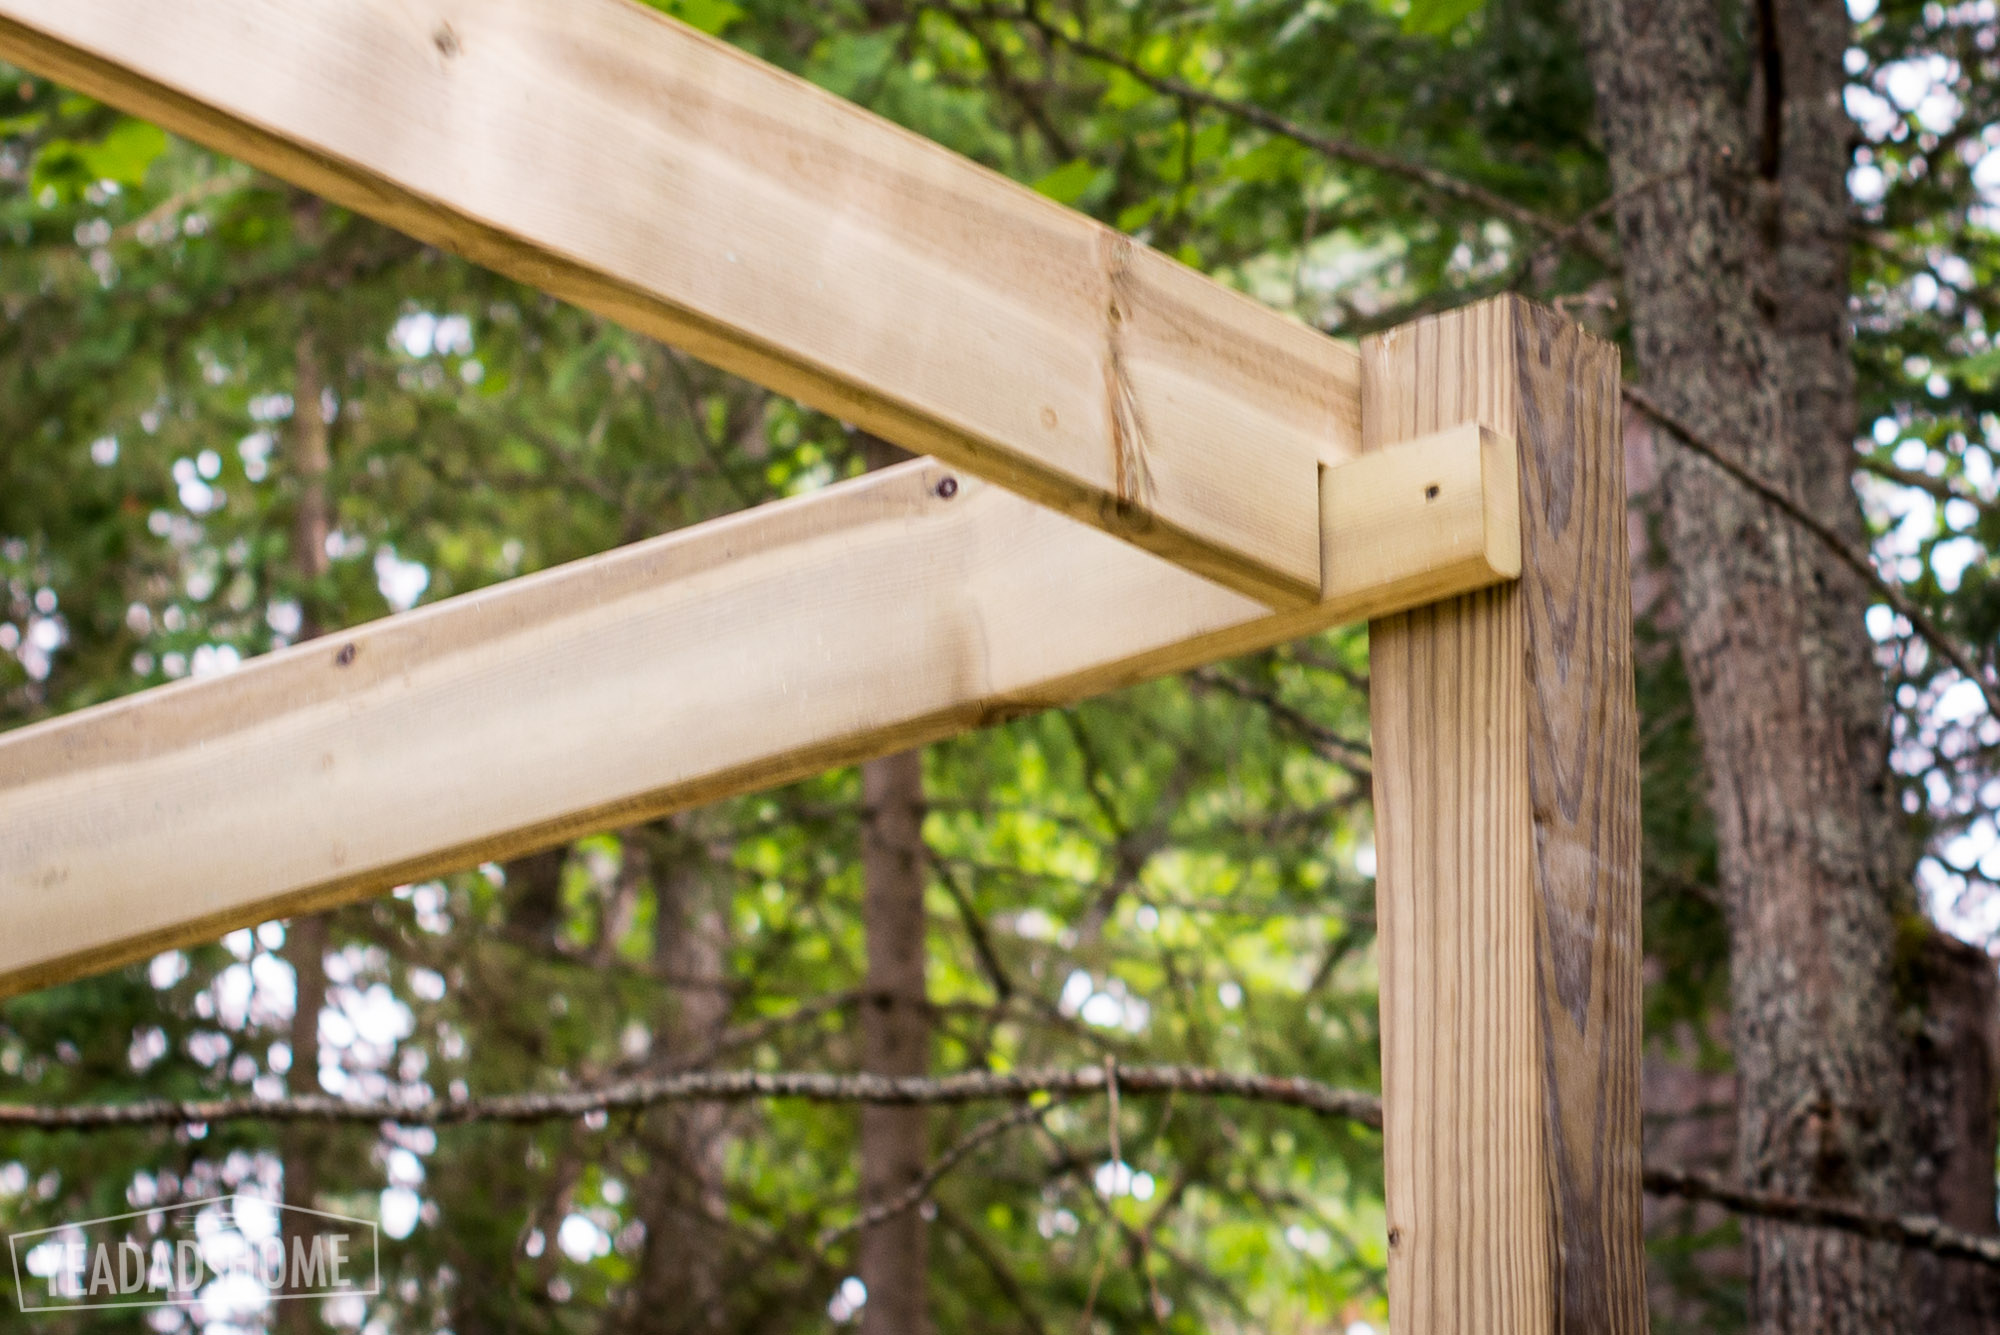
For the inside railing pieces, I made notches so that they would fit together on at the corner posts.
This is how the inside railings fit together.
Then we added the top railings. I measured the inside corner and added a half inch.
We added a middle post to firm things up. Those 8 foot 4×4 posts were not cut. I just pushed them up to meet the railing. I screwed them into place and then added a few bolts.
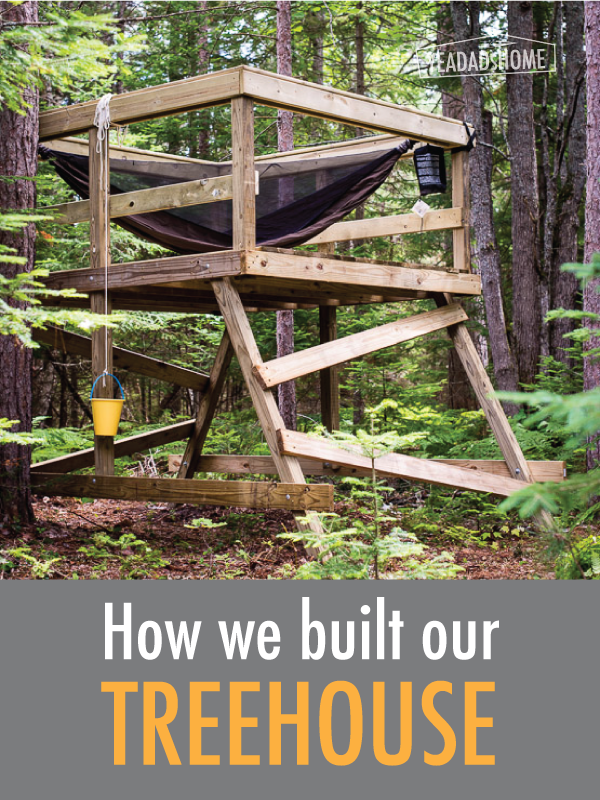
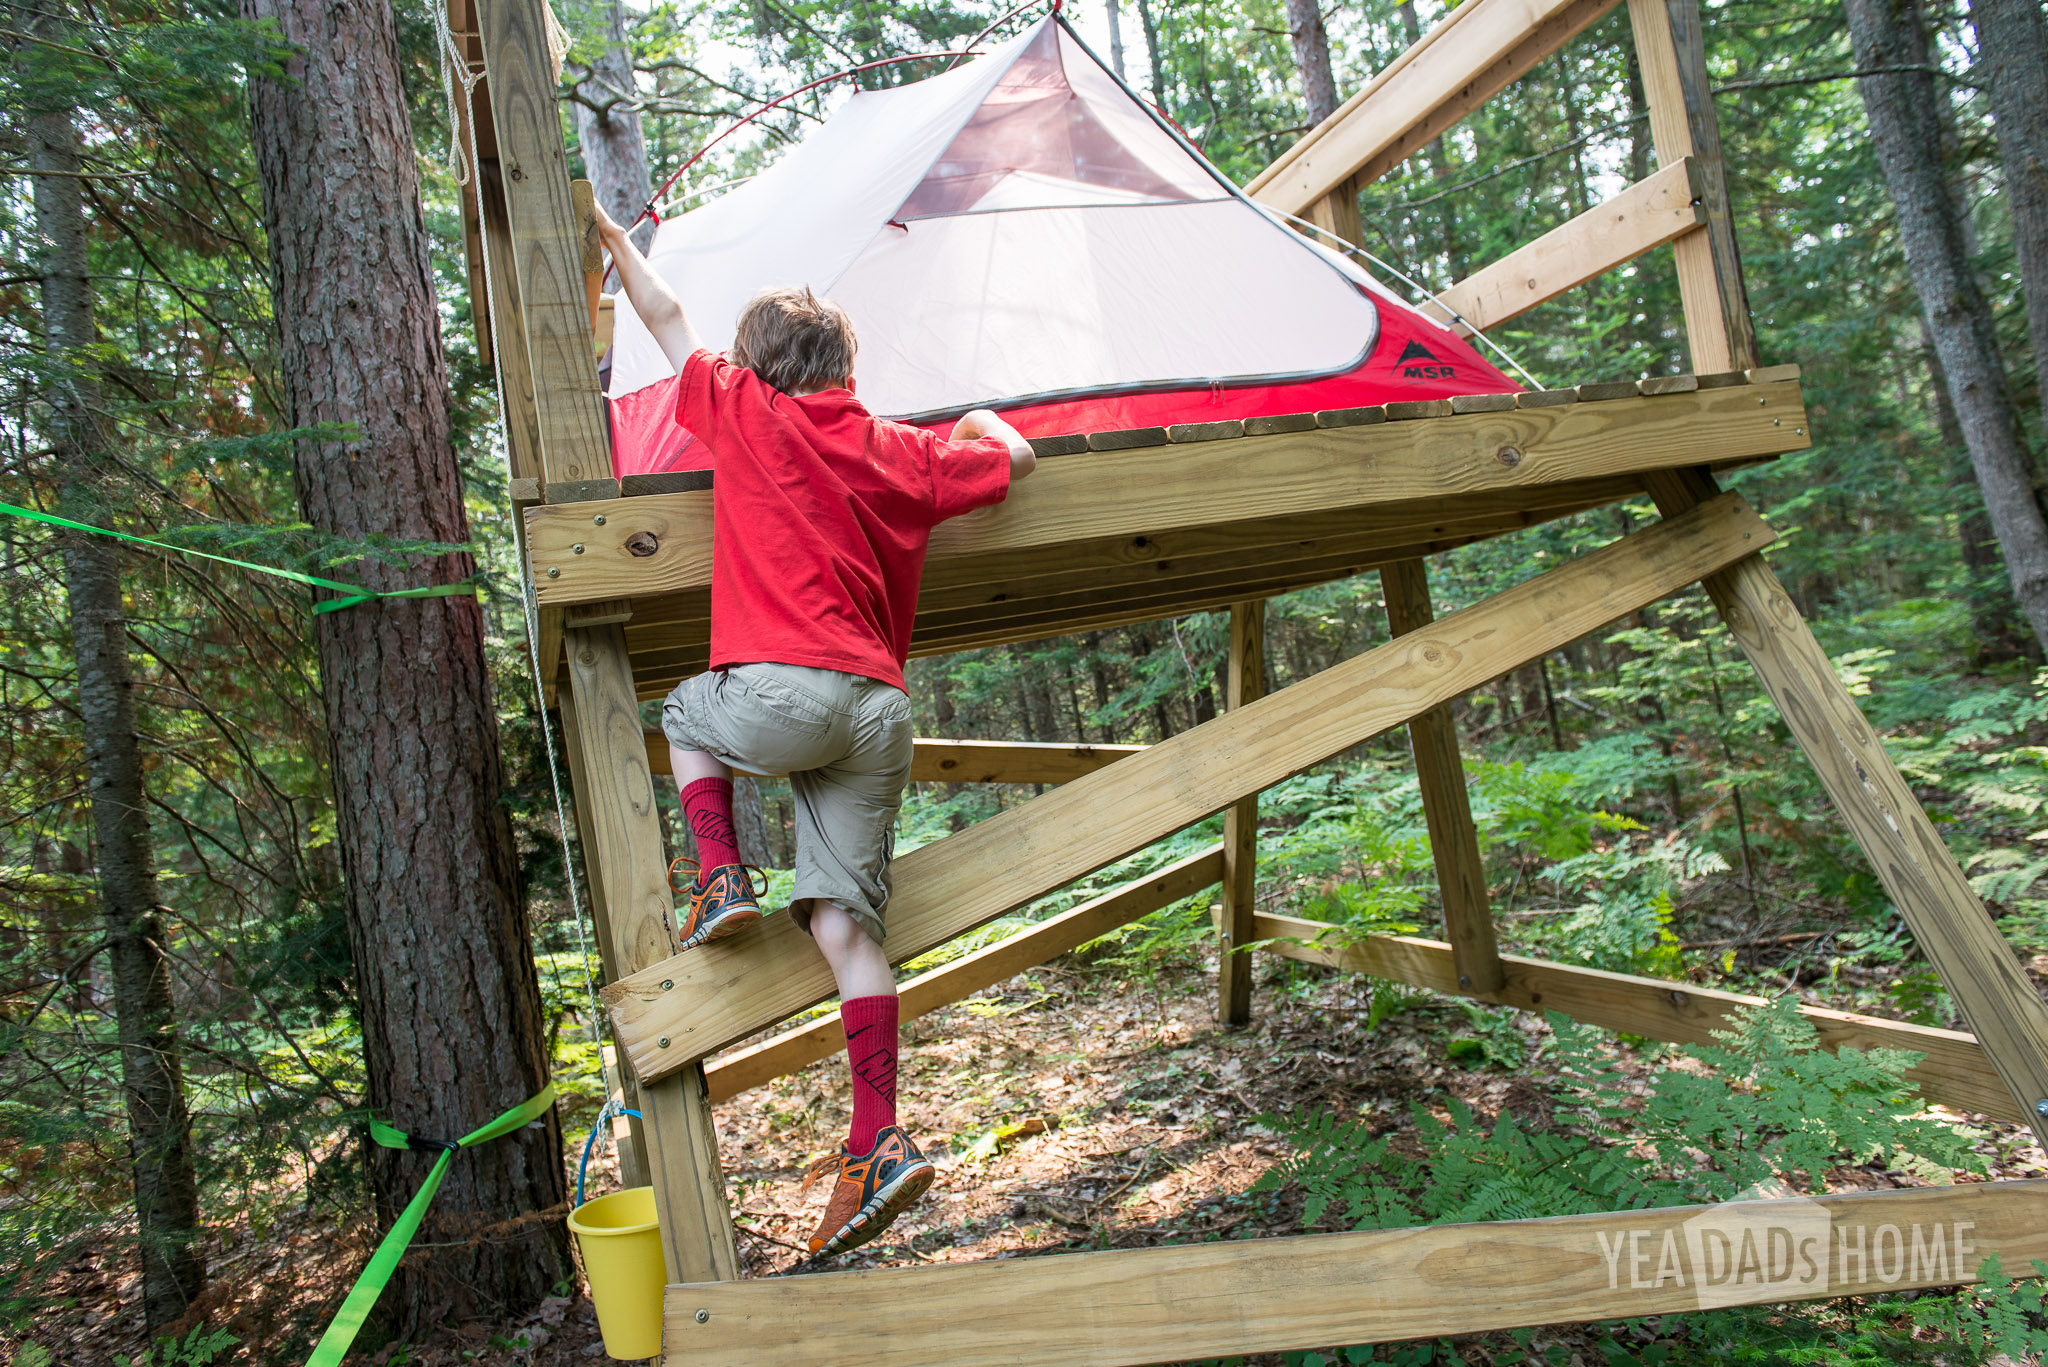
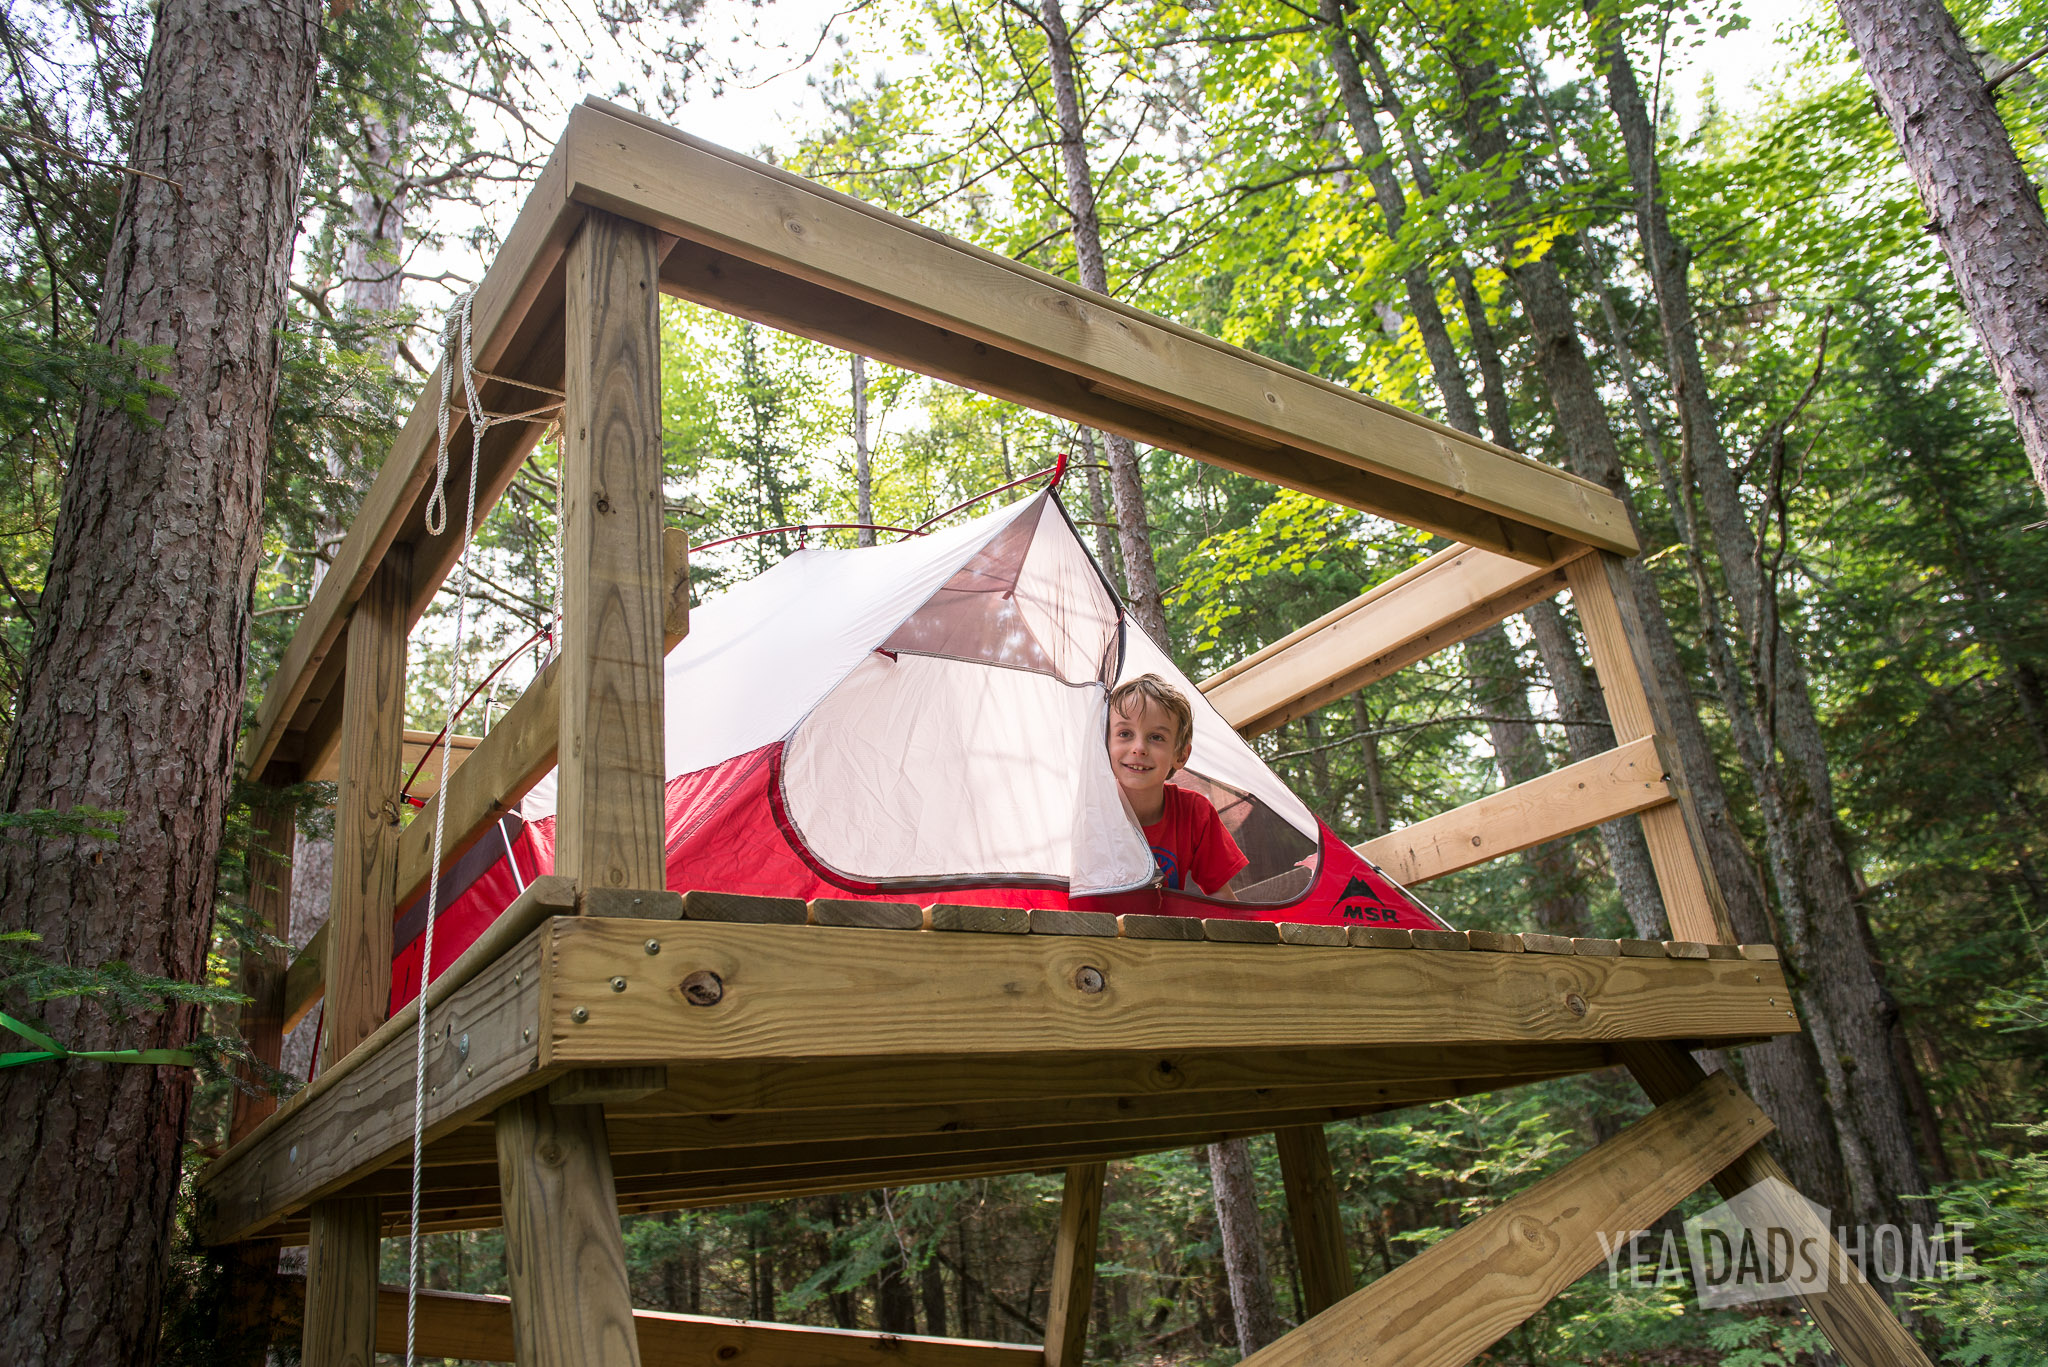
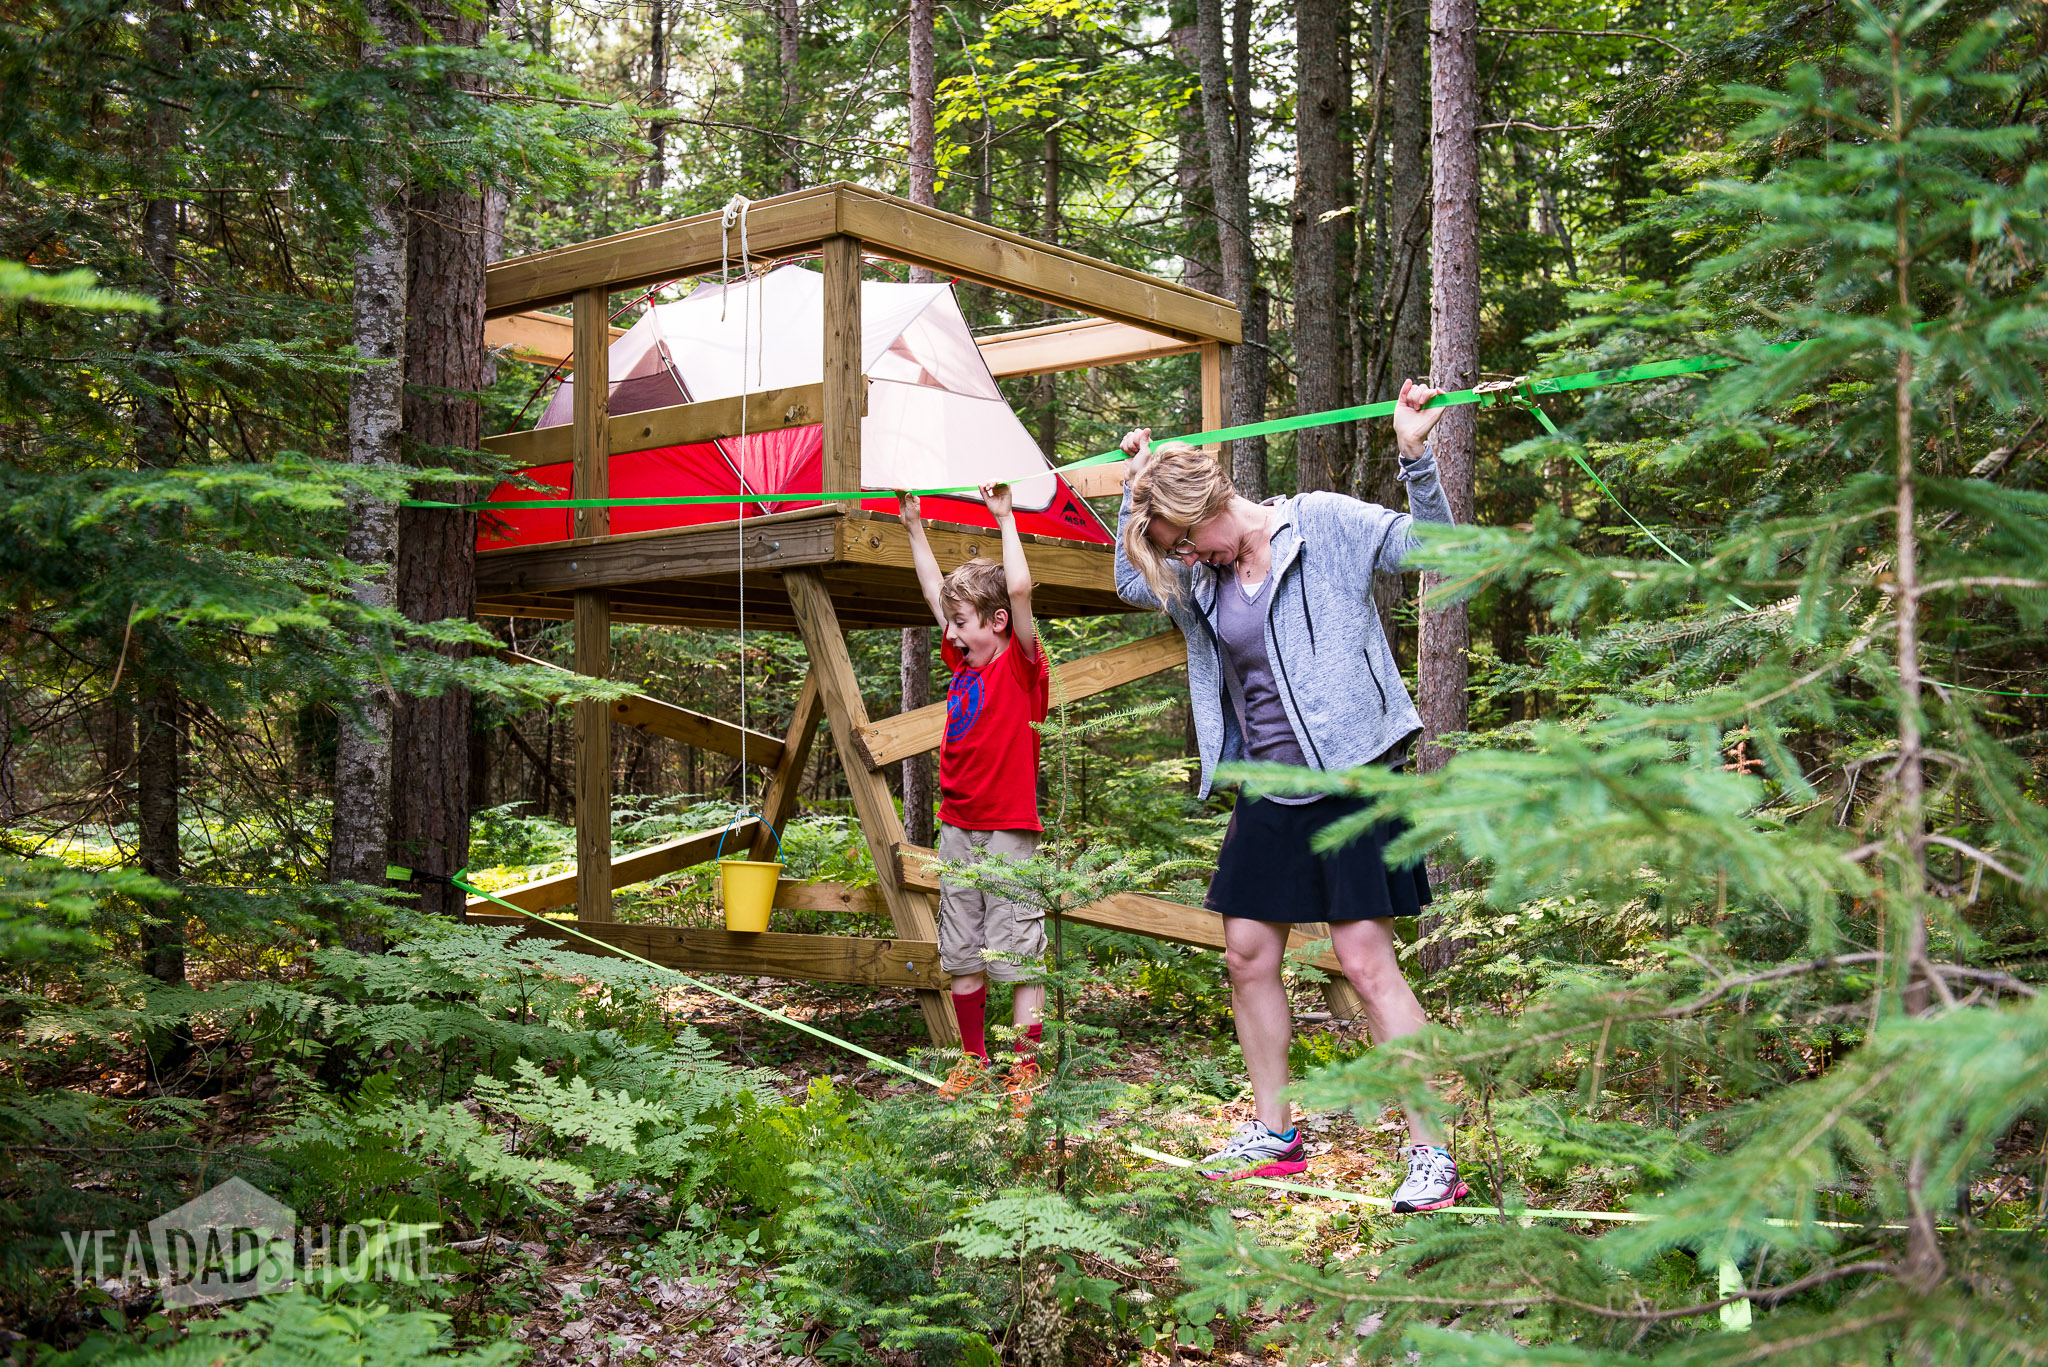
This is where we completed our simple treehouse build for this year. A bucket on a nylon cord was a handy way to deliver mail, or carry things up/down.
Treehouse Extras
We bought a Hennessy Hammock to hang in ours. It has a bug net and you get in/out through the bottom, so there isn’t any risk of someone rolling out. The Explorer Ultralite Asym Classic model was the one that looked best for us. It comes with a snake skin that makes packing it up really quick.
We bought a tent that fits on the platform. This MSR model was the one we picked. It fits on the platform, and it is light enough that we could use it for backpacking.
https://www.rei.com/product/865347/msr-elixir-3-tent
We added a slackfline this year. We string this from two tree near the treehouse to practice our balance. I wouldn’t anchor to the treehouse directly since that could move it off of its blocks.
http://slackersline.com/product/classic-green/
Nice job.
Thanks! That was a fun project. Quick enough we could finish during a busy summer. We have a few ideas for how we might enhance it next year too.
Hi Mark. Thank you for the great tutorial. I will be using it to build a similar tree house for my kids this summer. I have a question to ask you. Because the legs are not held into the ground with concrete, do you find that the structure eventually slides off the solid concrete blocks with time? Or is the weight of the structure heavy enough to keep it in place? Thank you for letting me know.
Hi Julien, The structure is really heavy. I am sure over time it will lighten up a bit as the treated lumber dries out, but I couldn’t move it on the blocks it once it was built. My rough guess (assuming 25-30 lbs per 4x4x8) is that it weighs about 400-450 lbs. Hope that helps.
Thank you Mark!