Category: Activities

  • How We Built Our Treehouse

    How We Built Our Treehouse

    This summer we built a simple treehouse in the woods near our house. Following is a list of materials and some pictures that we took during construction.


    Disclaimer

    Building is dangerous. It involves power tools, lifting heavy things, and if you do it wrong someone can get really hurt. You should also check you local codes to make sure you are ok to start.


    Treehouse Ideas

    As we started looking at ideas, I found a ton of very elaborate plans. There is even a tv show about building treehouses. We didn’t watch the show since I wanted to keep kid expectations in check. We wanted to build this in under a week so we had plenty of time to use it, and although I wanted my son to help, I was really doing the major construction by myself.

    Overall I wanted to make sure we had something safe that at least a few kids (and adults if allowed) could enjoy at the same time. We have a lot of really big trees on our property, so I wanted to make sure you could look all the way up in to the treetops. I didn’t want my construction to damage them. To begin I thought of building on one or two trees like these sites show.

    http://www.wikihow.com/Build-a-Treehouse

    http://www.instructables.com/id/How-to-build-a-treehouse/

    Looking through these and a several others, I learned that building in a tree requires a solid tree and heavy duty hardware. If you use two trees, you really need to let the second tree move. So good designs solidly attach the beams to the first tree and then brace the cross pieces on the second. Those braces should have metal over the wood that lets the cross pieces slide as the trees move.

    As I read more, I decided not to attach to our trees. I looked for something that didn’t have to sway with the trees. I found a really cool freestanding design. It looked sturdier, and like something I could pull off in a reasonable amount of time. It could easily fit in a clearing near a few of our big trees. This design also didn’t require digging post holes or using quickcrete, and that would save me some time.

    http://www.theclassicarchives.com/how-to-guides/free-tree-house-wood-plans


    Treehouse Design

    To refine my ideas I used a free 3d design program called “Google Sketchup Make.” My design included a platform about 6 ft from the ground like in the freestanding design above. I did cut the platform size to 8 ft x 8 ft. My thinking is that this is plenty big for kids to play on and it will hold a small tent or hammock. I know that I can lift 8 ft boards, and that it would be hard for me to lift the structure if it had 12 ft boards.
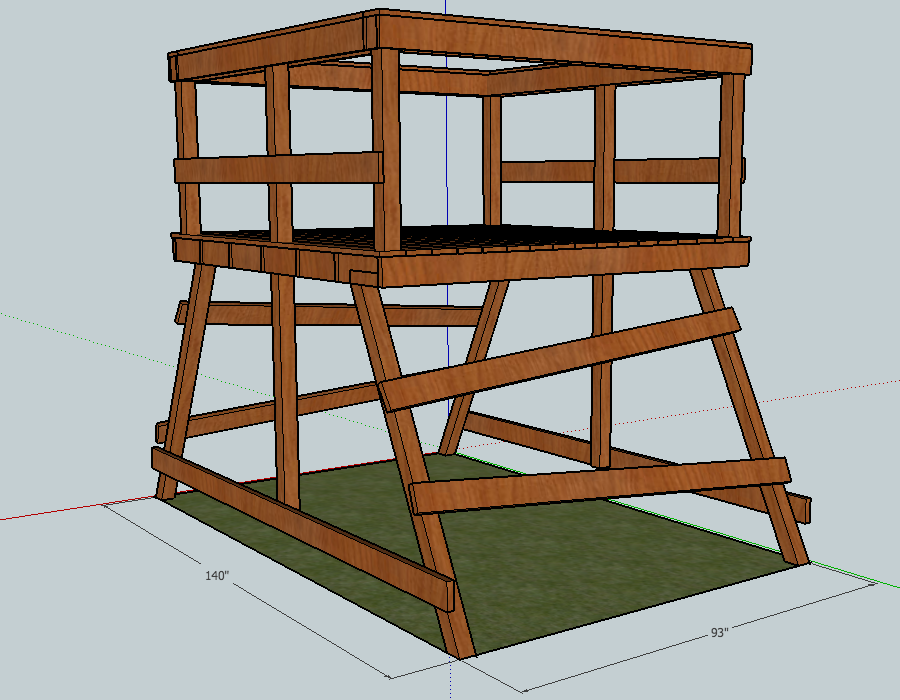
    Treehouse Design in Sketchup
    Treehouse Design in Sketchup

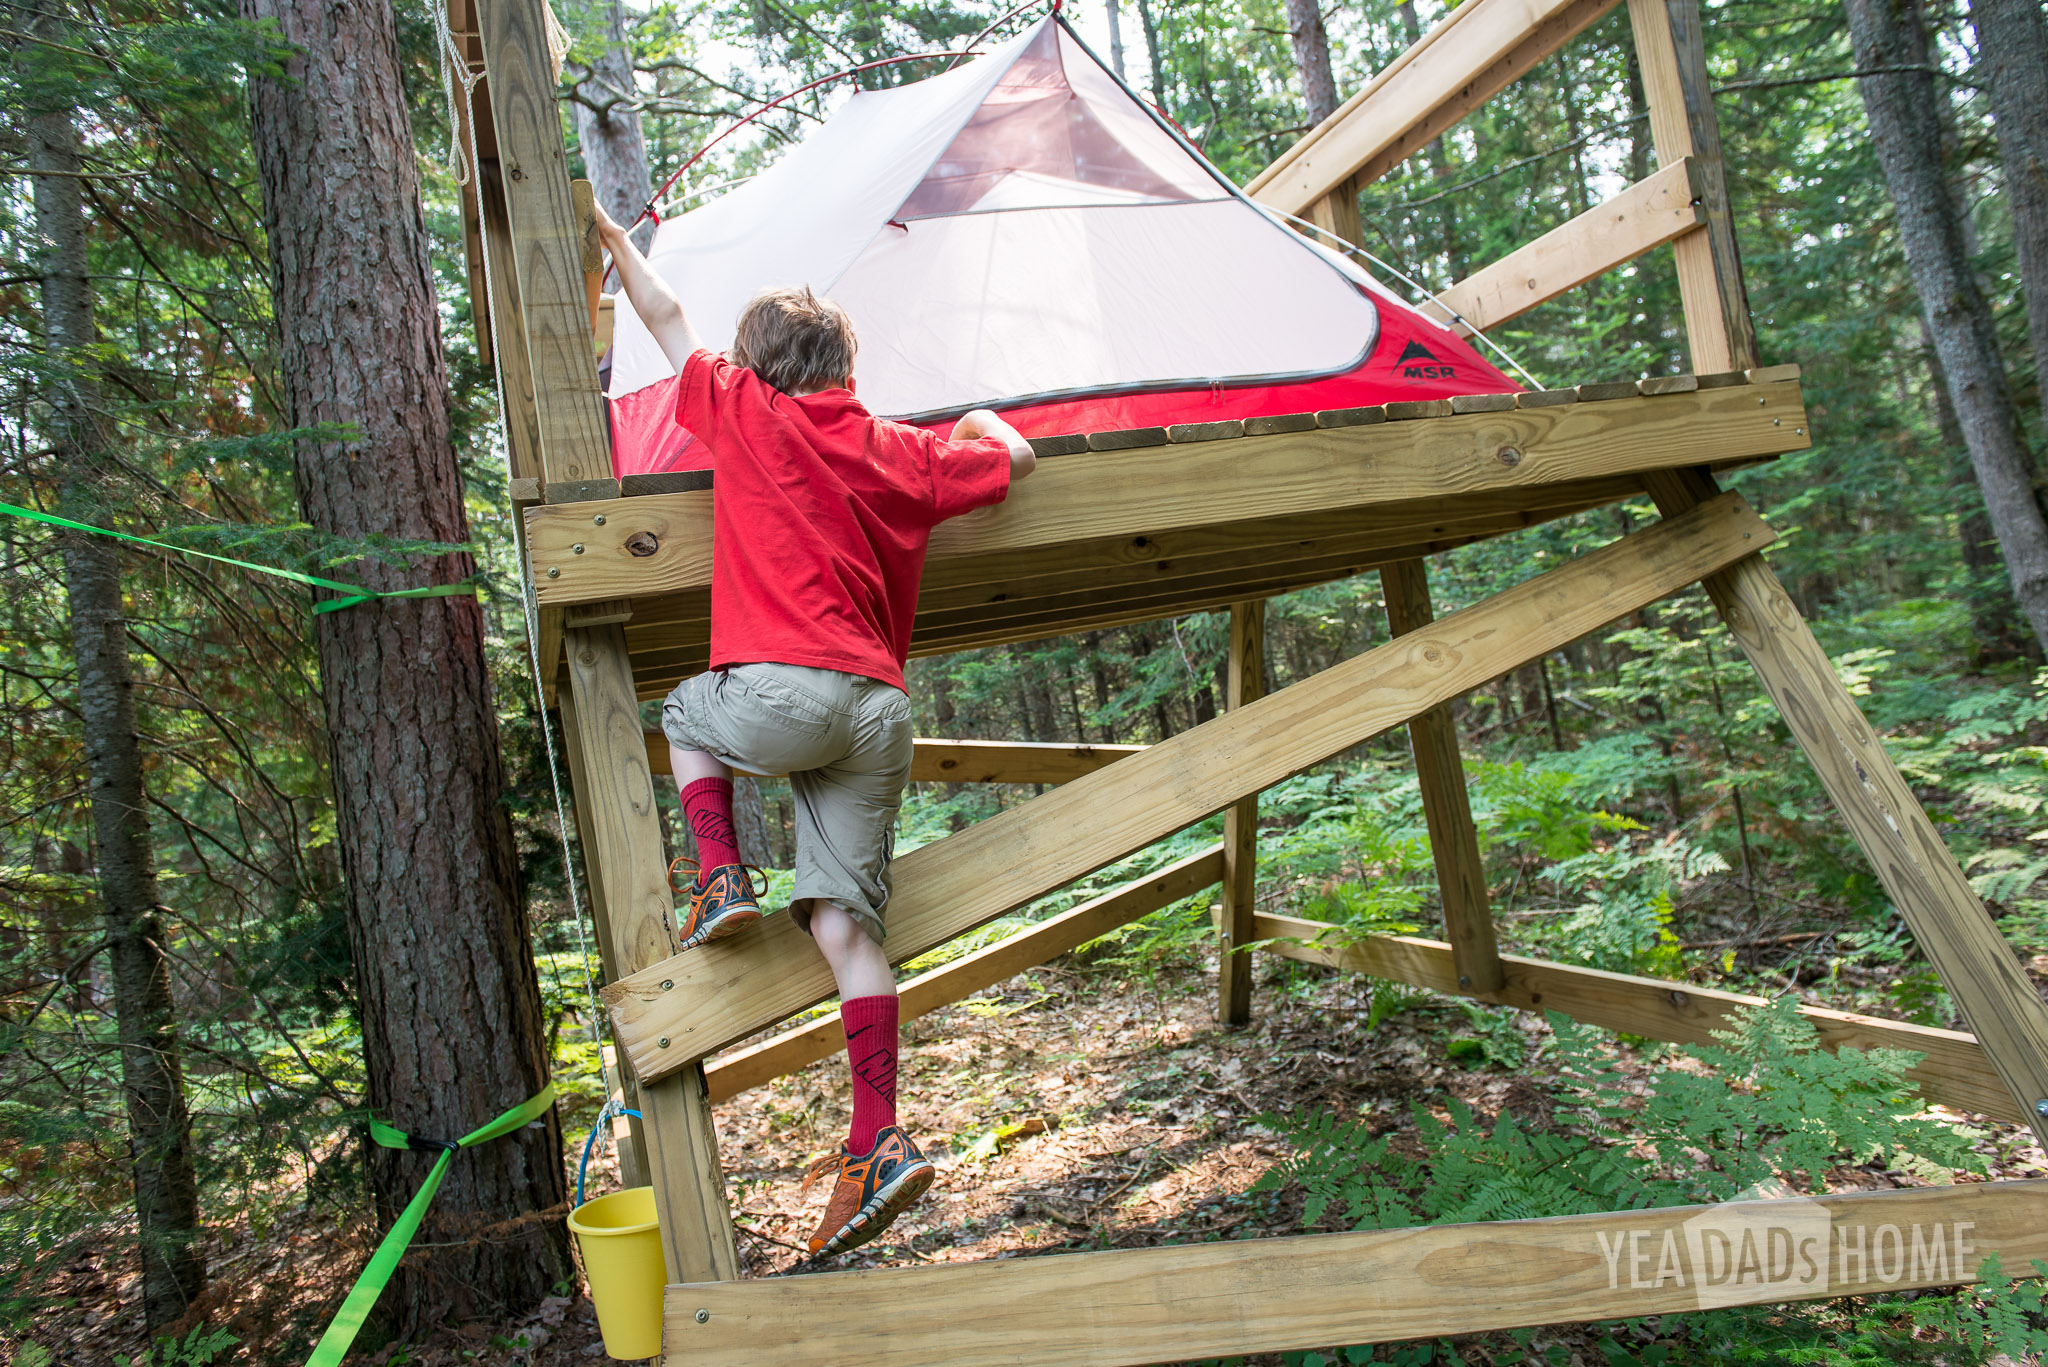
    As I started building, I was planning to add a ladder. My helper found it easy to climb the side supports, so we pulled that from our initial build plan.
    Treehouse-0268-2

    The two types of wood we considered were treated pine lumber or cedar. I did consider making the whole thing out of cedar because it is a lot lighter than pressure treated lumber. Cedar is more expensive. It was also tough to get the pieces I needed. My local lumber supplier didn’t have it on hand. So we decided to use pressure treated lumber. If you choose to use it wear a mask as you cut boards. It is really bad to inhale the dust. Also you may have to pre-drill a lot of the screw holes to keep it from cracking. On the plus side it is really light and does smell really nice as you build. It also can be painted or stained right away. Pressure treated lumber has to dry out before it will take as much paint or stain as you would want.

    Treehouse Tools and Materials

    For the project, I definitely needed these tools:

    • Circular saw
    • Extension cord
    • Hand saw
    • Cordless drill with a few batteries
    • A 1/2 inch drill bit that is 6 inches long
    • Two saw horses
    • Socket set
    • A hammer
    • Level
    • Builder’s square
    • Tape measure
    • Square shovel

    The only tool I wished I had, but didn’t for this project was a miter saw. It would have been a lot easier to cut the 4×4 pieces. My circular saw got me about half way through those, and I finished with the hand saw.

    An optional tool was a jigsaw. I used it to cut the deck boards at the ends of the platform. If I didn’t have this, I would have just cut those boards into a few pieces using straight cuts.
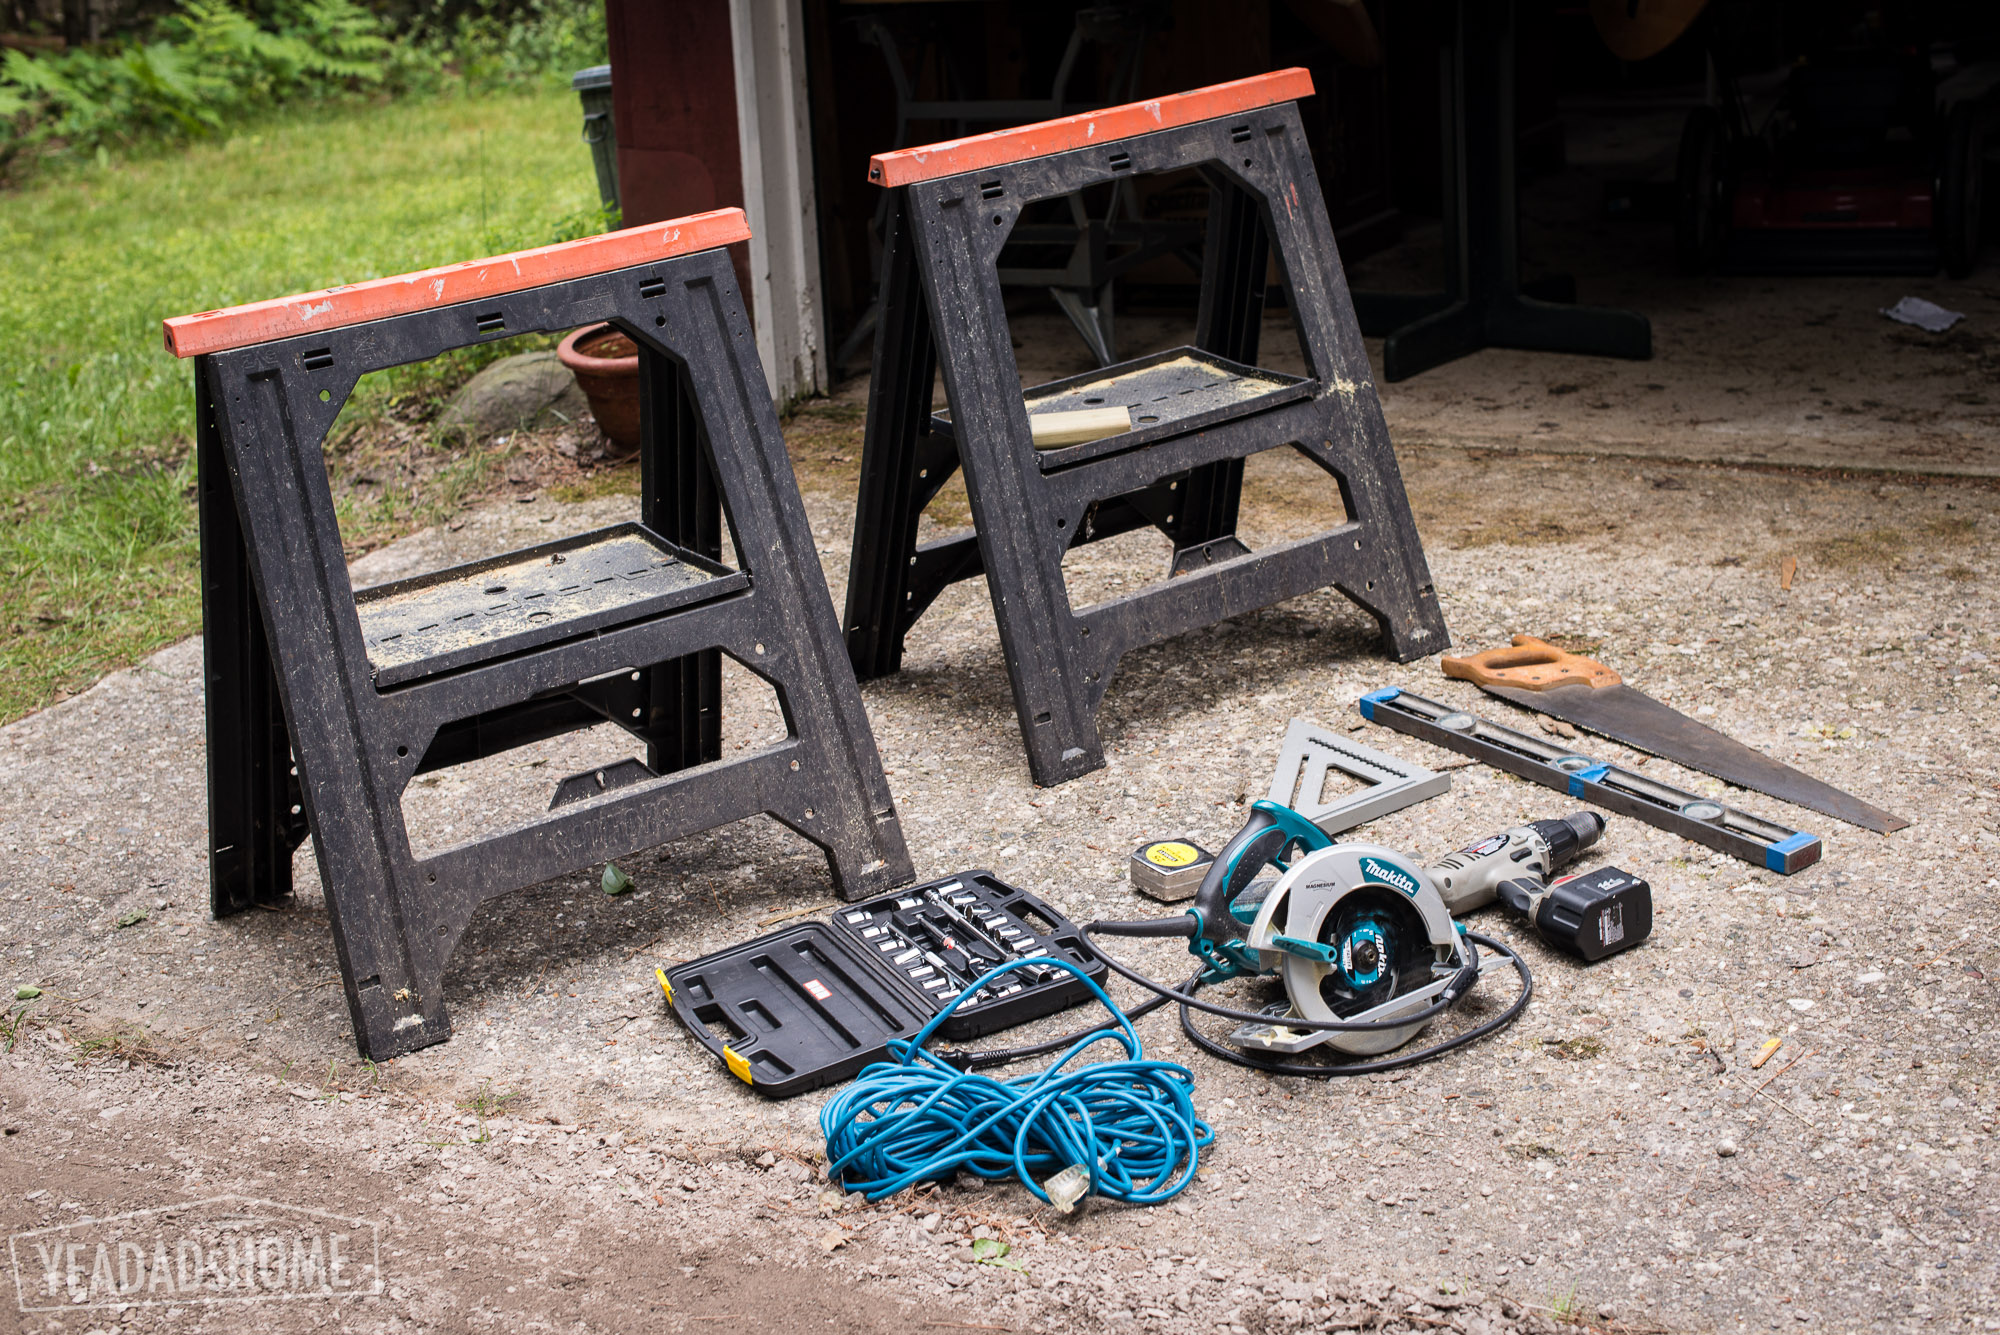
    Treehouse Tools
    Treehouse Tools

    Hardware

    12 ½ in x 6 inch, stainless carriage bolts (for the legs and side posts)
    12 stainless washers
    12 stainless locking nuts
    50 grk structural screws (for structural attachments)
    3 lbs deck screws (only for attaching deck boards)
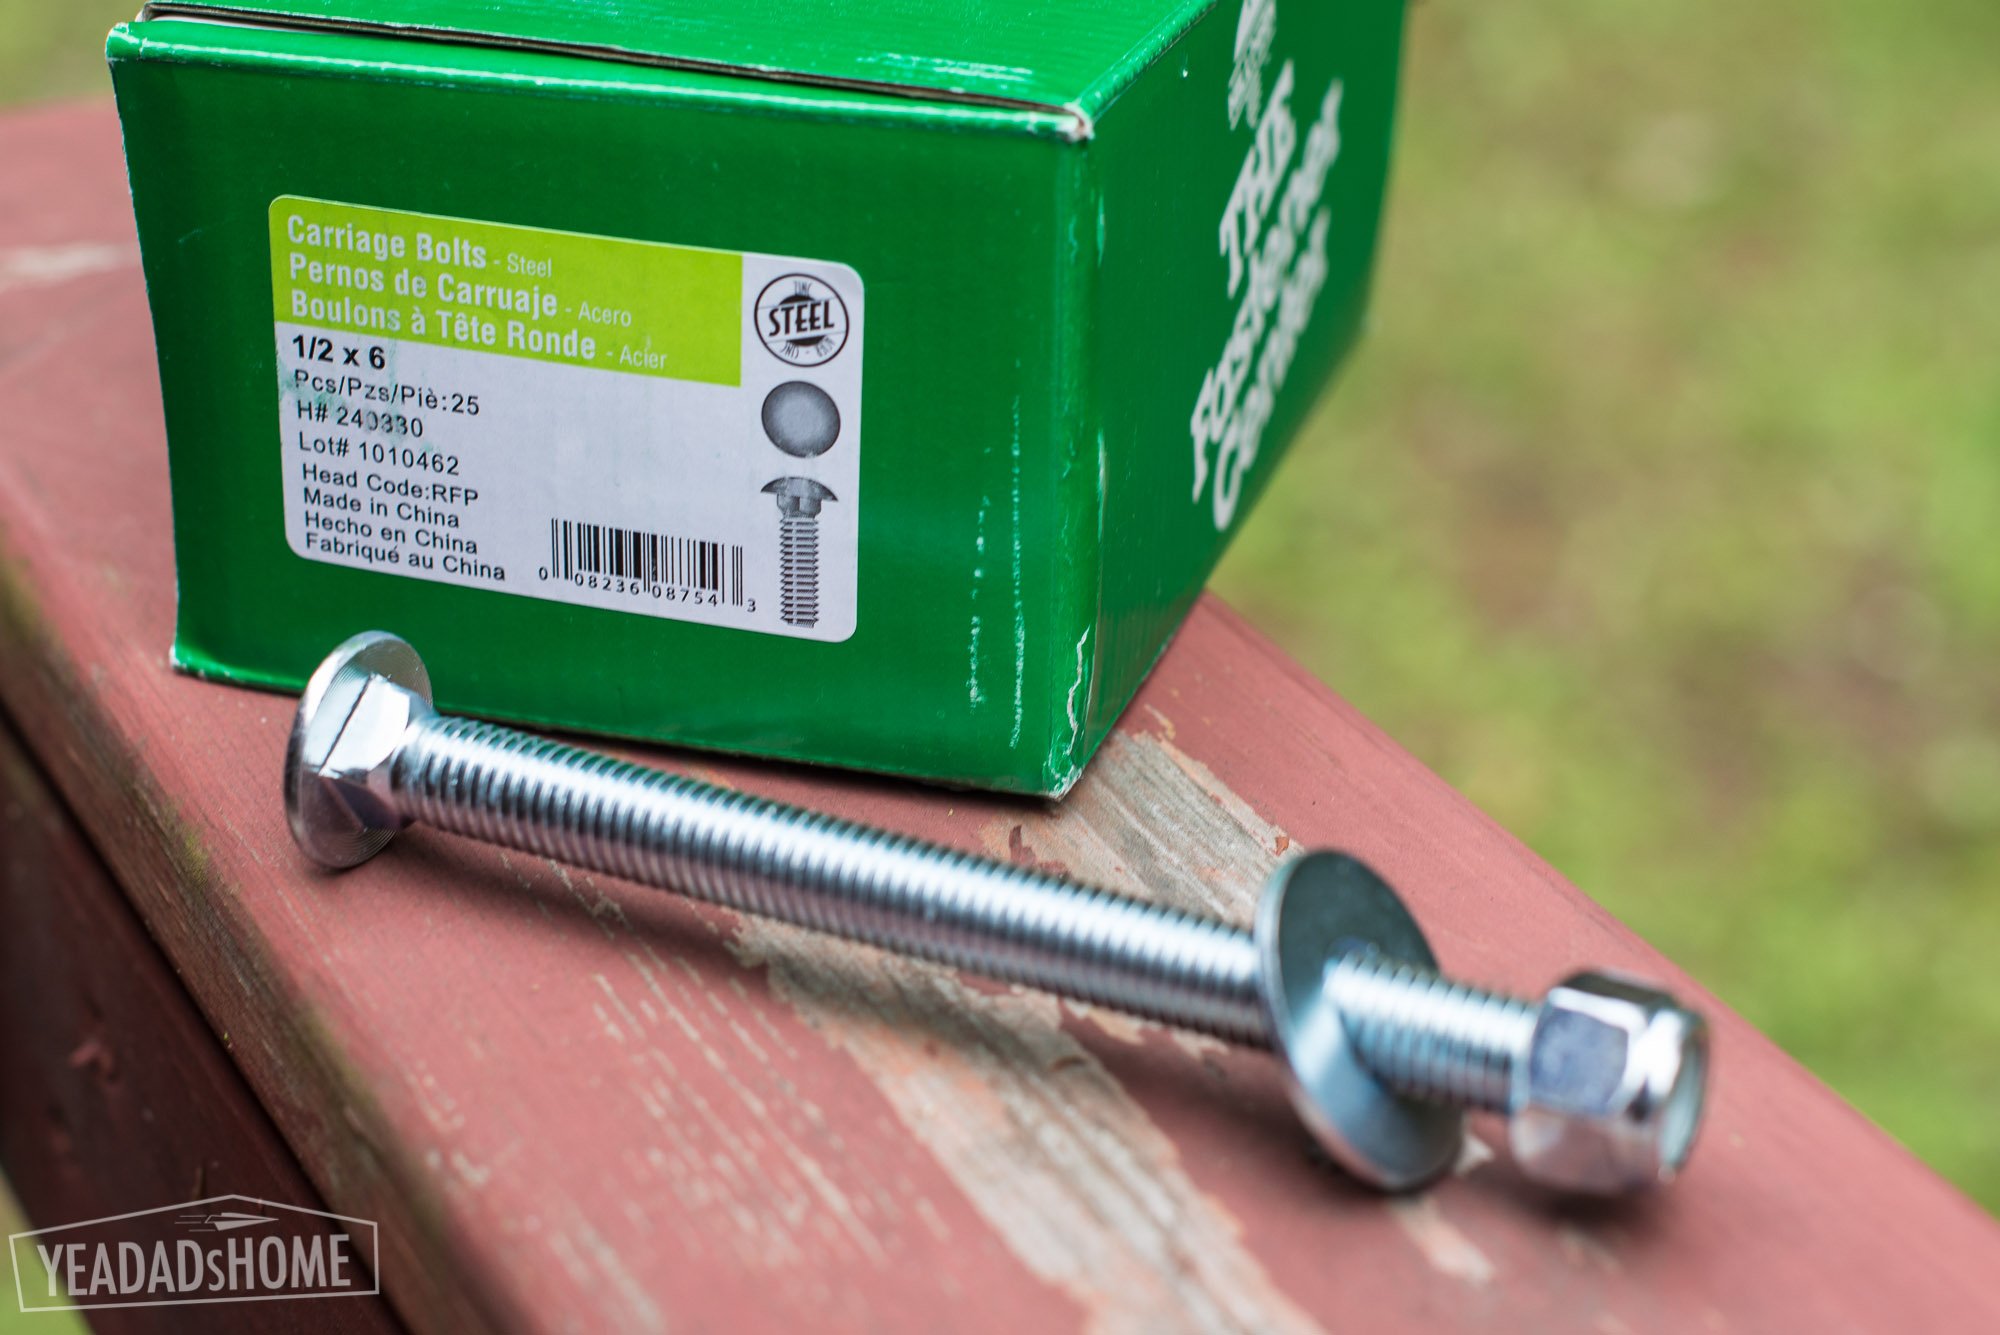
    Stainless Carriage Bolts, Washer, Nut
    Stainless Carriage Bolts, Washer, Nut
    GRK Screws
    GRK Screws

    Pressure Treated Lumber

    2×6 8ft – 13 pieces
    4×4 8ft – 8 pieces
    2×6 12 ft – 2 pieces
    1×6 8ft deck board – 30 pieces


    Cinder Blocks

    8 x 16 x 4 inch solid blocks – 4 pieces


    Total Cost

    $500 = $400 lumber + $100 hardware


    Getting the Lumber

    For my project I was lucky that I found a local lumber yard that would deliver and pick good boards for me. From what I have read, this isn’t always easy to do. Before I found that lumber yard, I thought about getting a delivery from one of the big stores. The more I read their reviews though, the less I liked that option. It sounds like some pick the knurliest pieces for that kind of delivery. Another option I considered was renting a truck for the day, picking the wood myself, and hauling it home. If I hadn’t found the place I did, I would have spent a full day moving lumber. I would have gotten some other things that don’t fit in my car too, but still I saved a bunch of time by working with a local lumber company.


    Building the Treehouse

    Day 1

    Our first day we picked up materials. Choose a site. Then we laid out and leveled the block where the feet would rest.

    To set the blocks. I used a few 12 foot and 8 foot boards to size up a 8×12 ft rectangle. I used a square shovel to dig holes for each that would level the blocks out. We have fairly sandy soil, and it had rained quite a bit, so this was pretty easy. You might need another tool if your ground is harder.
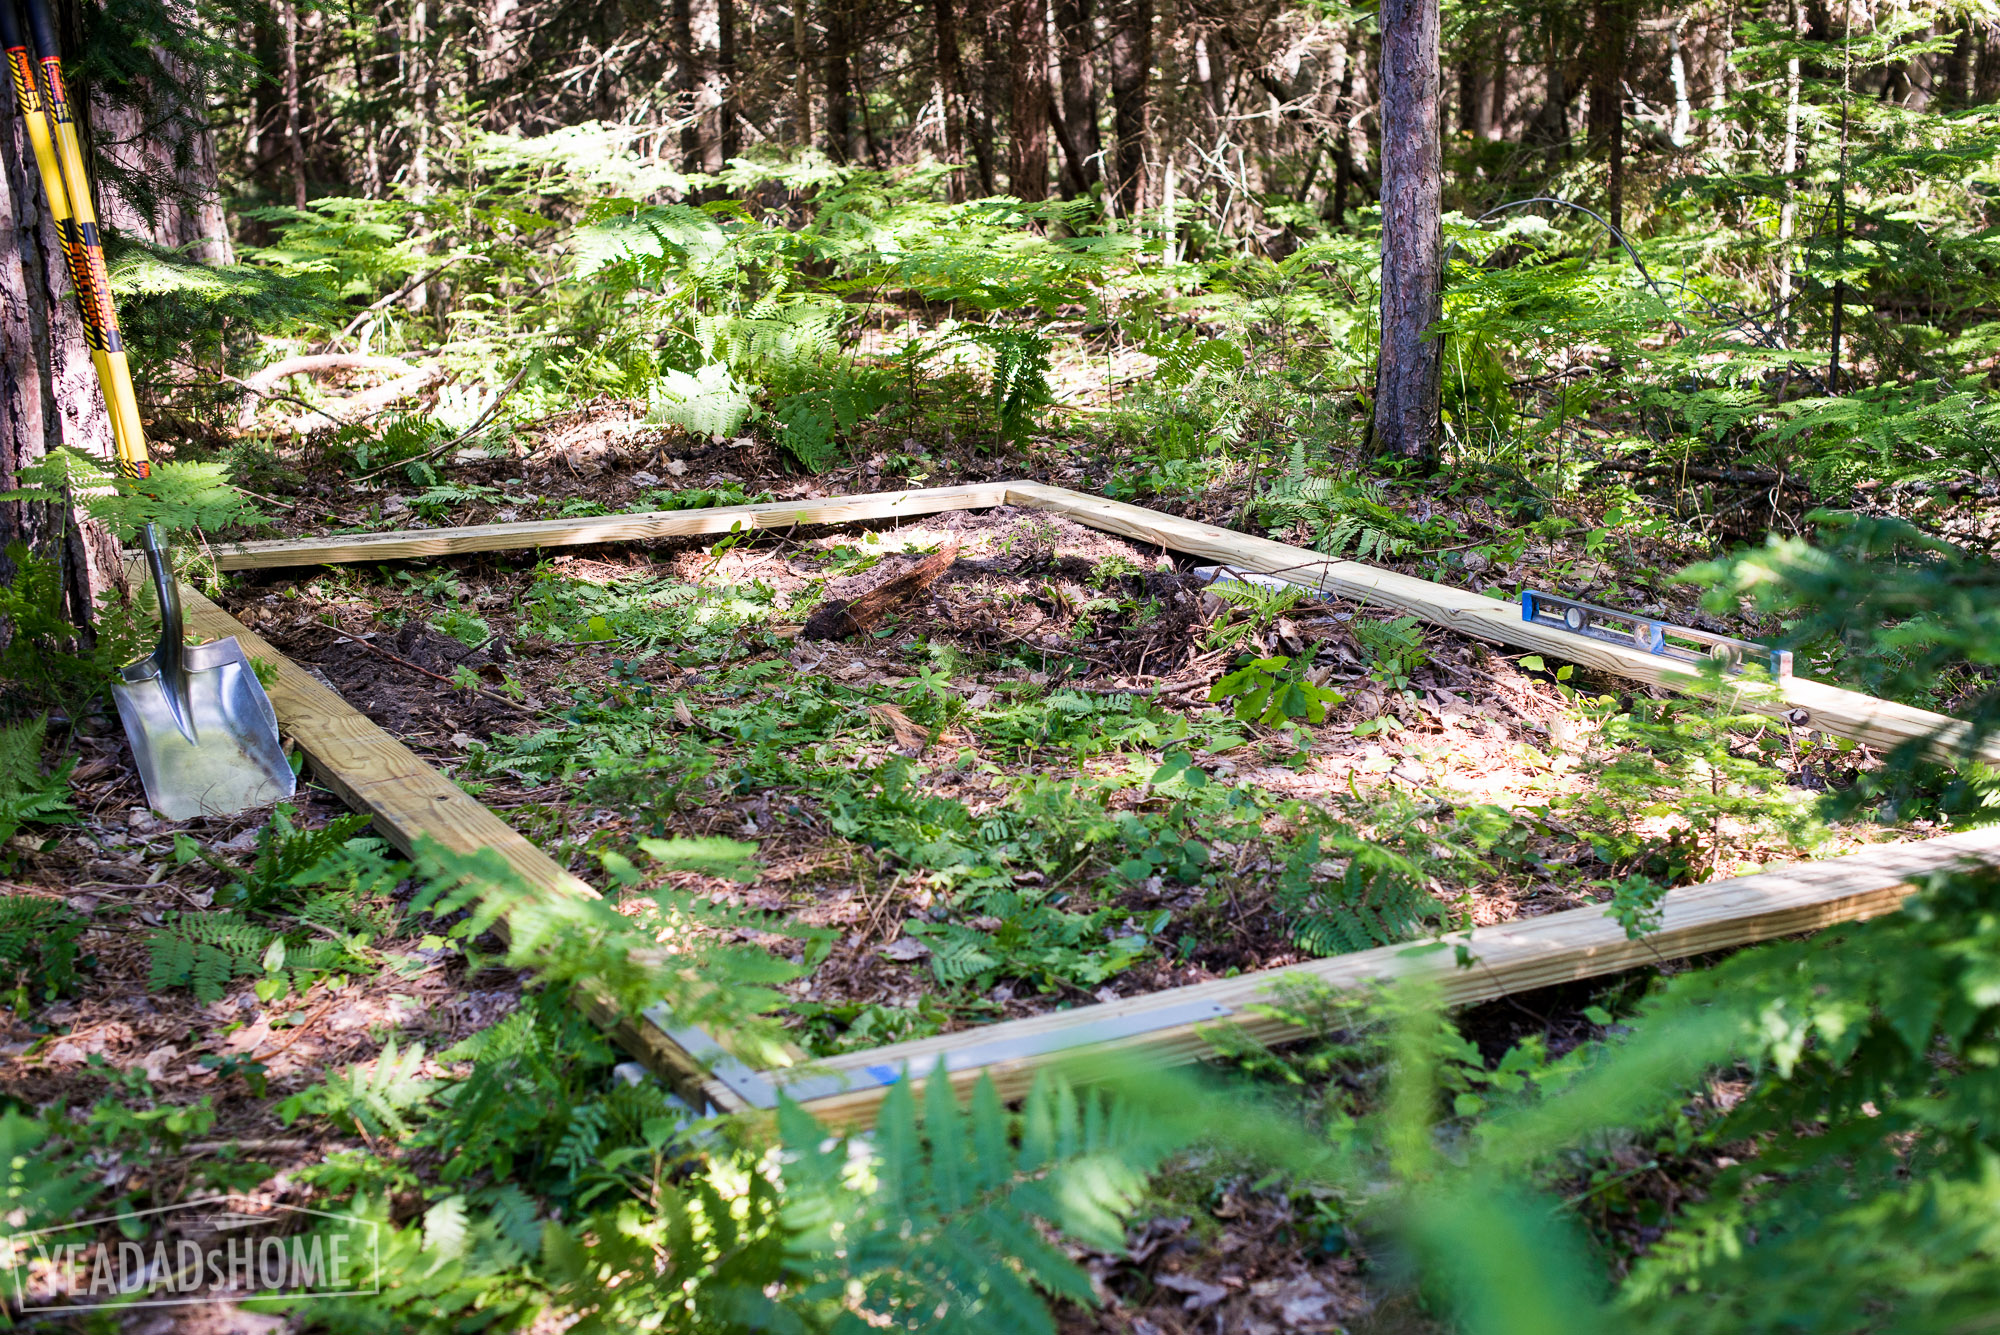
    Leveling Blocks For the Treehouse Feet
    Leveling Blocks For the Treehouse Feet

    Day 2

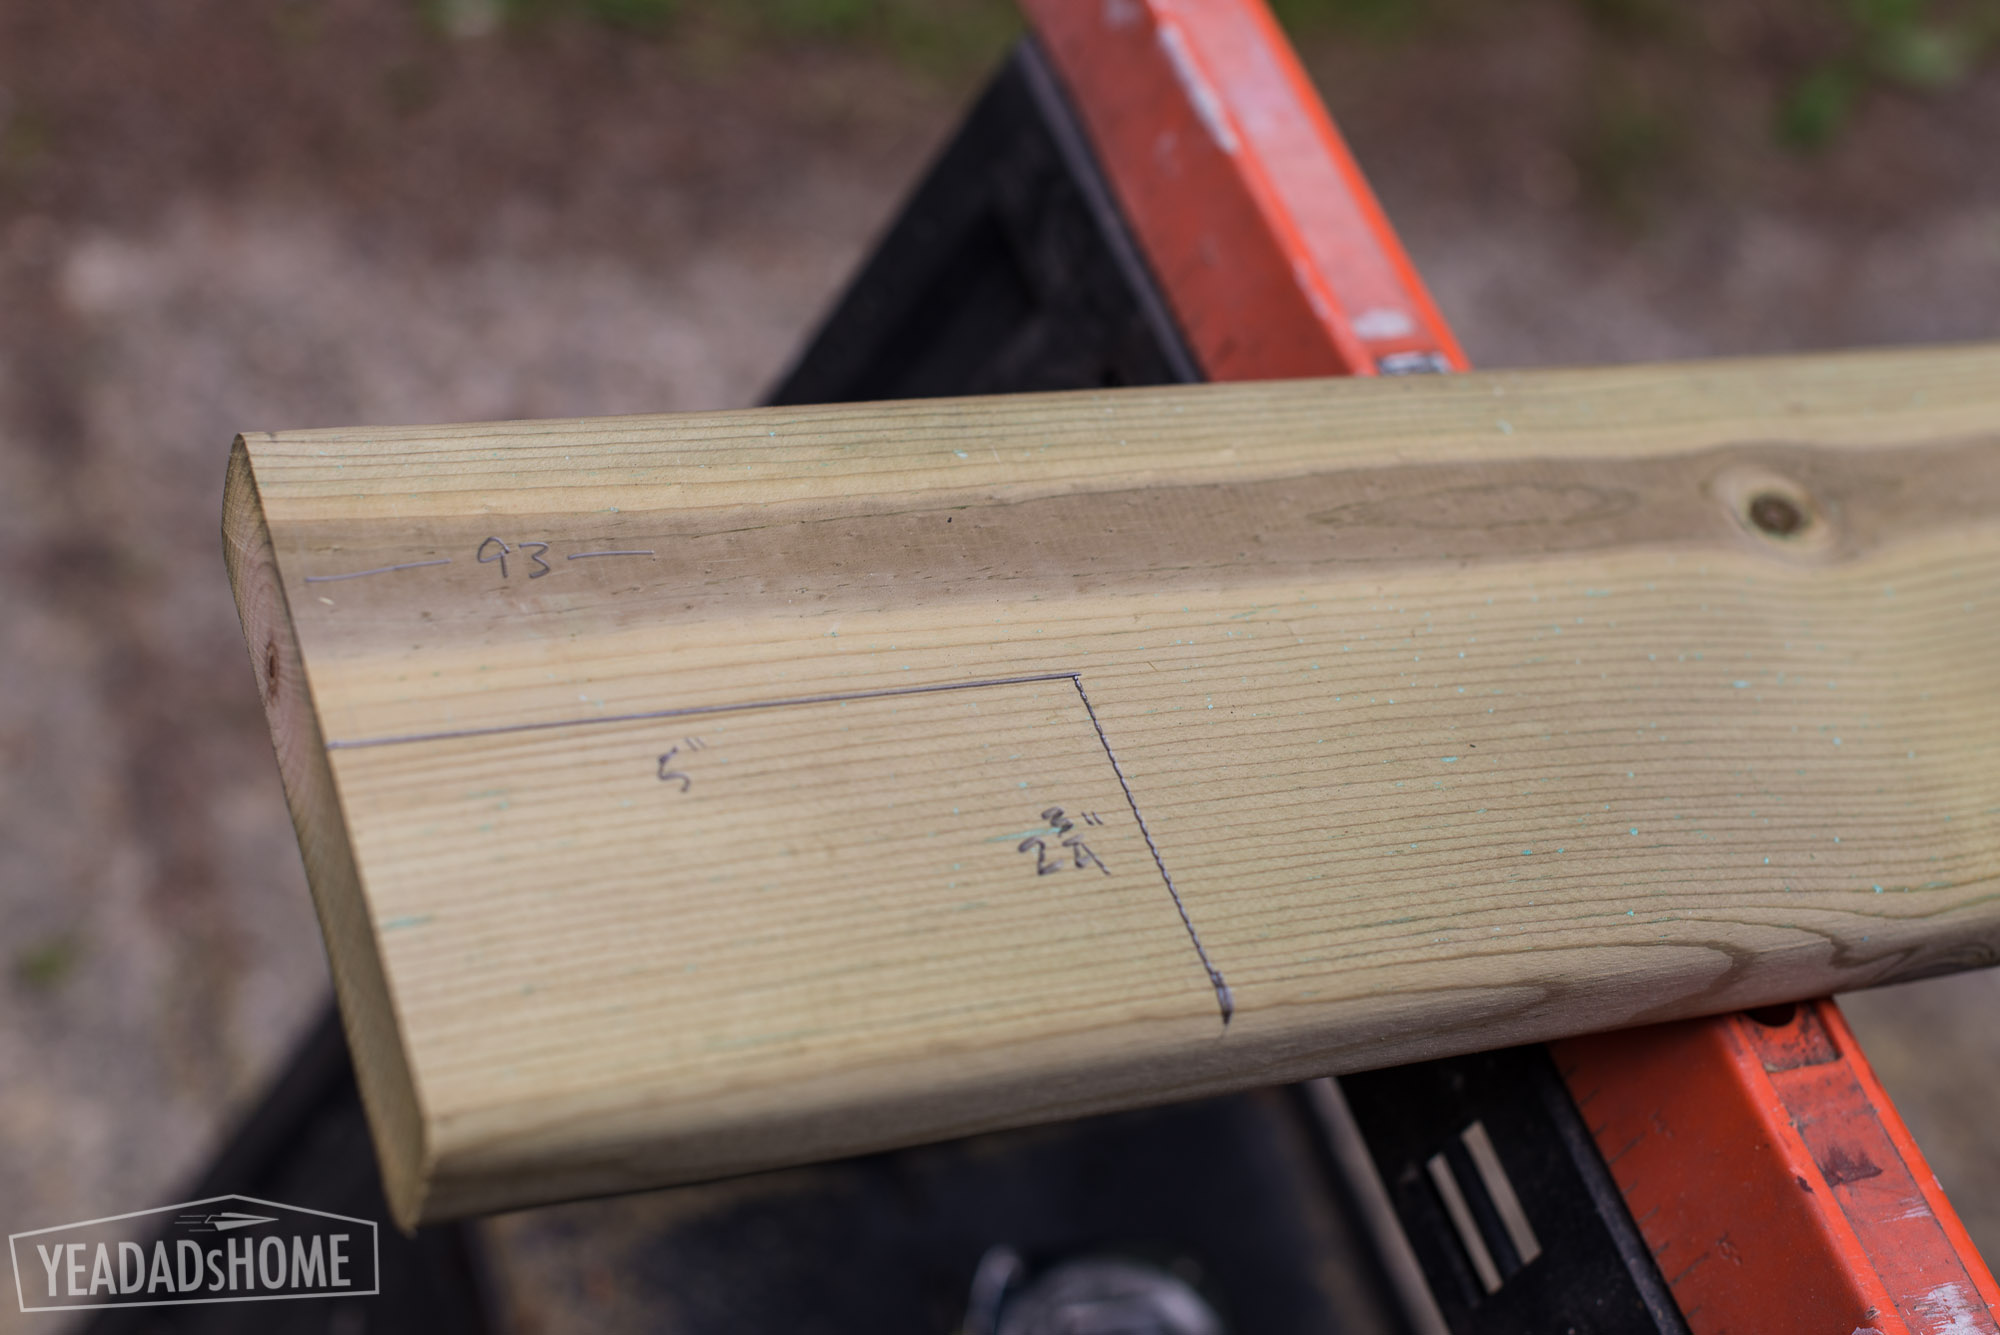
    To cut the legs, I measured 76 inches along 4 of the 4x4s and then marked a line that angles 1.75 inches from that mark.
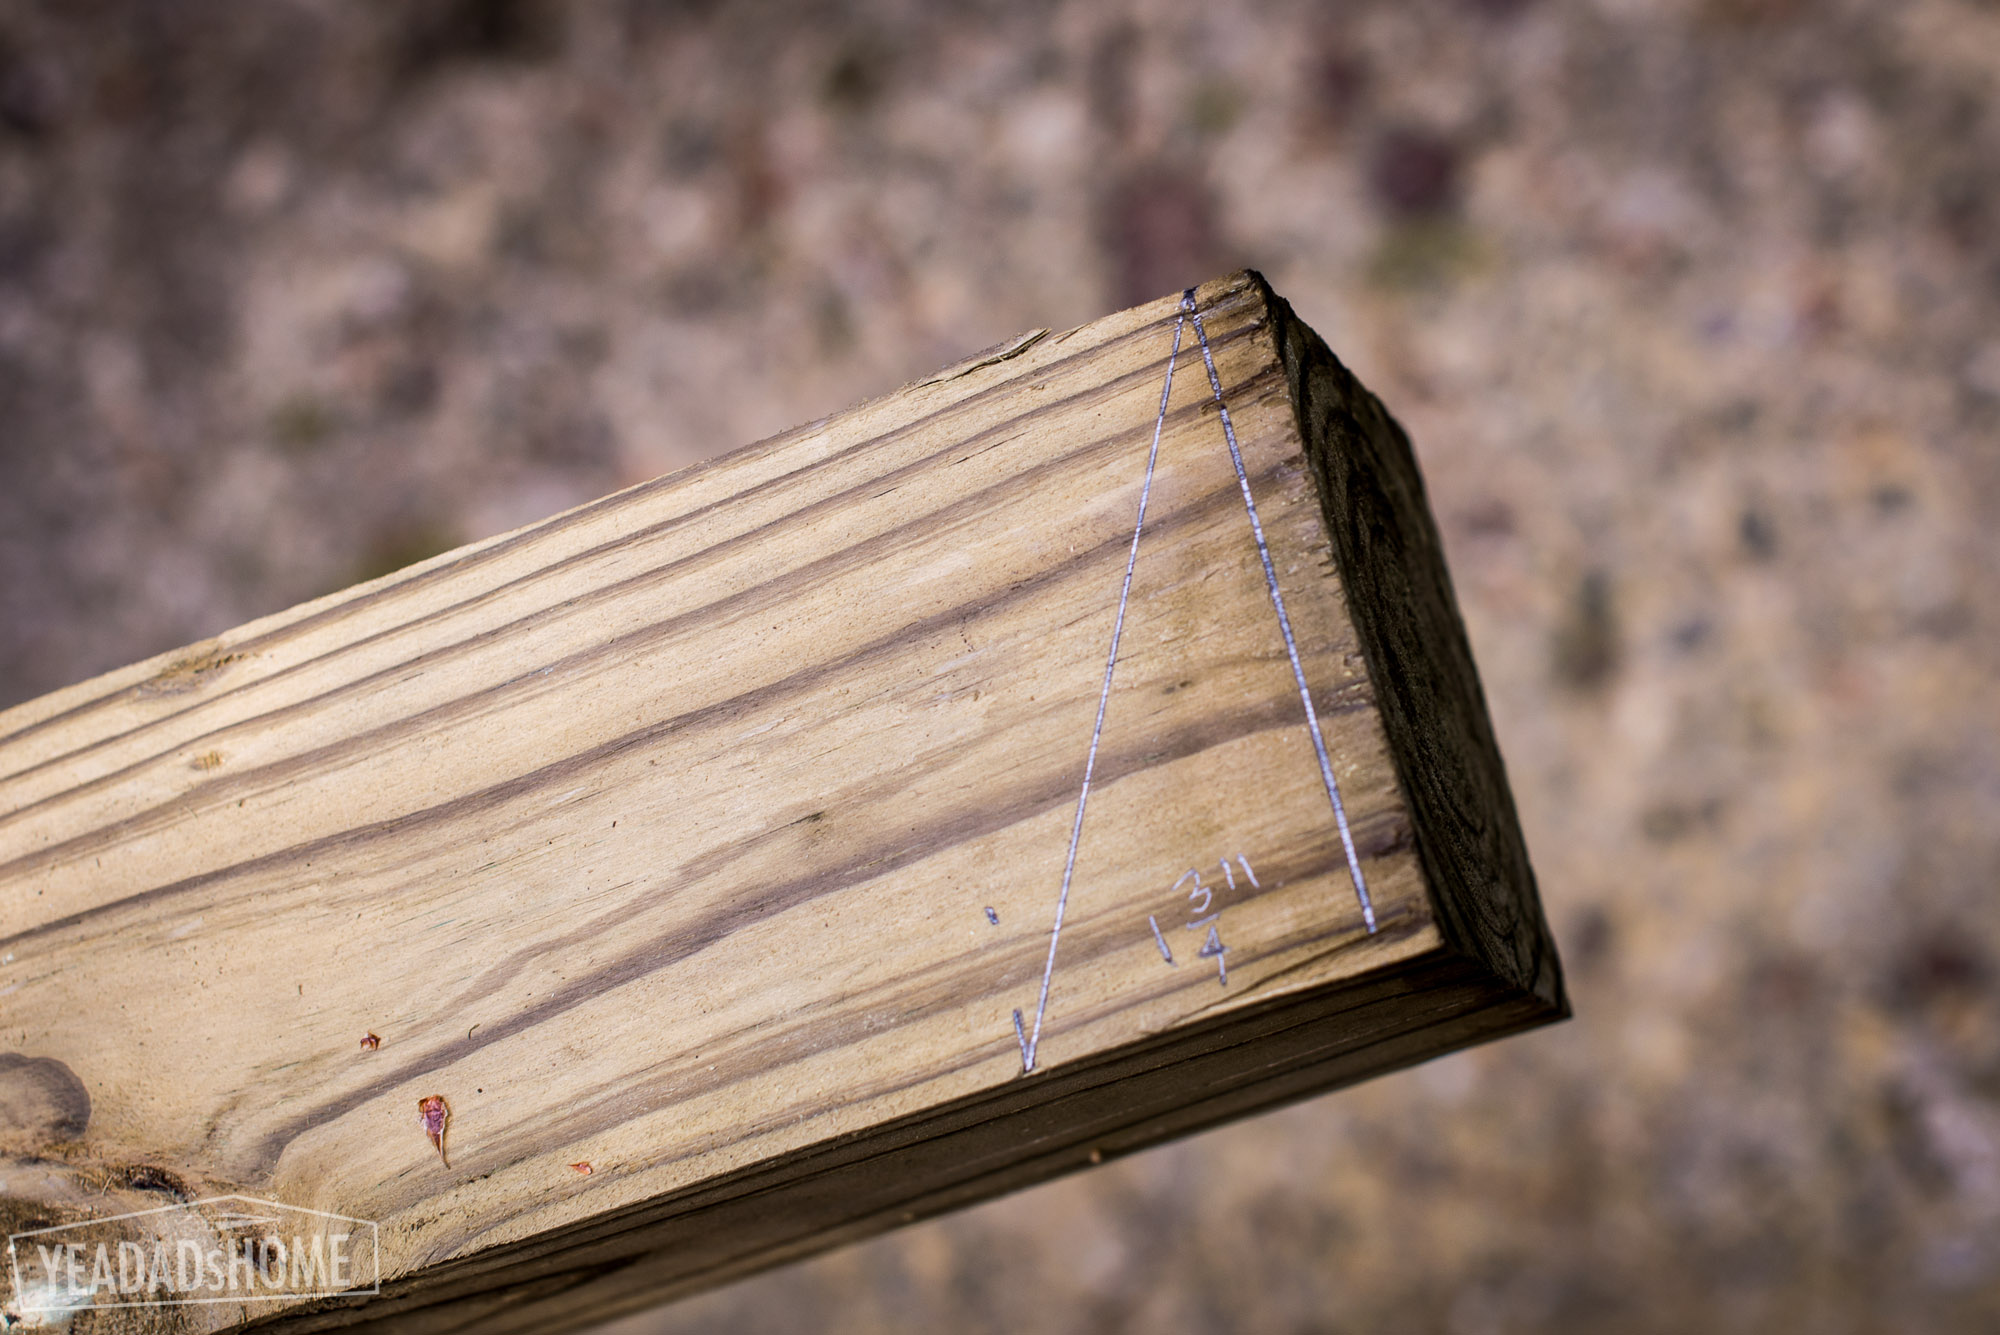
    Marking Cuts for Treehouse Legs
    Marking Cuts for Treehouse Legs


    The platform measured 96 inches square, so we had two 2×6 pieces that measured 96 inches. The other joists were 93 inches.

    Measuring Edge of Treehouse Platform
    Measuring Edge of Treehouse Platform


    Treehouse Joists
    Treehouse Joists


    To make sure I got the legs and treehouse ends exactly the same, we set the on top of each other. I screwed the boards together and then drilled holes for the bolts. We used a hammer to set the carriage bolts into place and then the socket set to tighten then nuts.
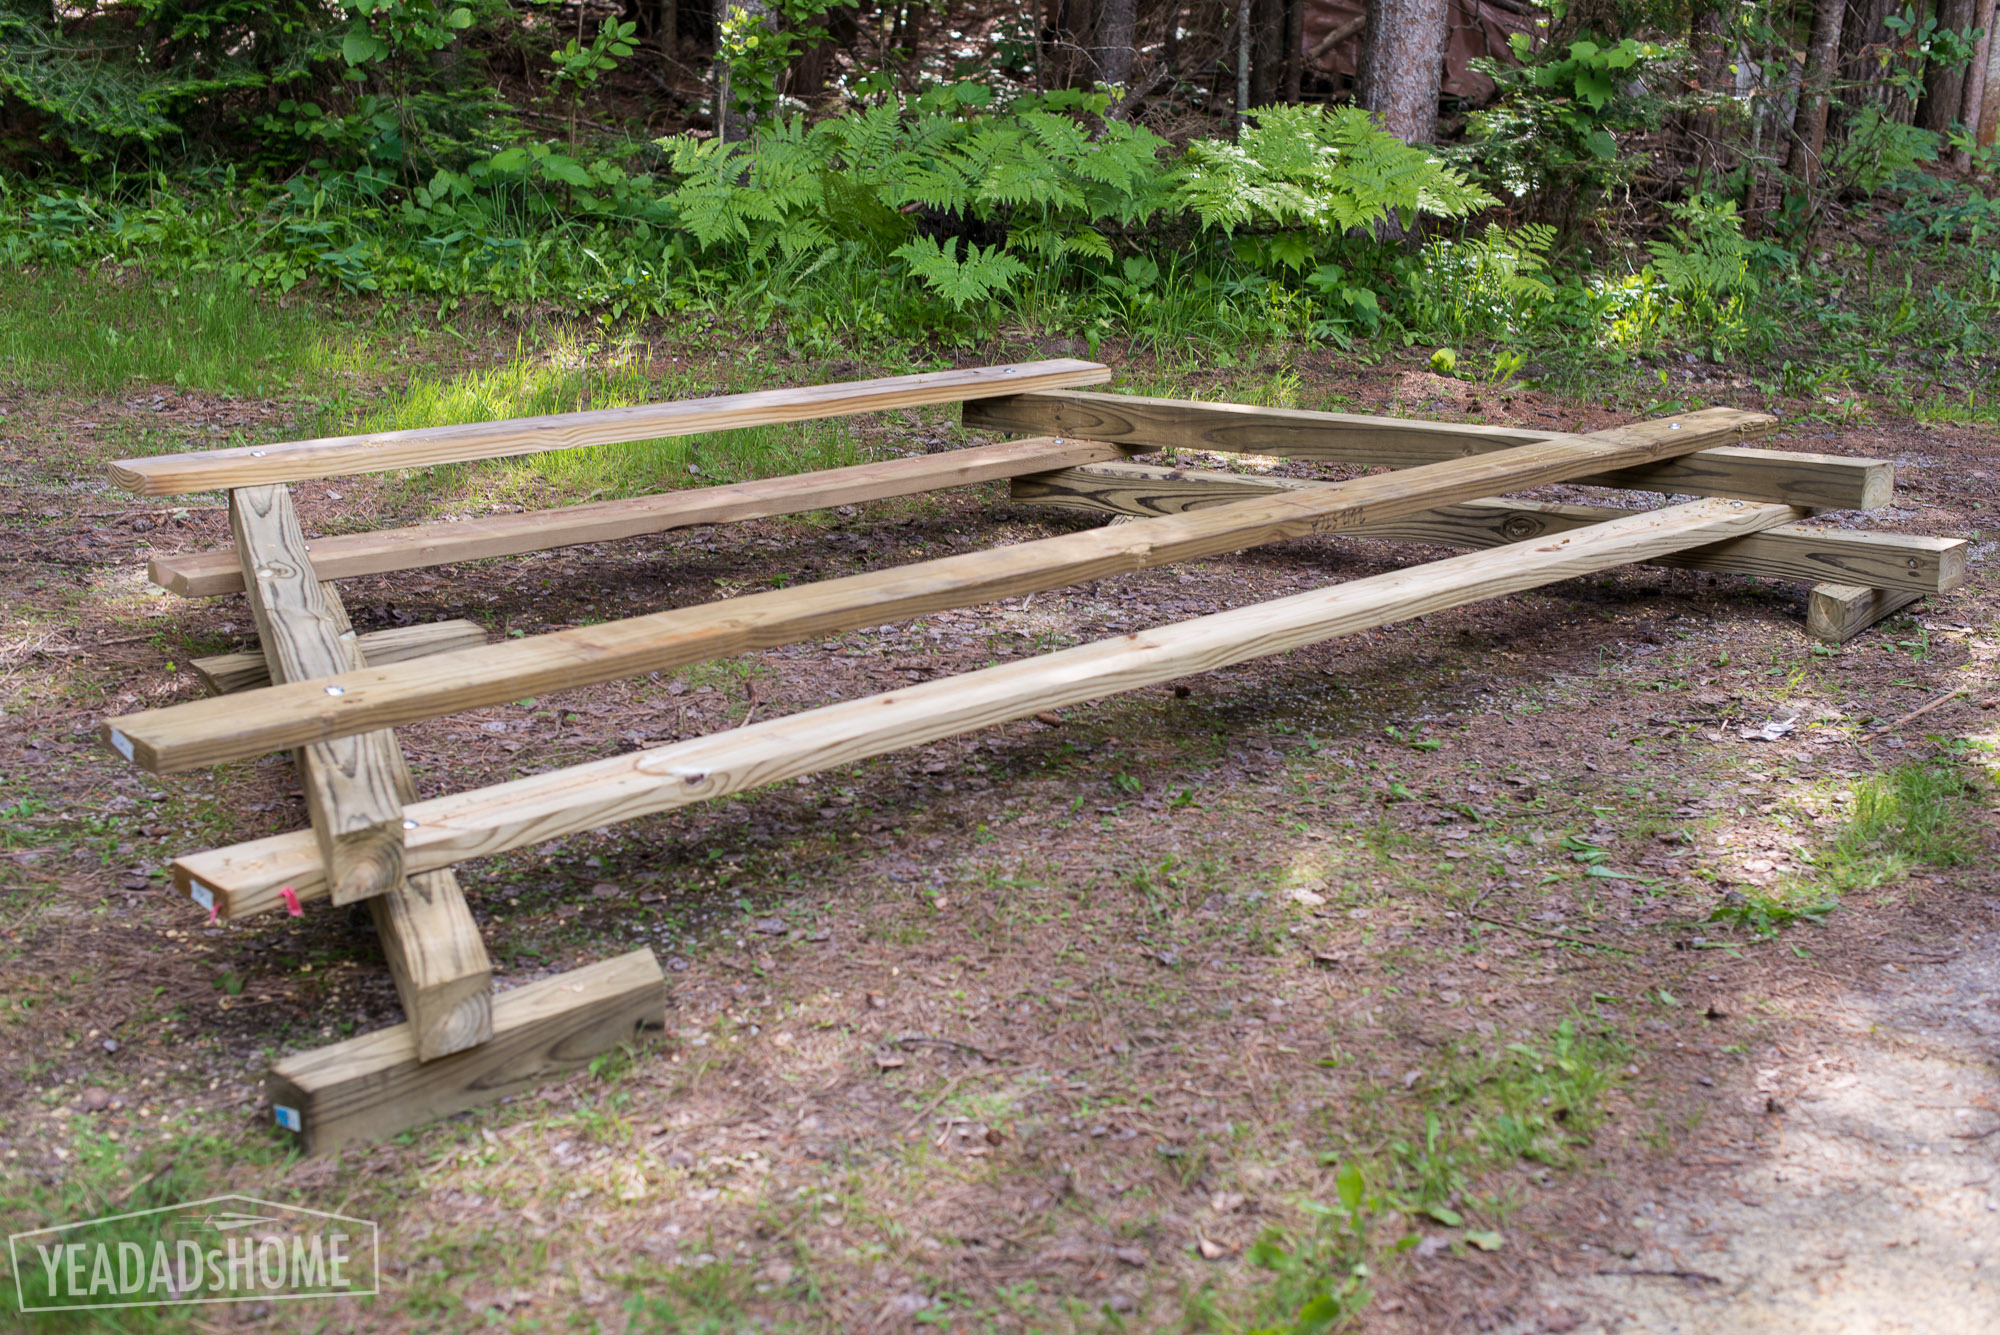
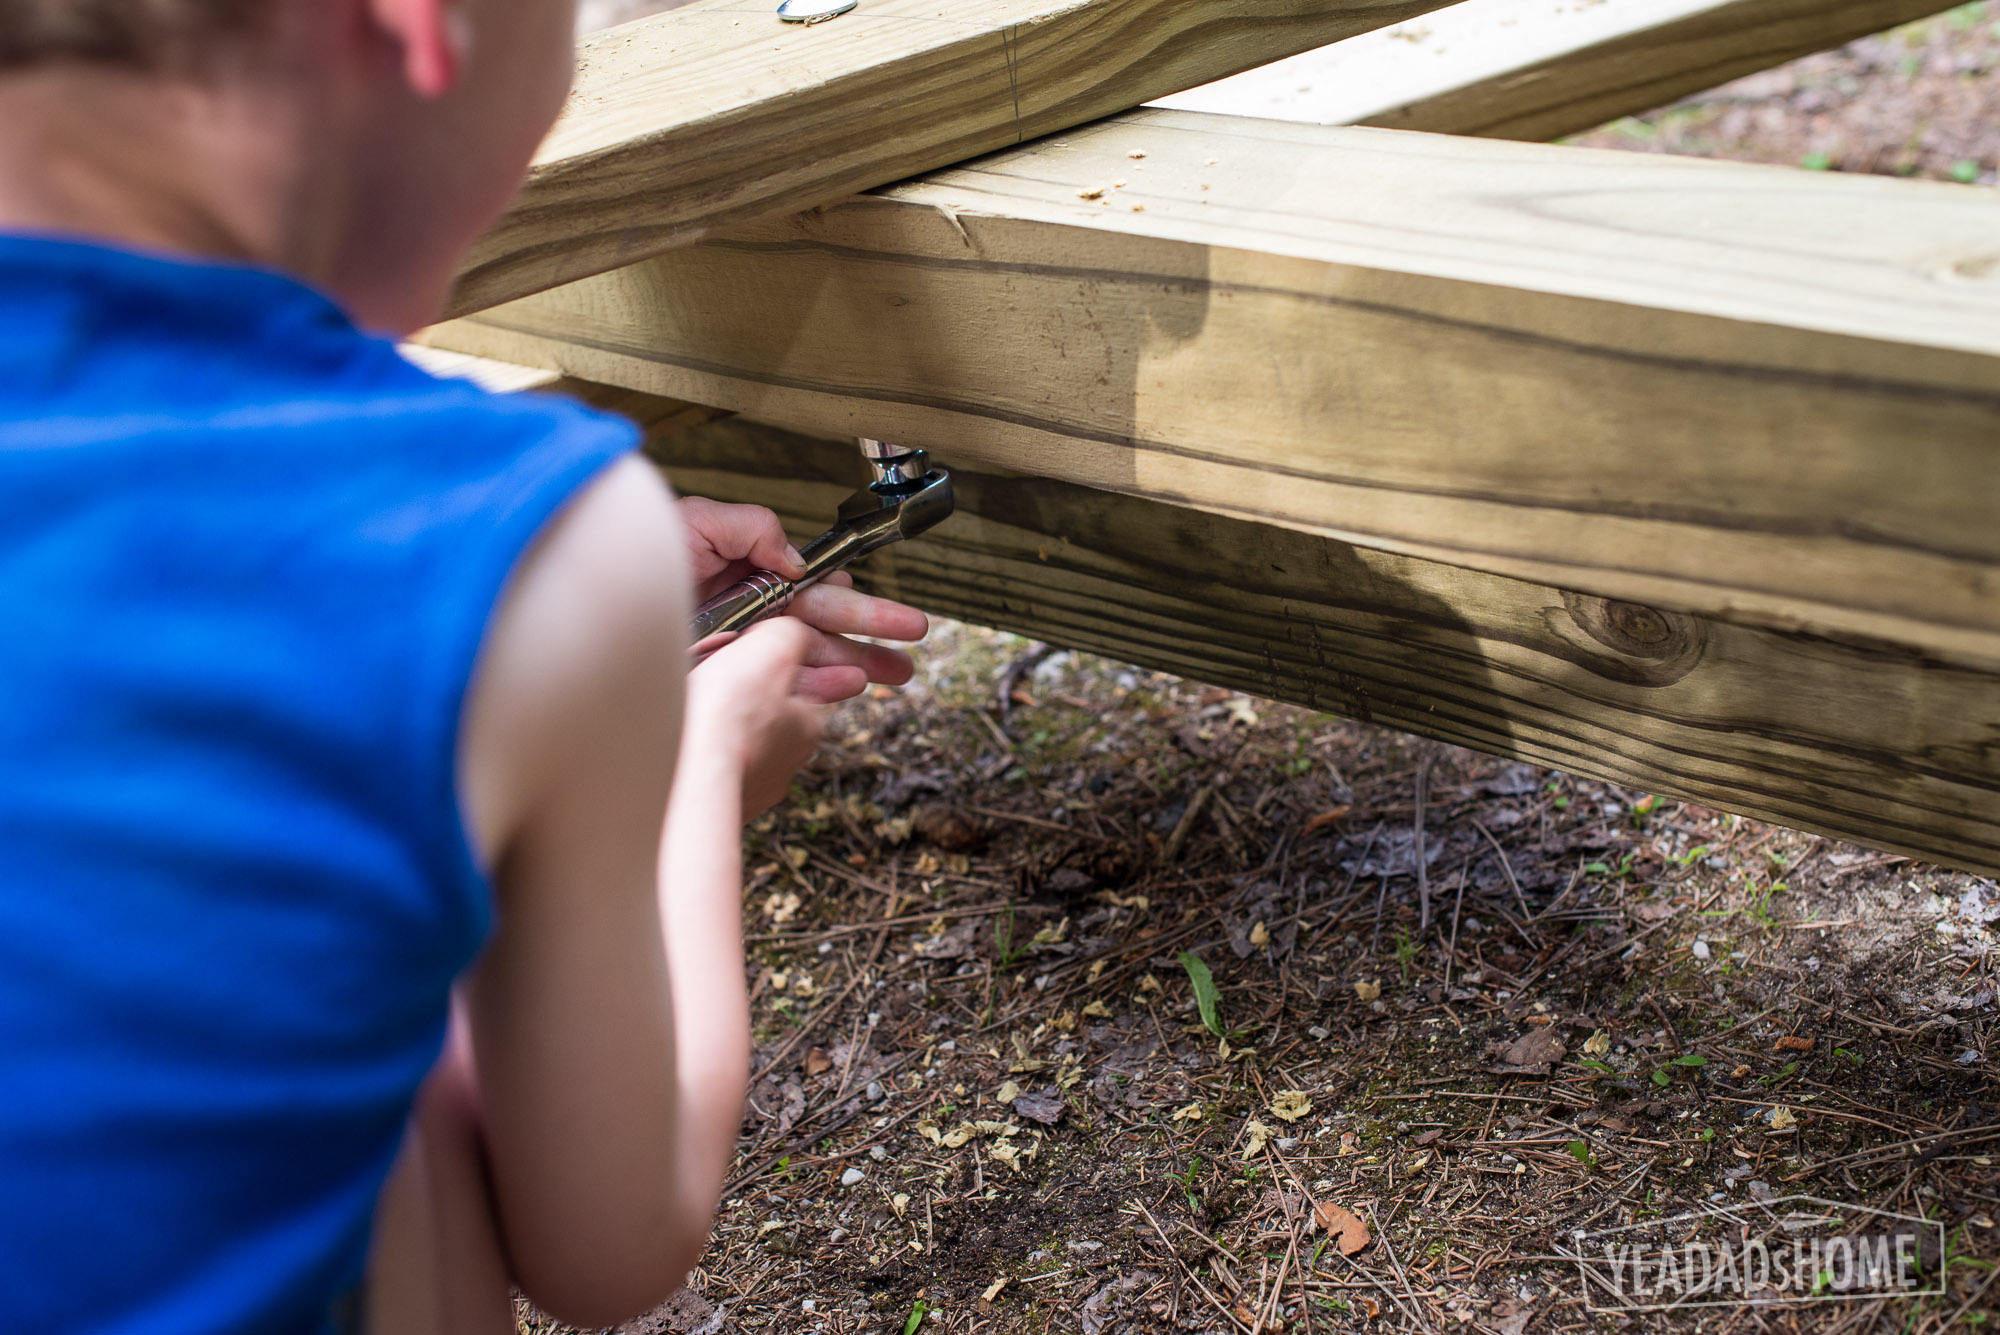
    Assembling Treehouse Legs
    Assembling Treehouse Legs
    Tightening The Bolts
    Tightening The Bolts

    Day 3

    The ends are the first wooden pieces to go into place. I used an extra pieces of lumber to prop  them up on the cinder blocks, and then I added the side supports on the angled side. The side supports were 8 foot long 2×6 boards. I didn’t cut those, but I did mark 93 inches on them, and used that measurement to line up the outside edge of the legs on the end pieces.
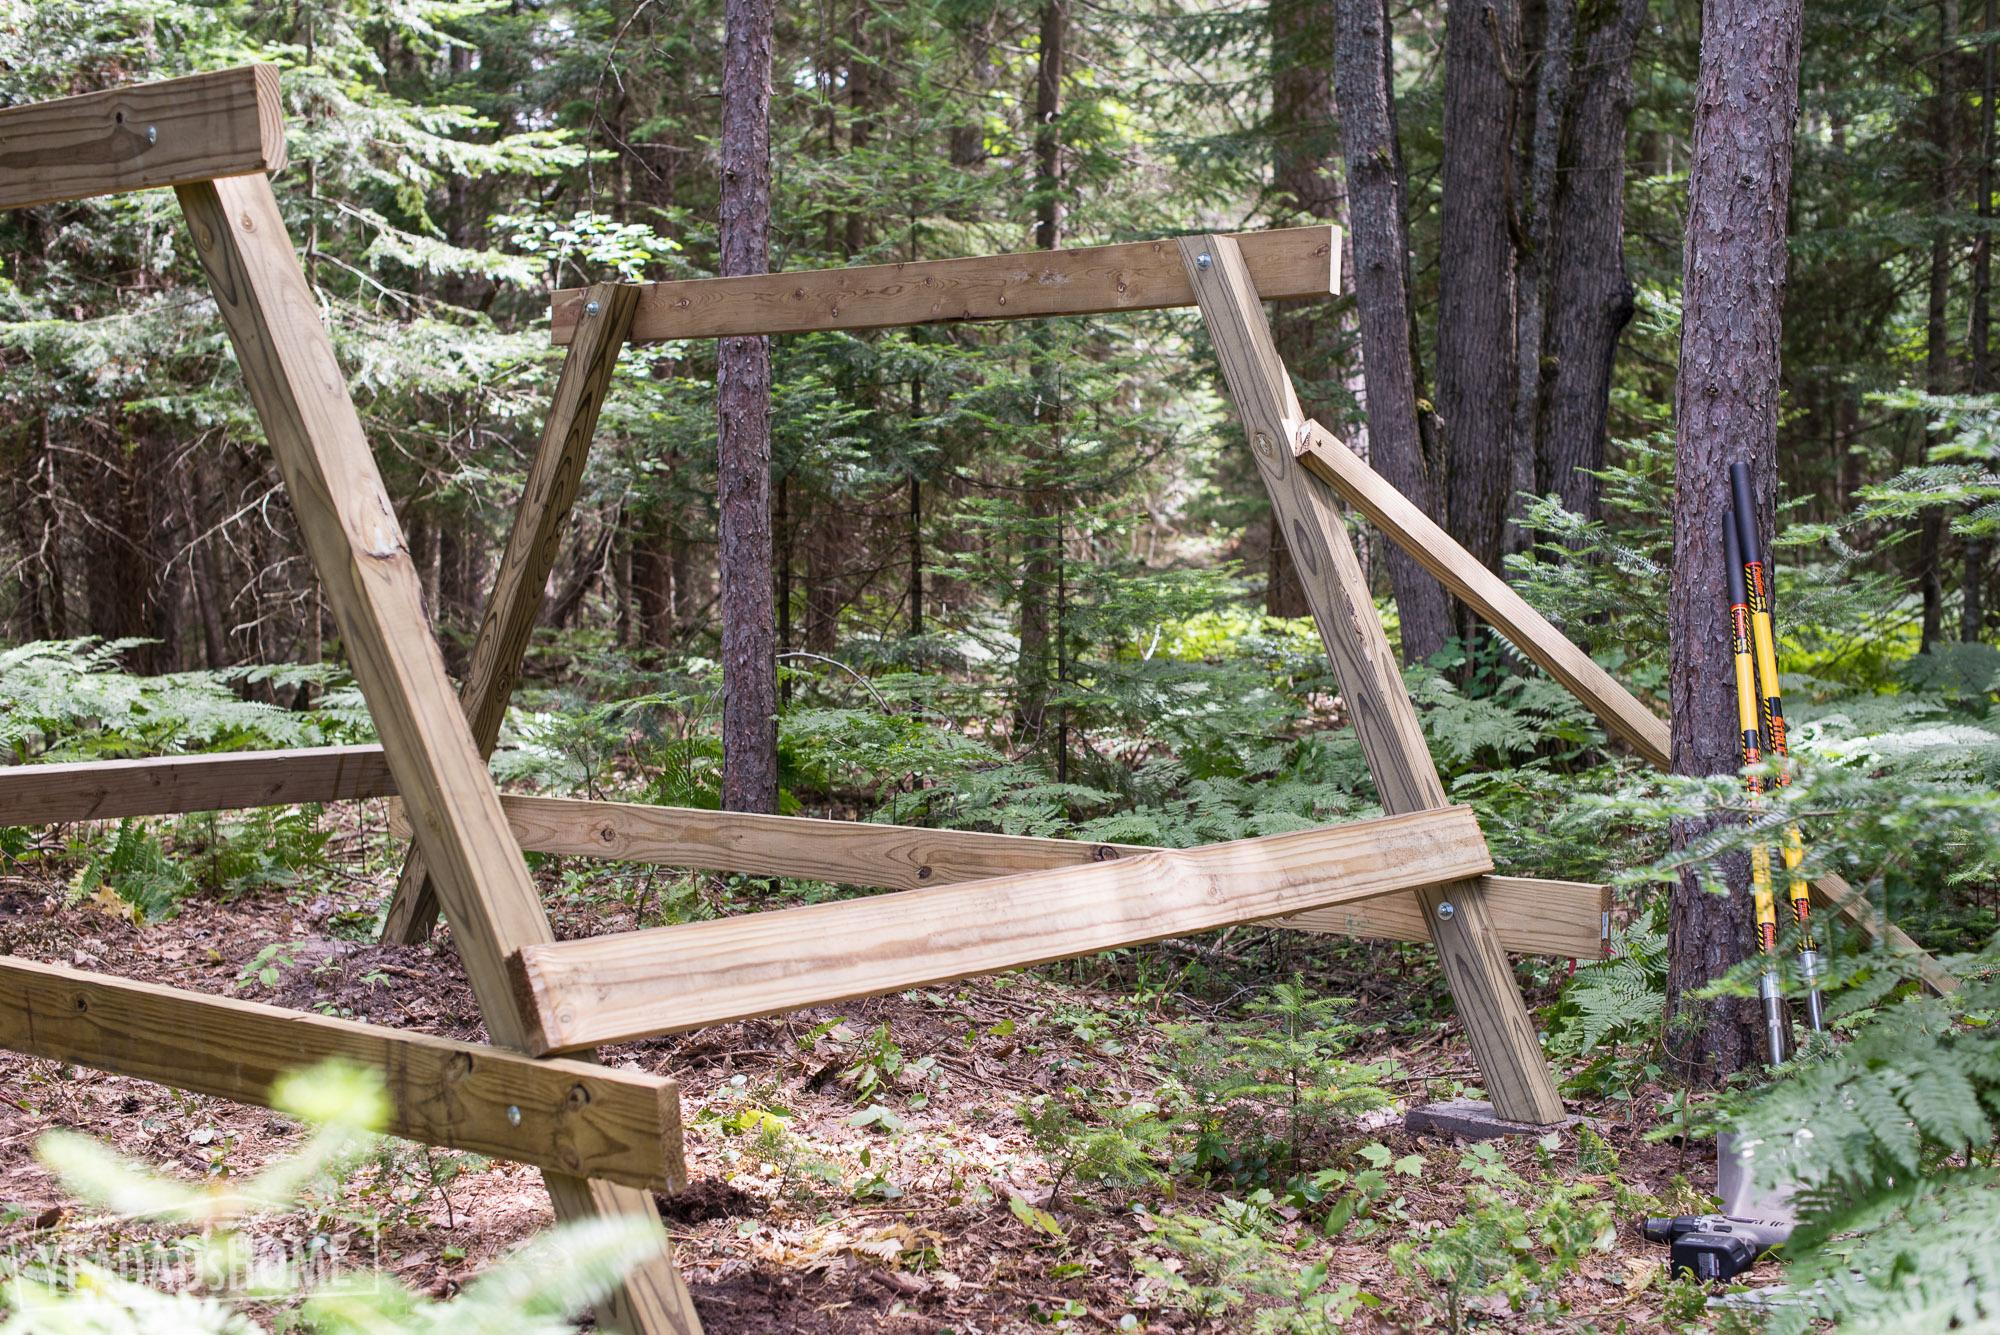
    Setting the Treehouse Legs in Place
    Setting the Treehouse Legs in Place

    Then I added the joists. In my plan legs were attached to two of the 93 inch pieces, and I then set the joists 15 inches from each end and then 15.75 inches apart. Here is a picture of that layout:

    Joist Layout
    Joist Layout

    I attached a deck board under the 2×6 pieces to help set the joists in place. If I wasn’t building on my own, I wouldn’t have needed that temporary piece.
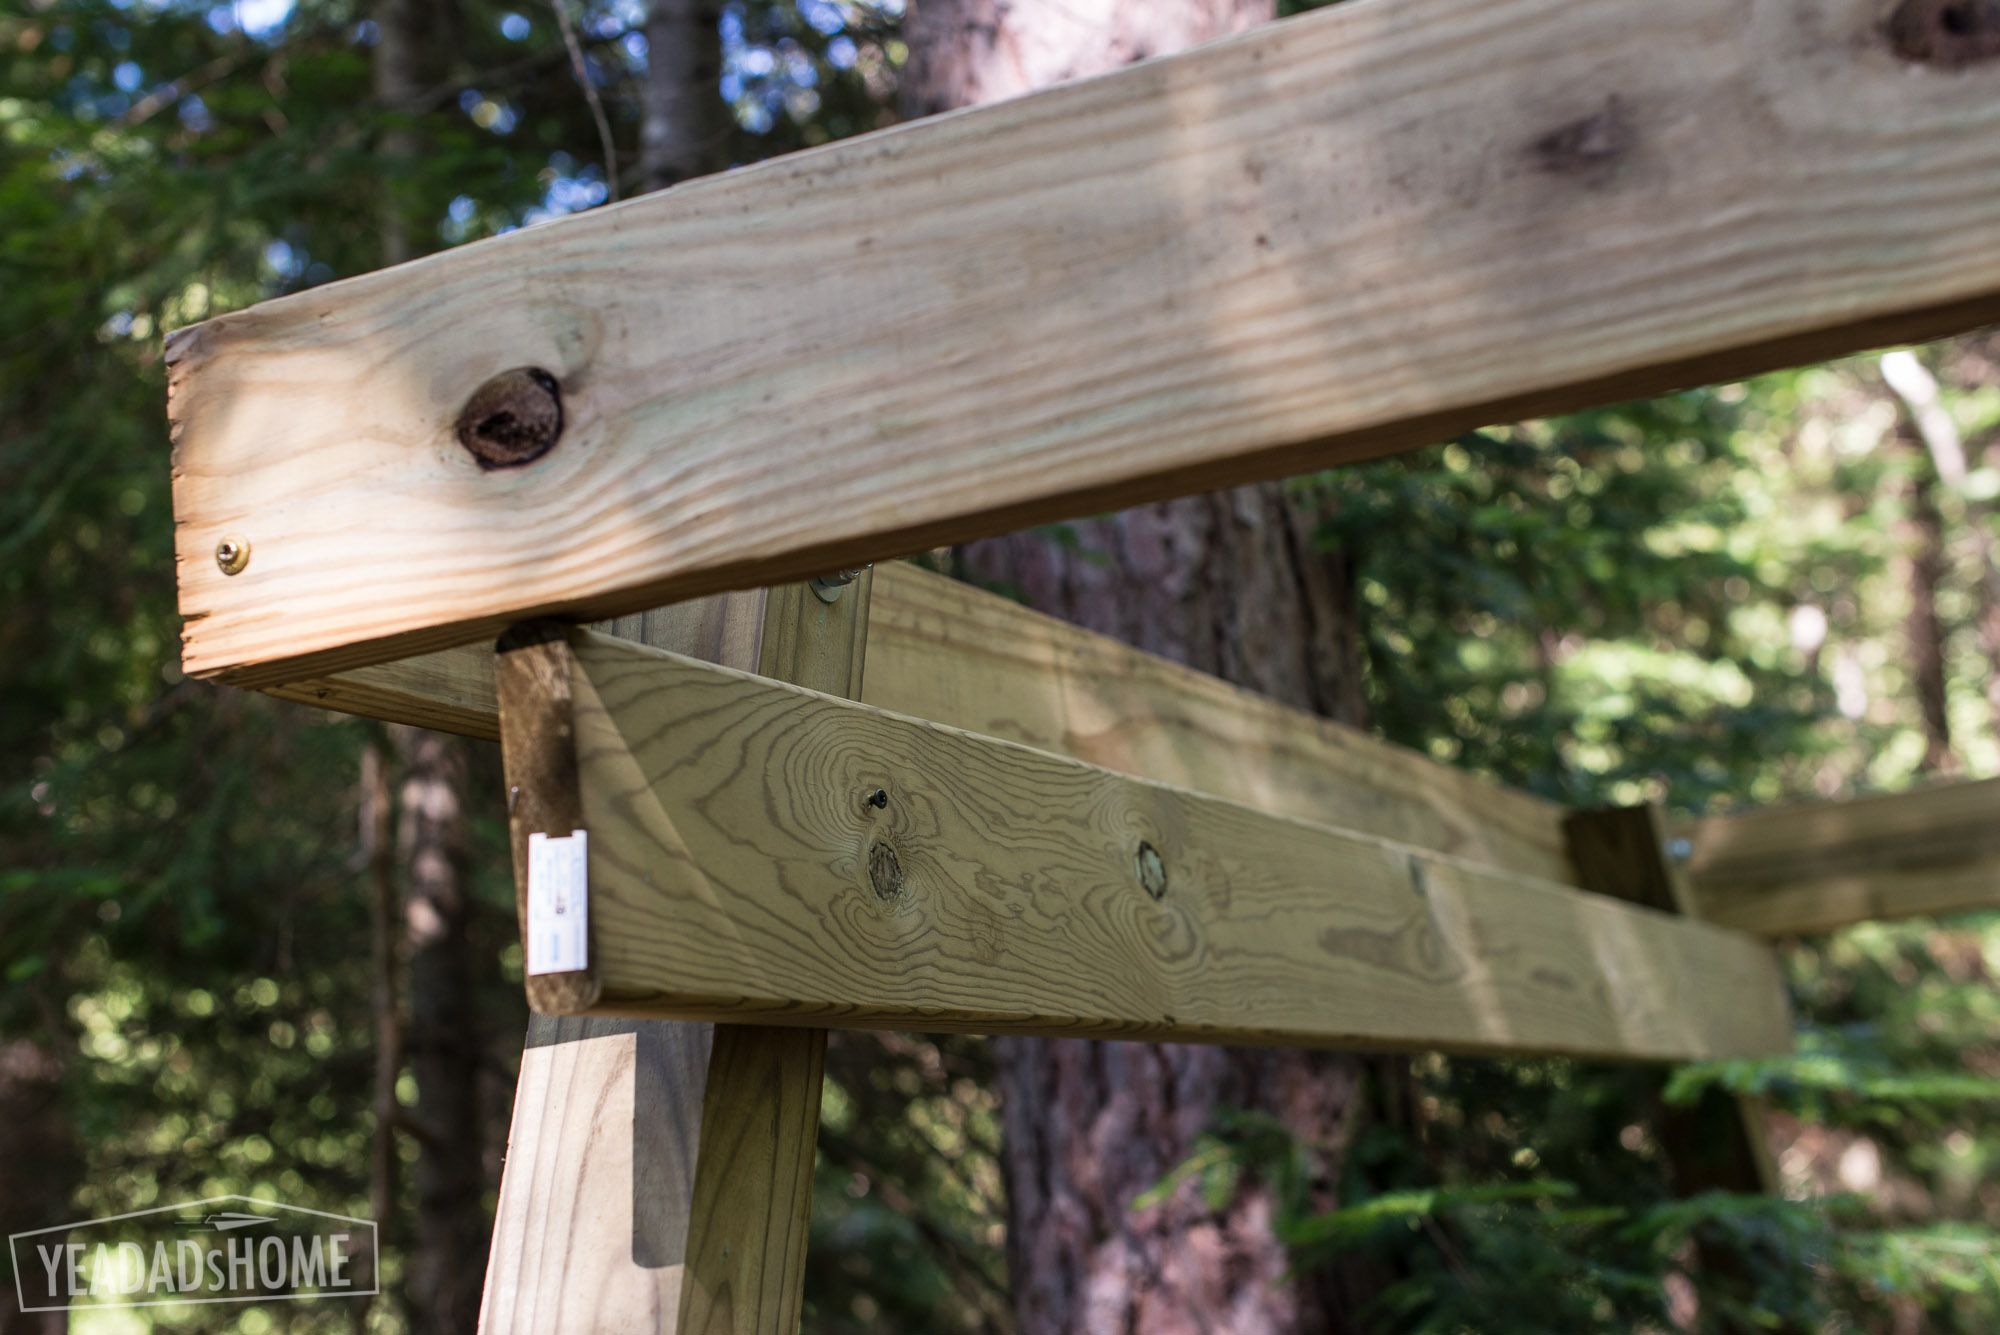
    Support for Hanging the Joists
    Support for Hanging the Joists


    We set the deck boards on the platform, and secured them with a few of the 3 inch deck screws.
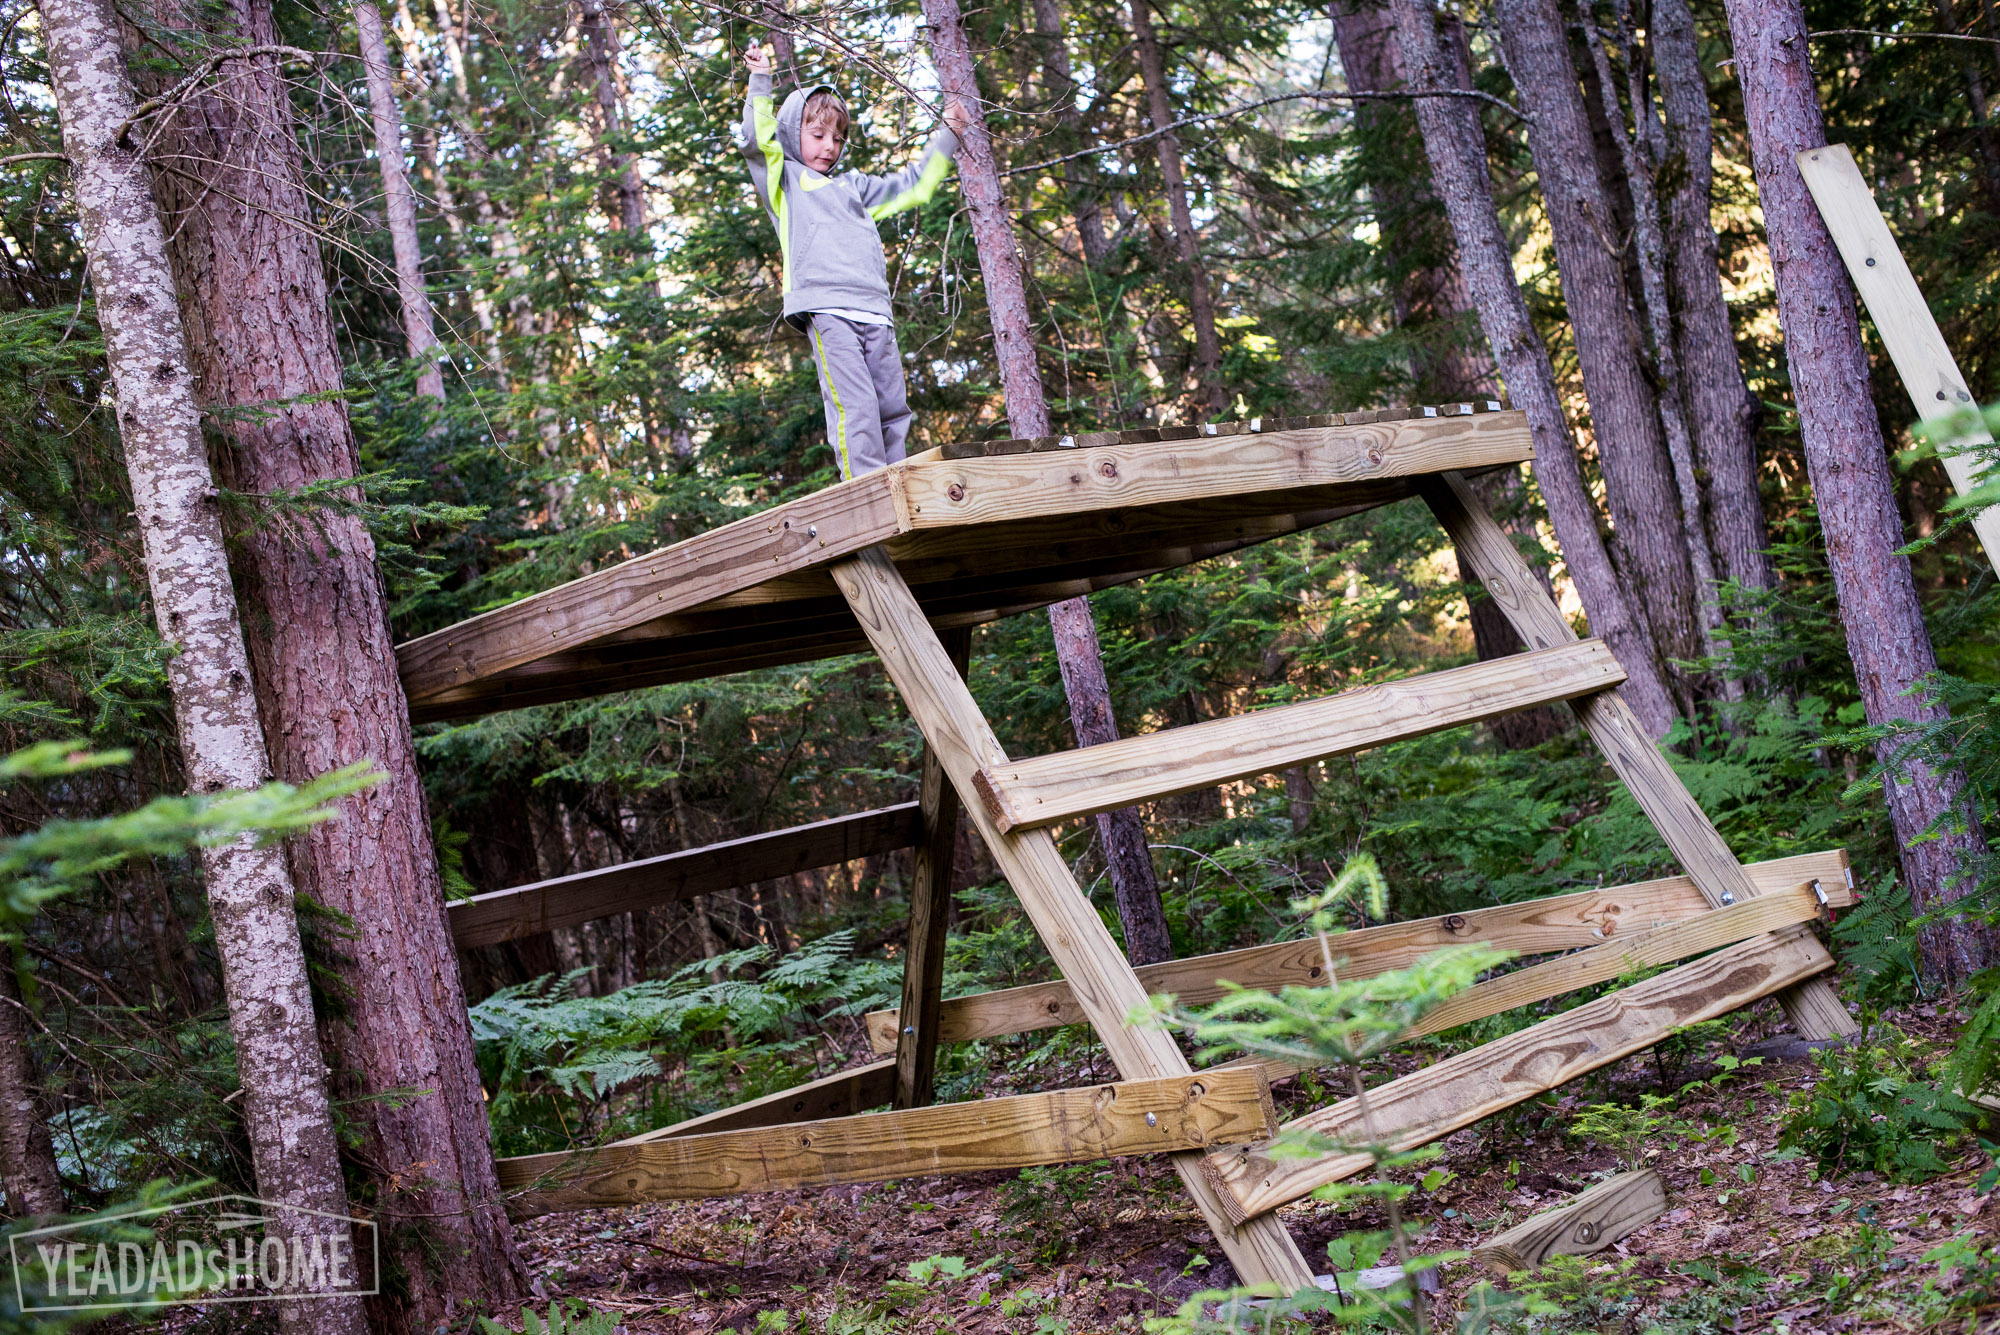
    Treehouse Platform in Place
    Treehouse Platform in Place


    Day 4

    Angling the side supports added stability. Then we added the railings. To keep things simple I cut the 4×4 pieces in half, so each was 48 inches. Then I attached them so that they sat 42 inches above the top of the 2×6 floor structure.
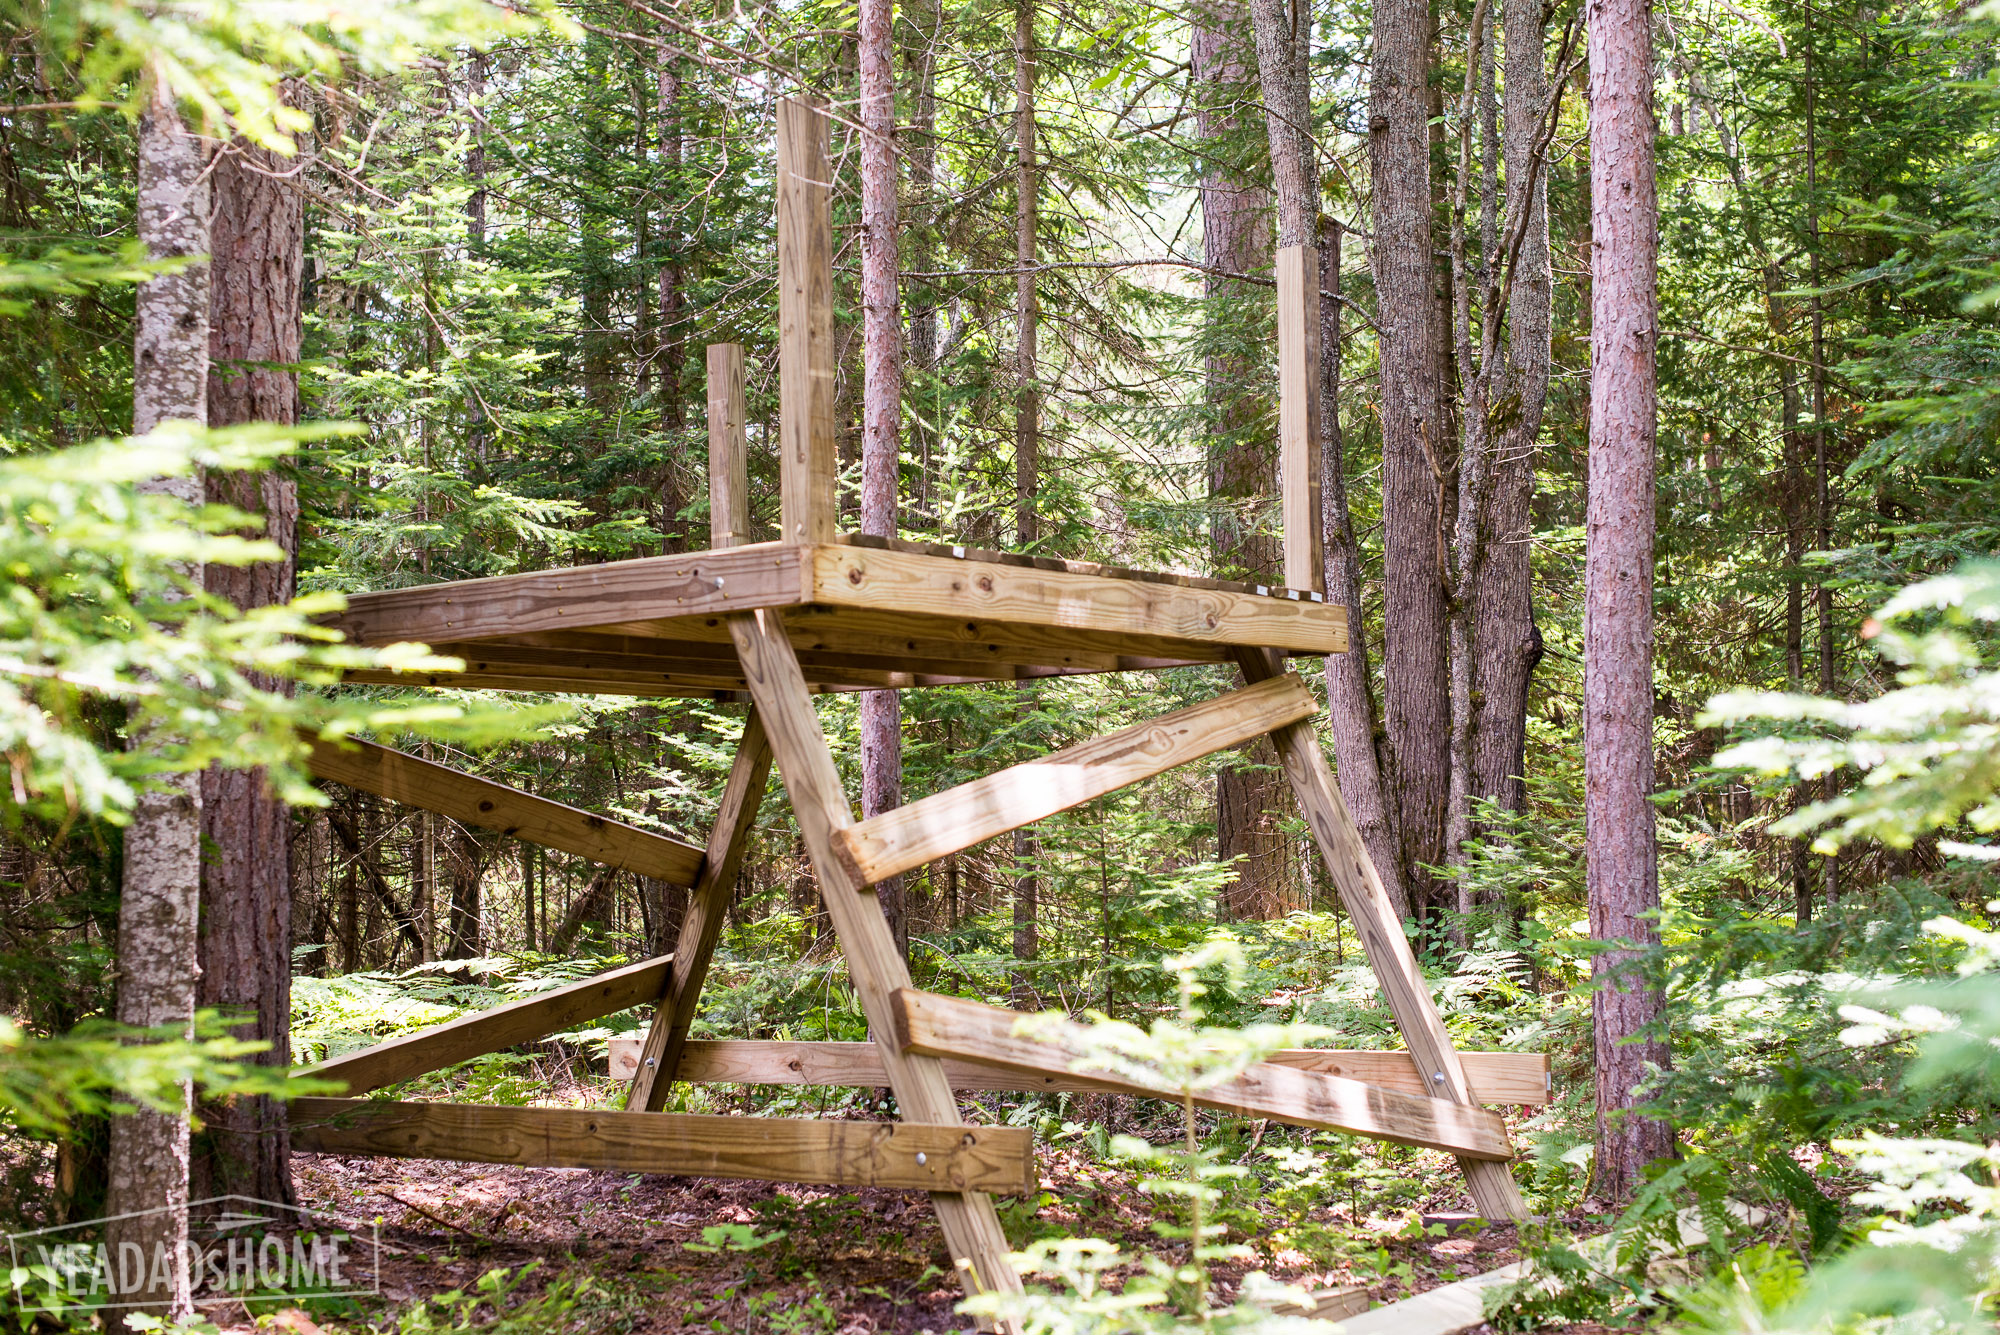
    Aligning the Side Supports
    Aligning the Side Supports


    For the inside railing pieces, I made notches so that they would fit together on at the corner posts.
    Treehouse Railing Notches
    Treehouse Railing Notches


    This is how the inside railings fit together.
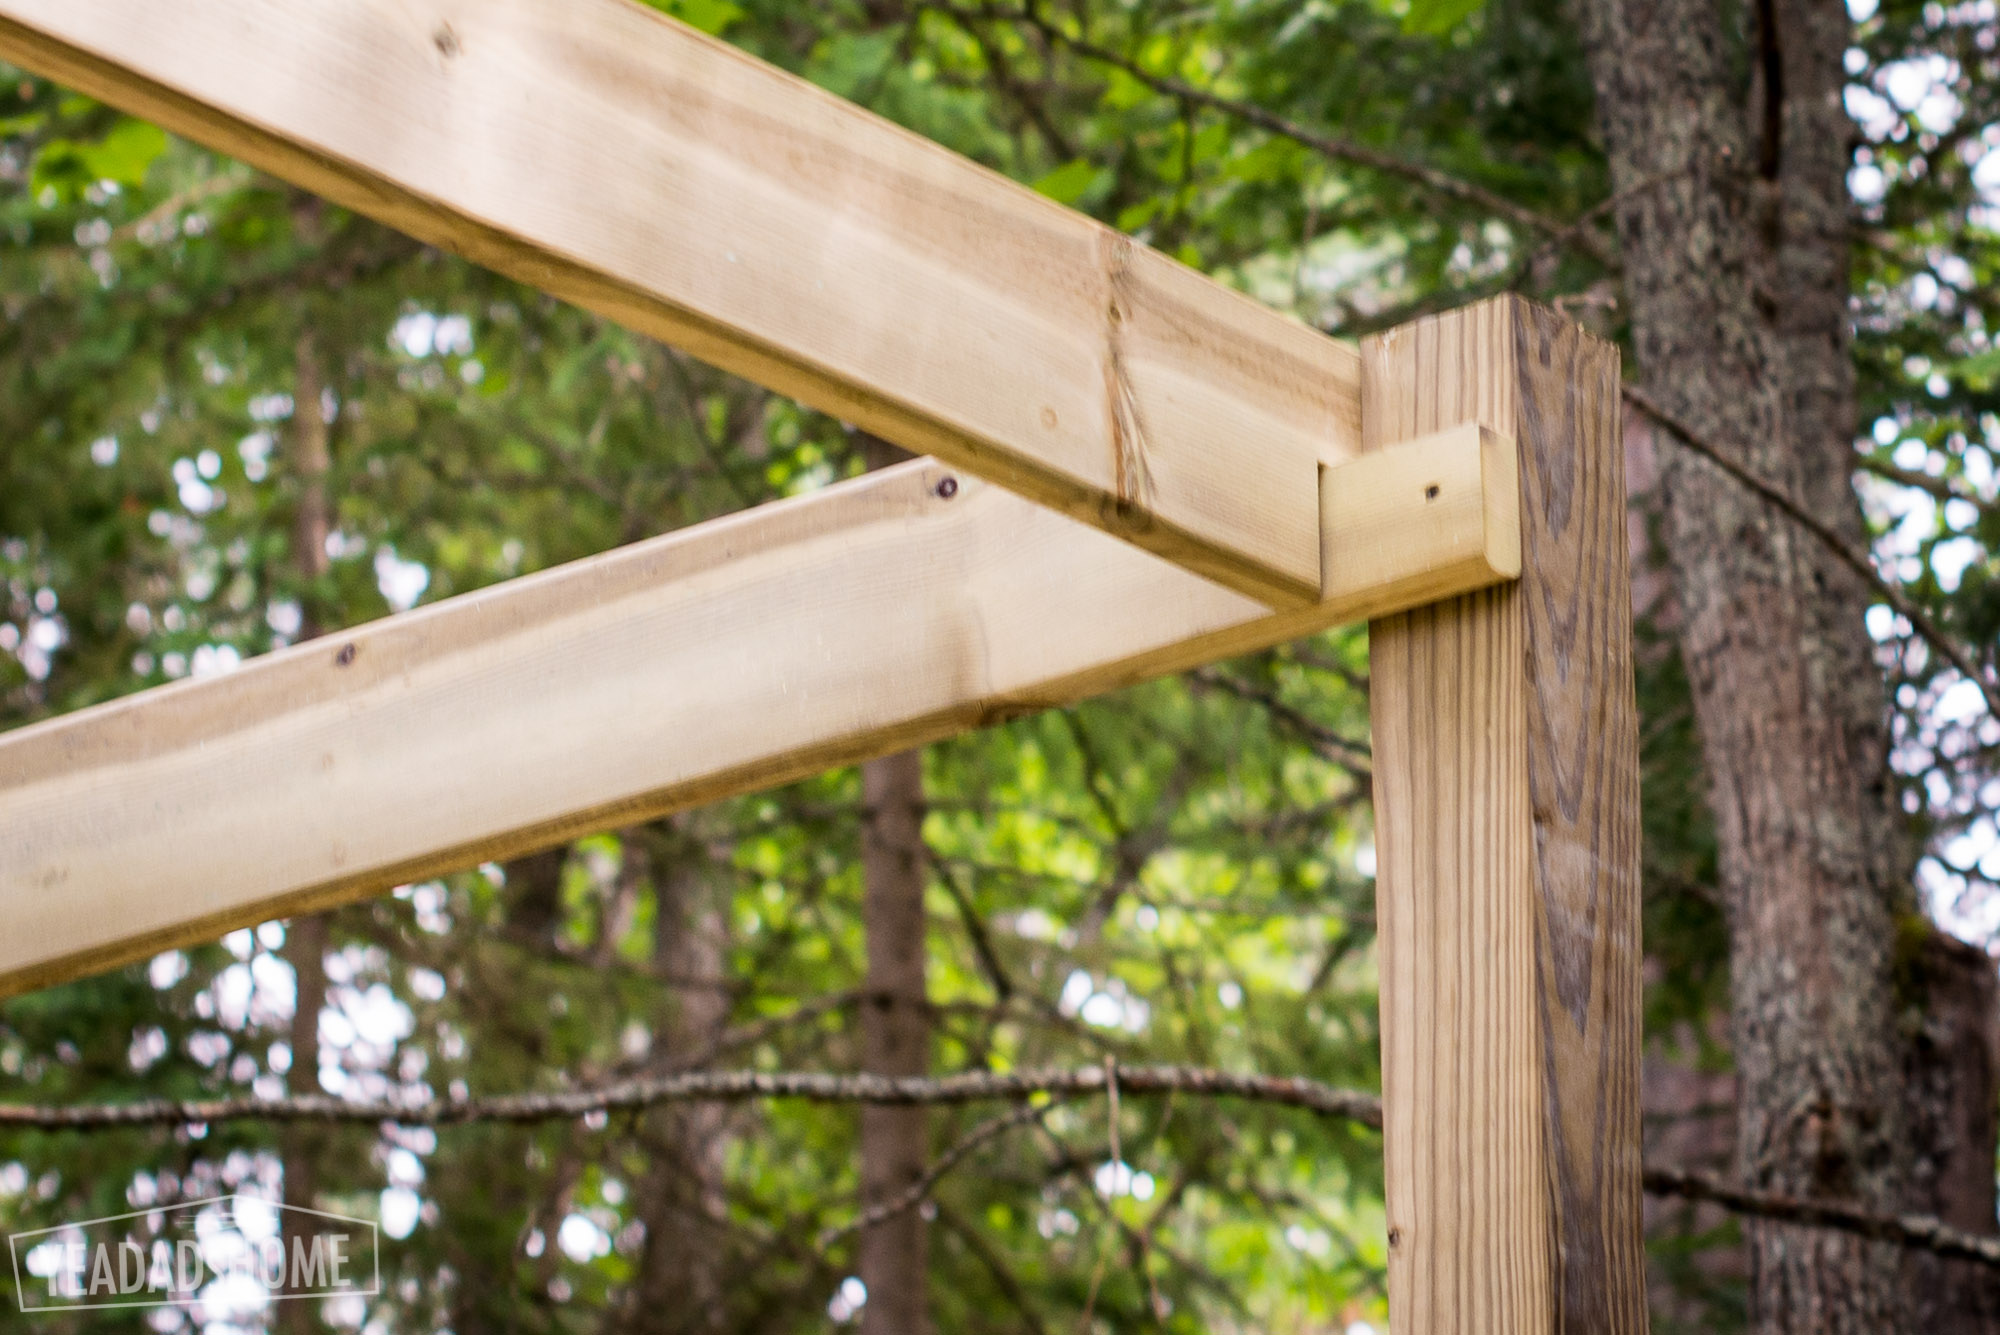
    Inside Railings for Treehouse
    Inside Railings for Treehouse


    Then we added the top railings. I measured the inside corner and added a half inch.
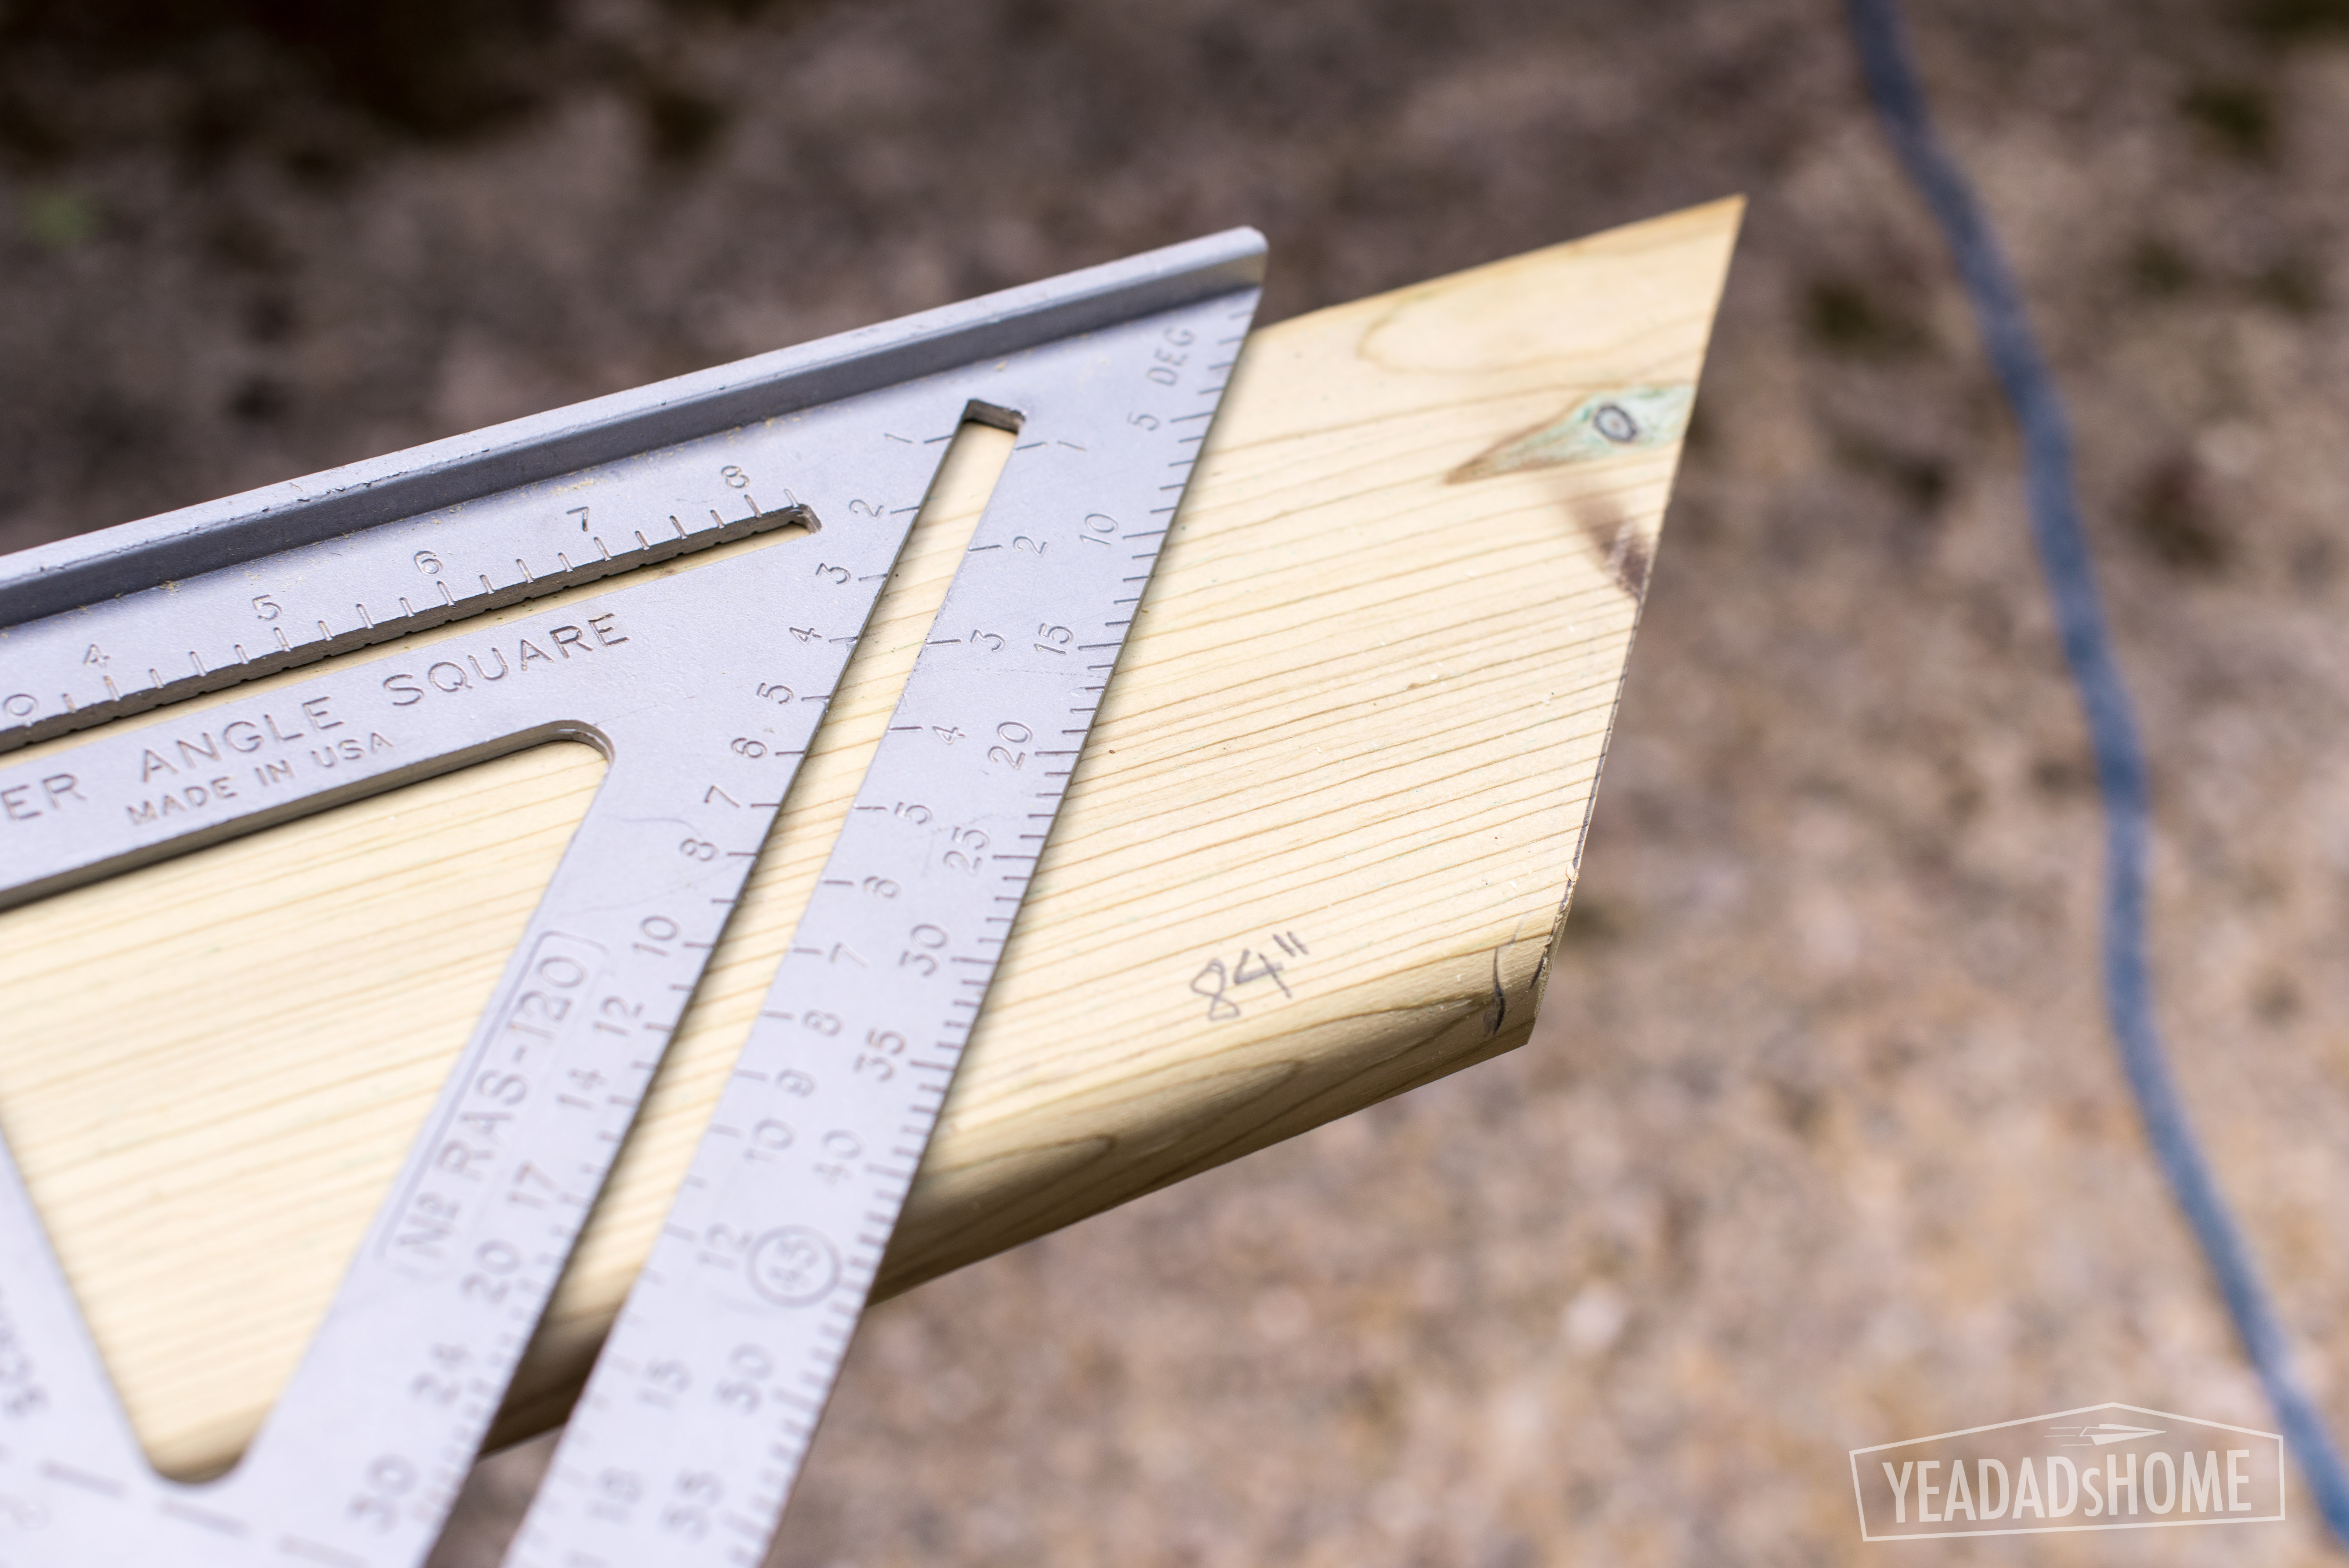
    Treehouse Top Railing
    Treehouse Top Railing


    We added a middle post to firm things up. Those 8 foot 4×4 posts were not cut. I just pushed them up to meet the railing. I screwed them into place and then added a few bolts.
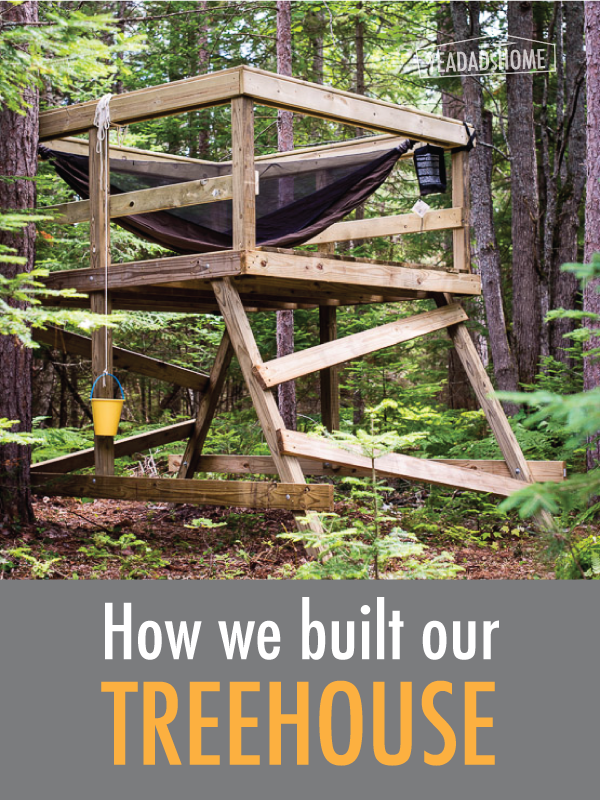
    how we built our simple treehouse
    Our Treehouse


    This is where we completed our simple treehouse build for this year. A bucket on a nylon cord was a handy way to deliver mail, or carry things up/down.

    Treehouse Extras

    We bought a Hennessy Hammock to hang in ours. It has a bug net and you get in/out through the bottom, so there isn’t any risk of someone rolling out. The Explorer Ultralite Asym Classic model was the one that looked best for us. It comes with a snake skin that makes packing it up really quick.


    We bought a tent that fits on the platform. This MSR model was the one we picked. It fits on the platform, and it is light enough that we could use it for backpacking.

    https://www.rei.com/product/865347/msr-elixir-3-tent
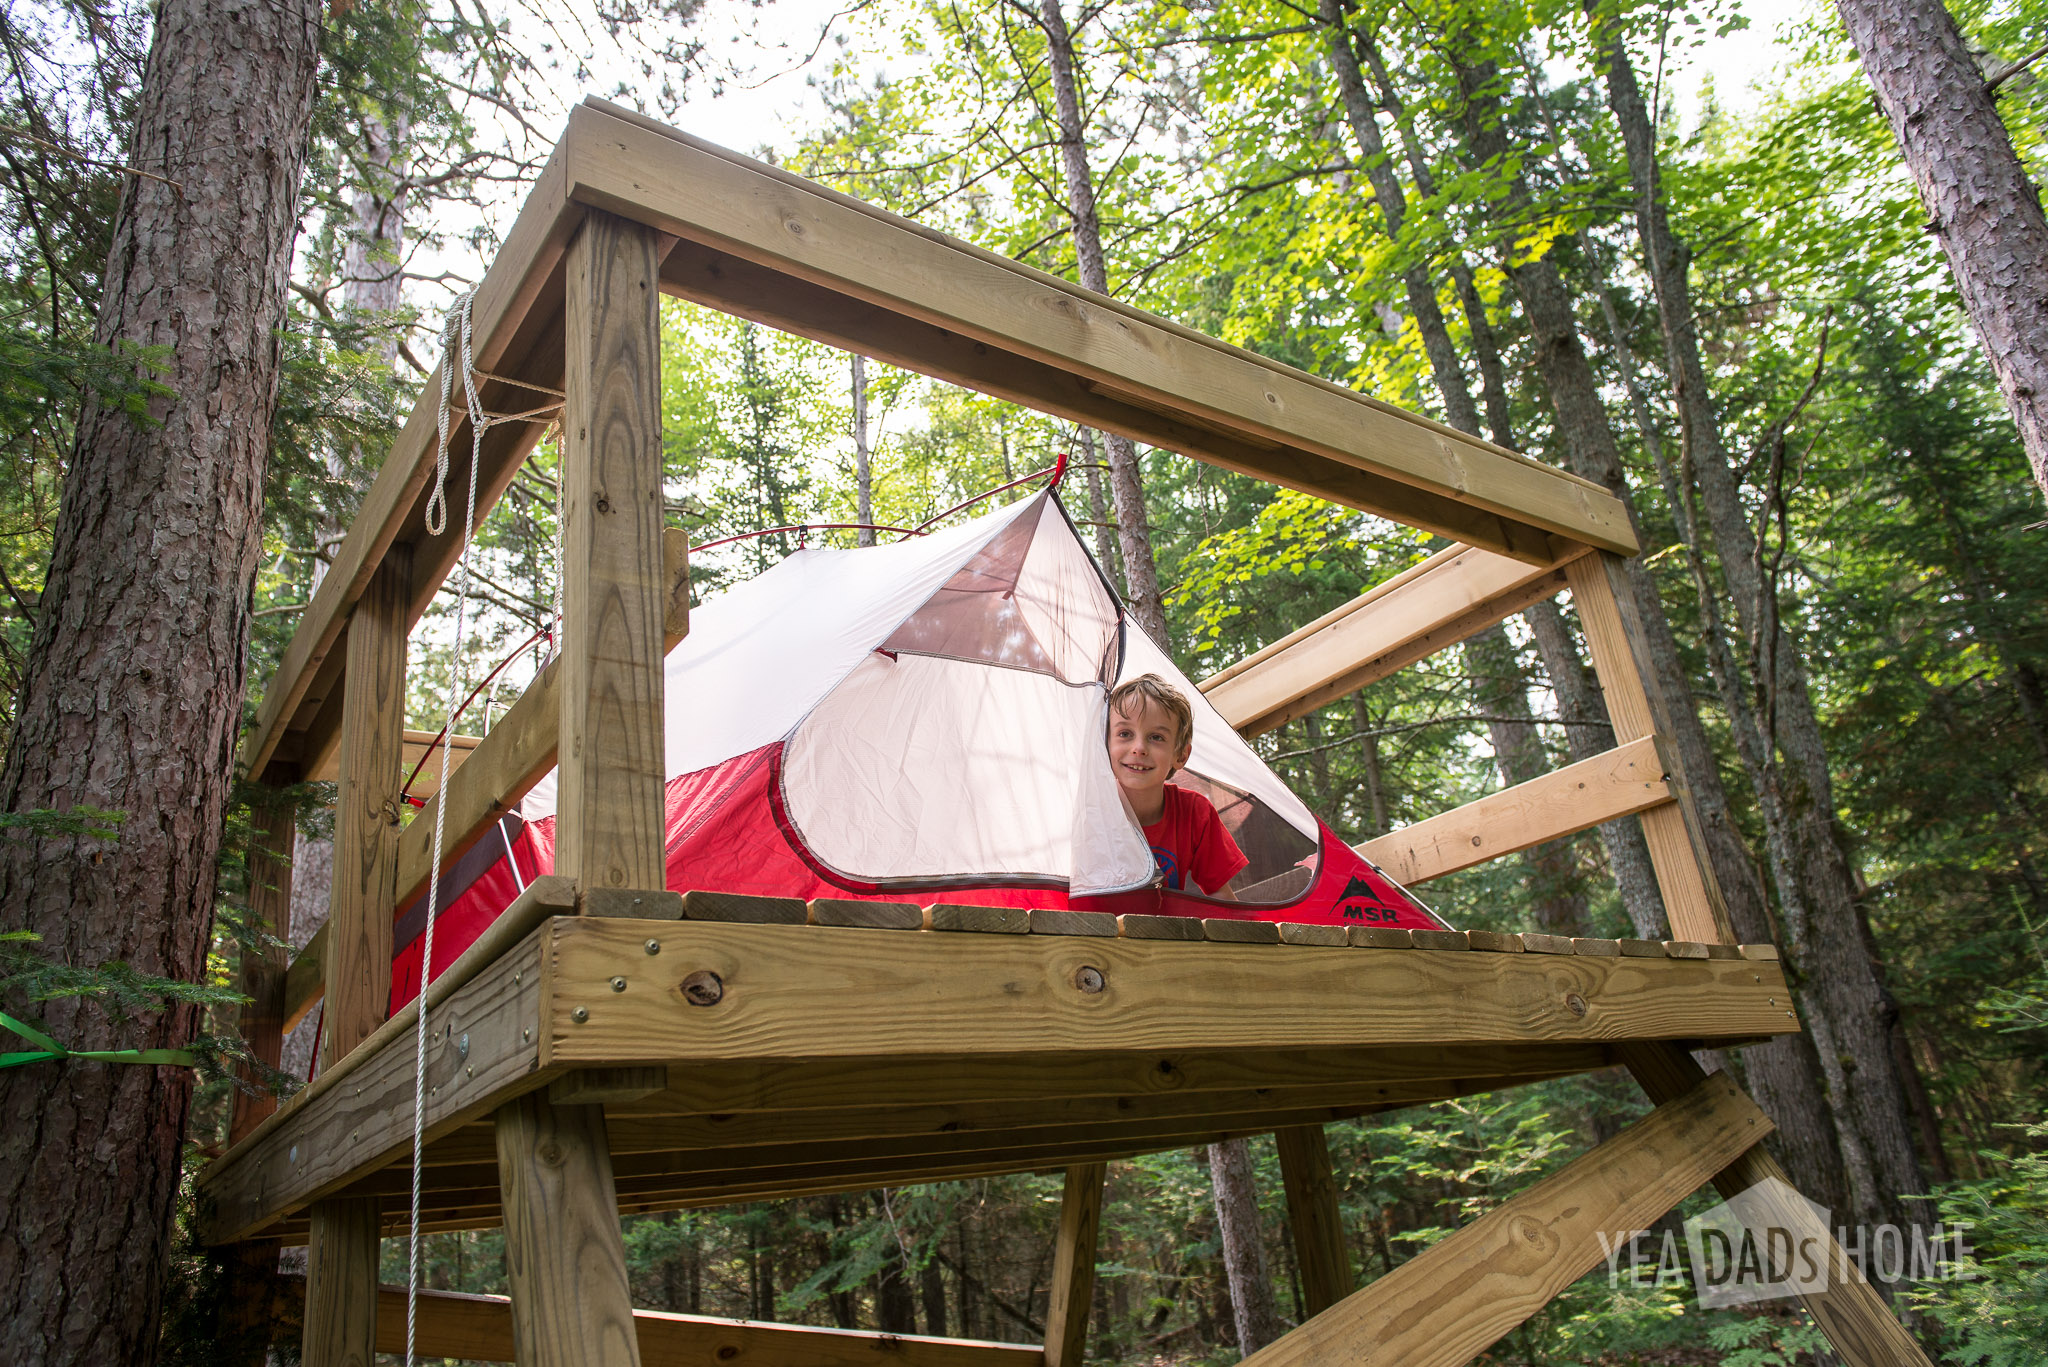
    Treehouse-0256-2


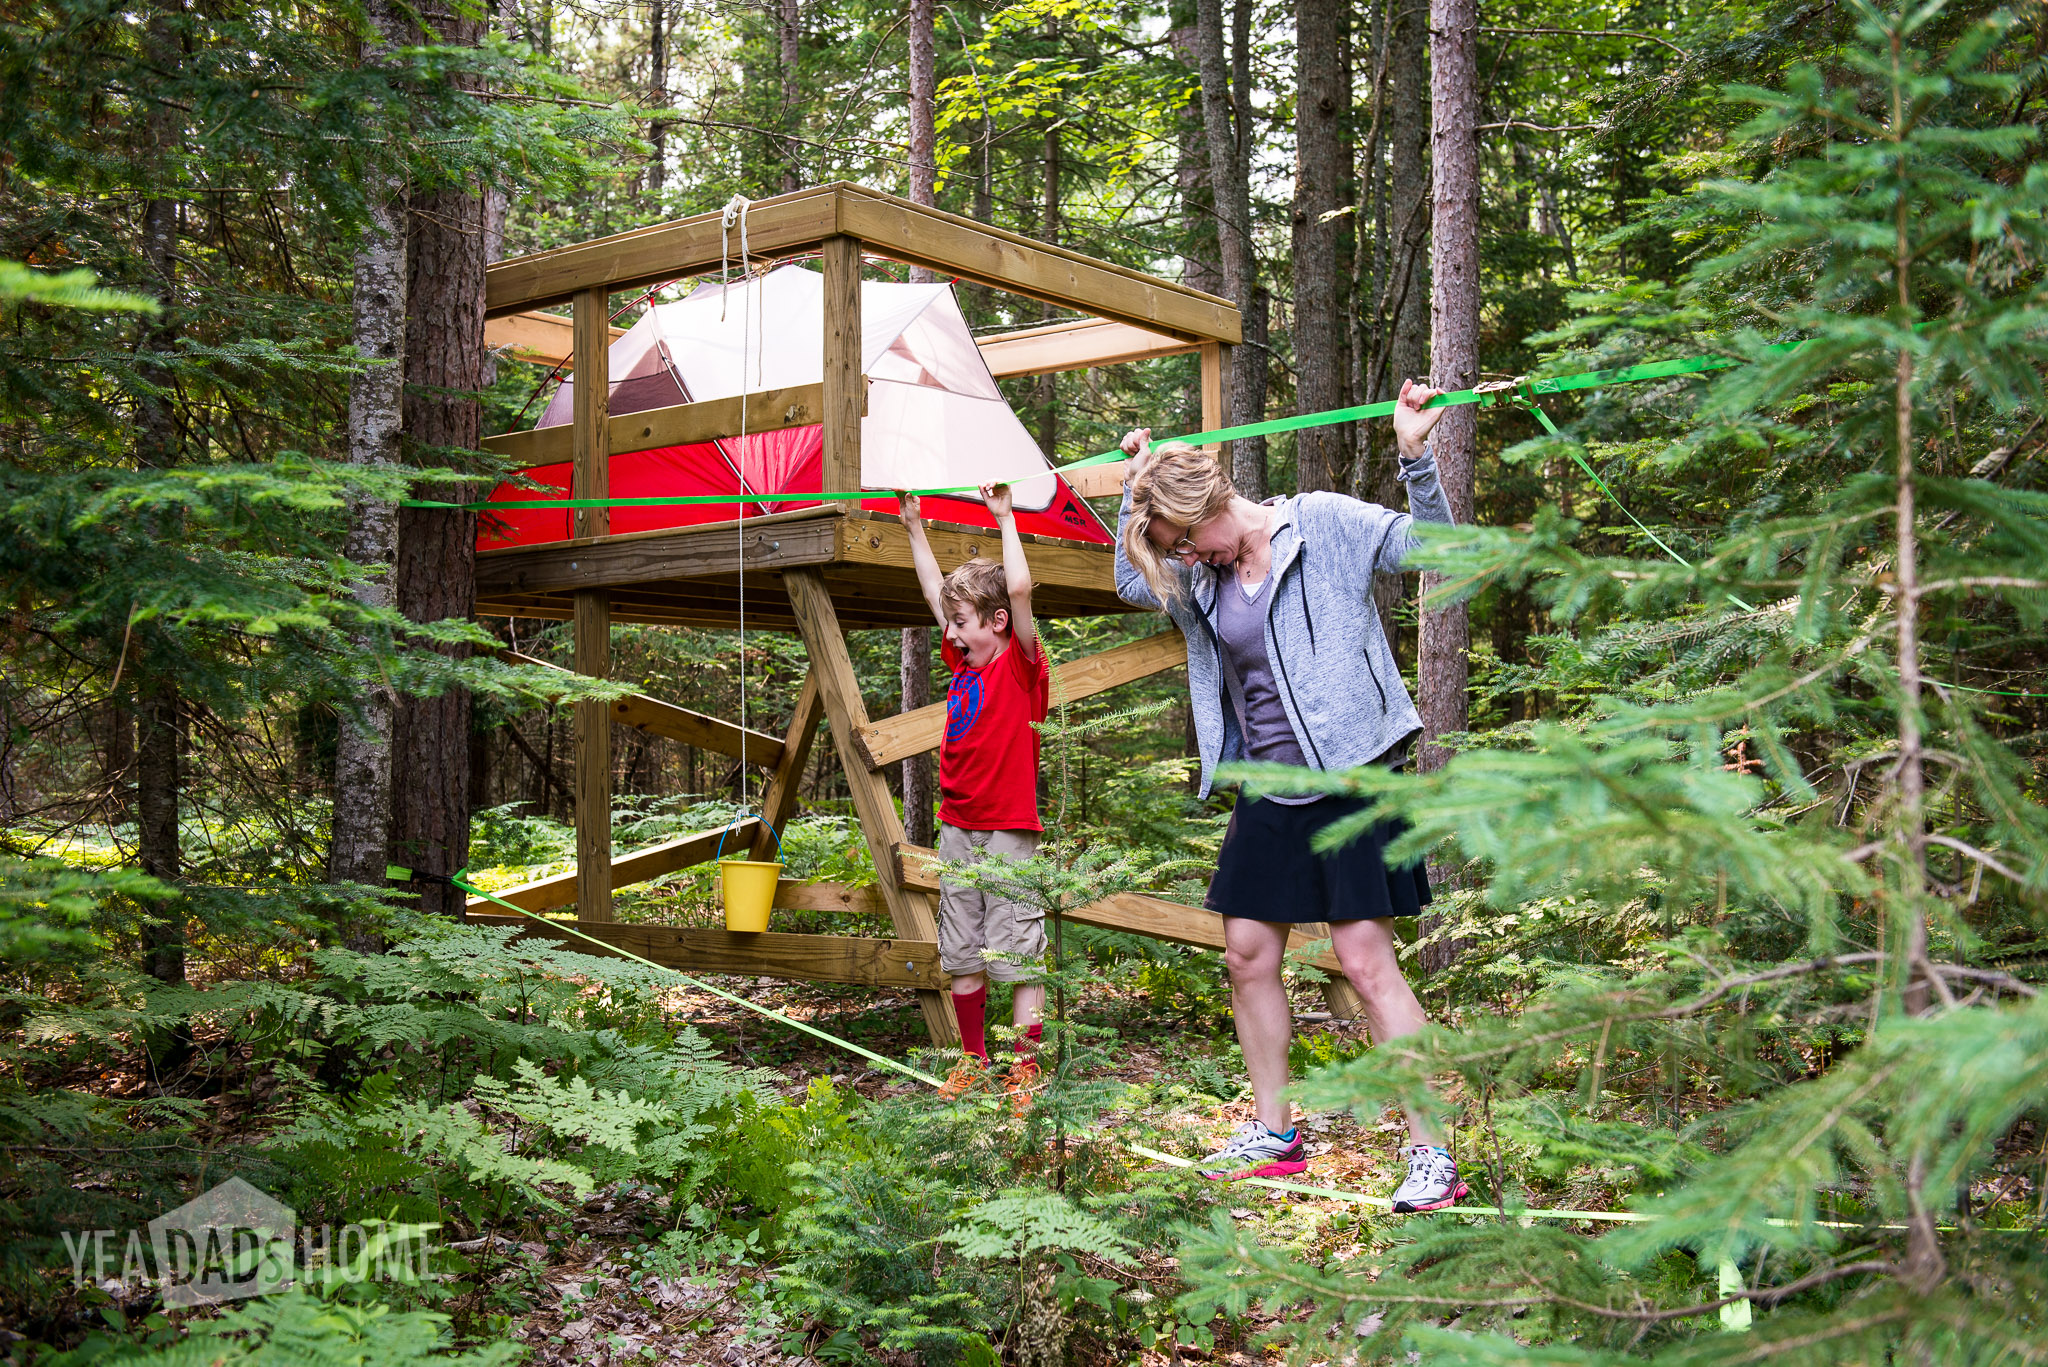
    We added a slackfline this year. We string this from two tree near the treehouse to practice our balance. I wouldn’t anchor to the treehouse directly since that could move it off of its blocks.

    http://slackersline.com/product/classic-green/
    Treehouse-0274

  • Flying Arc Paper Airplane

    Flying Arc Paper Airplane

    Paper airplanes are a hit in our house, and this the one that we had fun with over the weekend. This flying arc paper airplane is similar to a design I found in The Great International Paper Airplane Book that we got a long time ago at the Smithsonian in DC. We modified ours to include stabilizers. On a rainy day they can burn some energy climbing stairs as we launch them over and over. Of course you can take a break from the stairs and decorate them too. We like to make a several at a time.
    The best part about this paper airplane is that you can modify it as you play and it will change how it flies. If you tilt the tail stabilizers, it will turn differently. You can also change how much lift it has by changing how tight the arc is. If the arc is really tight, very curved, it will descend more quickly. If the arc is slight, almost straight, it will try to climb. The fun is trying to figure out how much arc will make it glide for the longest.

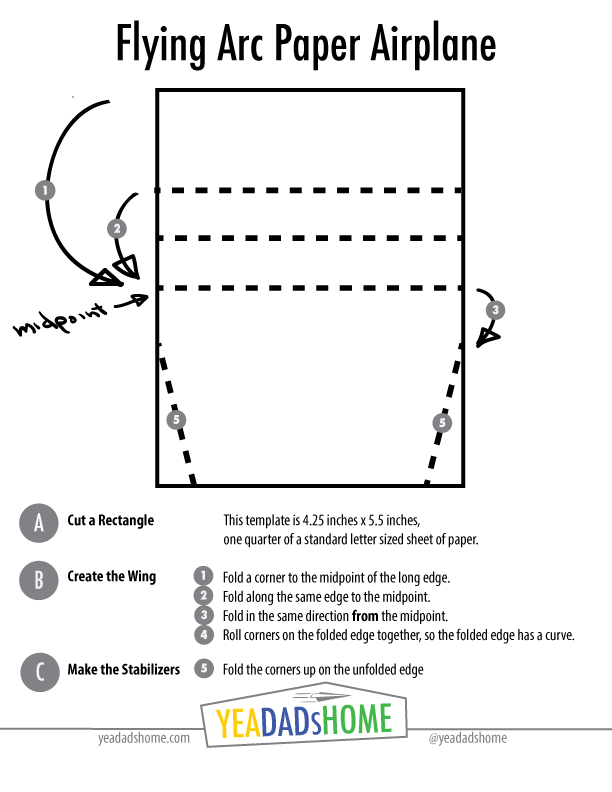
    This template shows the folds and steps. Once you get the hang of it, you can make four from a standard letter sized piece of paper. it works with a full size piece of paper too., although we have more fun when we have lots of flying arcs to launch.


    Tools and Materials

    • Paper
    • Scissors (optional)


    Instructions

    Cut a Rectangle

    • This template is 4.25 inches x 5.5 inches, the size of a quarter of a sheet of letter sized paper.


    Create the Wing

    • Fold a corner to the midpoint of the long edge.
    • Fold along the same edge to the midpoint.
    • Fold the thick edge in the same direction from the midpoint.
    • Roll corners on the folded edge together, so the folded edge has a curve.


    Make the Stabilizers

    • Fold the corders up at the unfolded edge. These are about 0.5 inches tall.


    Flying the Arc

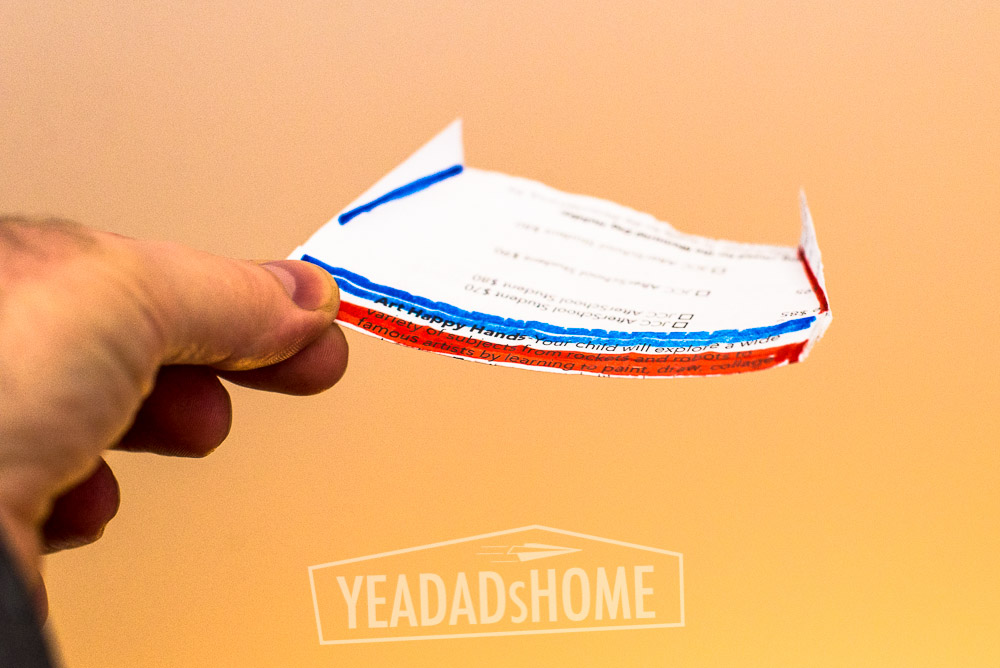
    • The front of the plane is the folded edge. To launch this plane, you hold it in the middle of the back edge. Thumb and forefinger works well. Let the front drop a bit lower than the back. Then let go.
    • If the plane drops too fast, try straightening out the arc.
    • If the plane climbs and stalls, then climbs and stalls, try bending the arc a bit more.
    • You can also play with the stabilizer fins to make it turn at different angles or go straight.


    Flying Arc Paper Airplane Template

    This is just a guide with proportions that work well. You could make 4 of these from a standard sheet of paper. Click the graphic below for PDF of this template to print.


    Flying-Arc Paper Airplane--YeaDadsHome

    Pictures

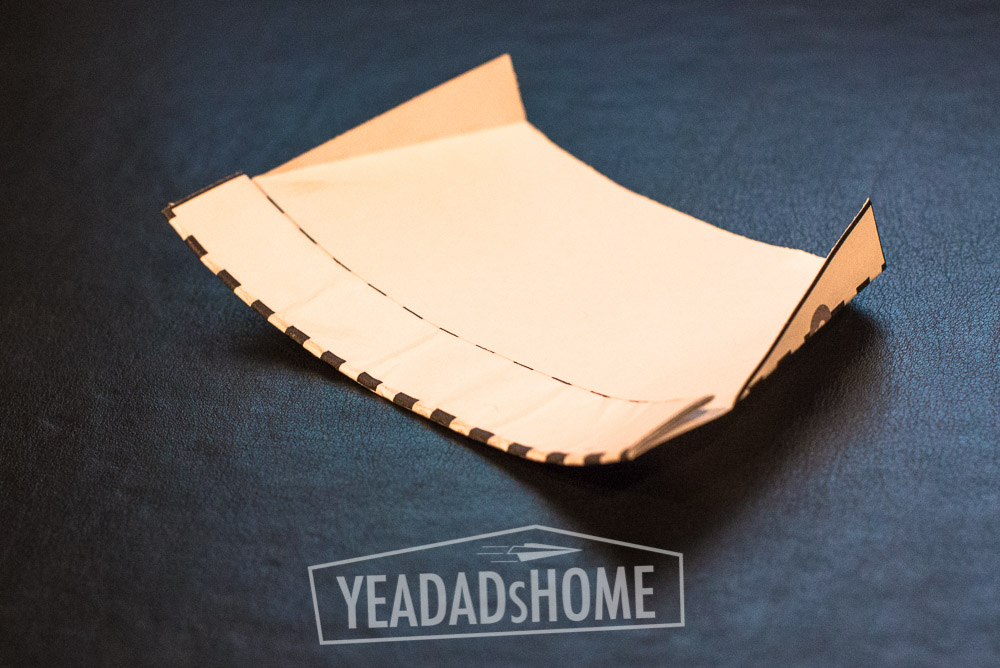
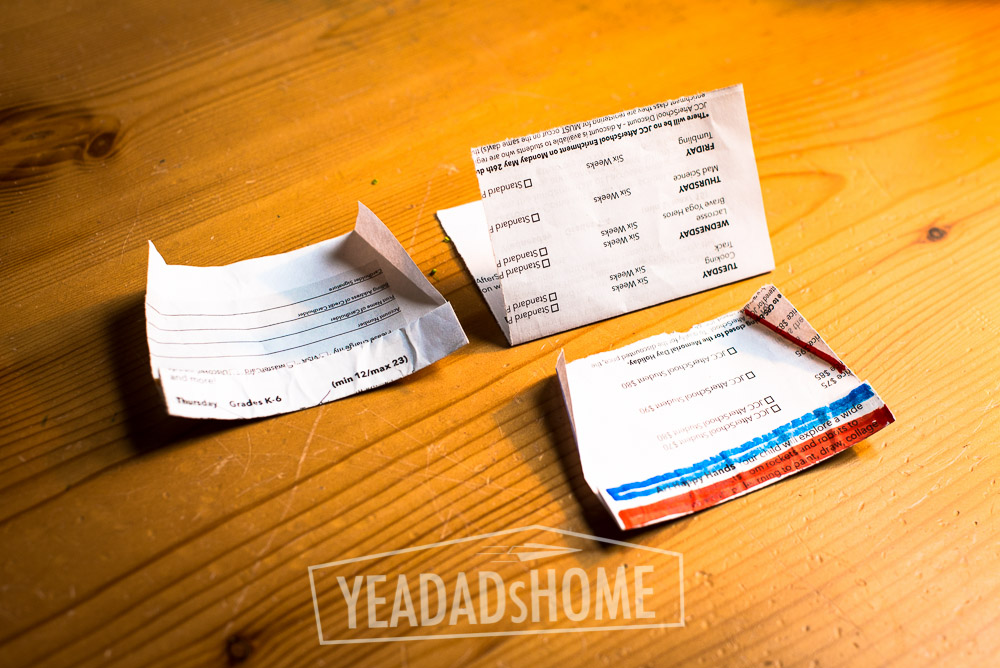
    This is how it looks fully assembled. We used scrap paper for this one. Usually that is pretty easy to find in our house. As you can tell, we also didn’t use scissors, we just creased the paper and tore it into the rectangle we needed.


    Flying Arc Paper Airplane - YeaDadsHome-9821


    Flying Arc Paper Airplane - YeaDadsHome-9851


    Flying Arc Paper Airplane - YeaDadsHome-9840


    This is a version made from the template. I started with the printed side down so I could see the dashed lines in the template as I folded.

    Flying Arc Paper Airplane

  • 3 Mistakes to Avoid When Molding Crayons into New Shapes

    3 Mistakes to Avoid When Molding Crayons into New Shapes

    Over the past few years we have collected a bunch of crayons. When we eat out we usually come home with three or four. So after a few years, our crayon collection was getting to the point where we were going to either find a bigger container or find a good use for them.


    The Crayon Collection

    extra crayon bin  |  yeadadshome.com

    Last week we got a great idea from a friend. We could melt them into fun new shapes. She even had a mold shaped like large lego bricks like this Lego Ice Bricks Tray. The lego shapes in the mold are about one inch by almost 2 inches. There are a lot of silicone molds out there, but we liked the lego shape. Following are the steps we followed along with 3 mistakes to avoid when molding crayons into new shapes.
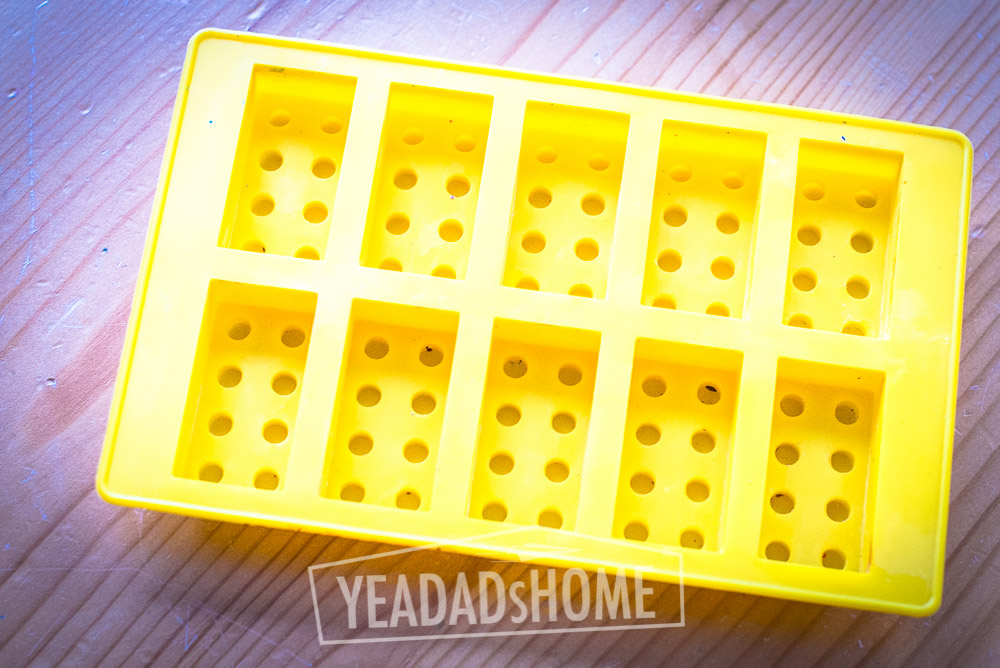
     

    Silicone Lego Mold

    lego crayon mold  |  yeadadshome.com


    Steps for molding crayons into new shapes:

    1. Collect a bunch of crayons to use. We used about 40 crayons per batch.
    2. Find a silicon mold or two with fun shapes.
    3. Cut and pull the paper off.
    4. Snap the crayons into pieces.
    5. Put the filled mold on a baking sheet, and fill the molds with crayon bits.
    6. Heat the oven to 275F (we used 250 on convection).
    7. Melt the crayons for 15 minutes.
    8. Cool for an hour and then 15 minutes in the freezer.
    9. Pull the mold away from the sides of the newly molded crayons, and then push them out.


    Mistake 1 – Hastily Cutting Paper Will Cost You

    Adults need to do the crayon wrapper cutting. This is the most dangerous step. I am all for letting kids learn how to responsibly use a knife, but the paper on crayons is tricky to cut. Set up a cutting board and make sure your kid audience is on the side you are cutting from. For a right-hander like me that is on my left as I cut to the right. As we were making ours, I wanted my son to see. He set up on the right, and his enthusiasm pulled him a bit close and he bumped me. I only got nicked. I can see how a rolling crayon or a bump could turn this project into a lot more drama than necessary.

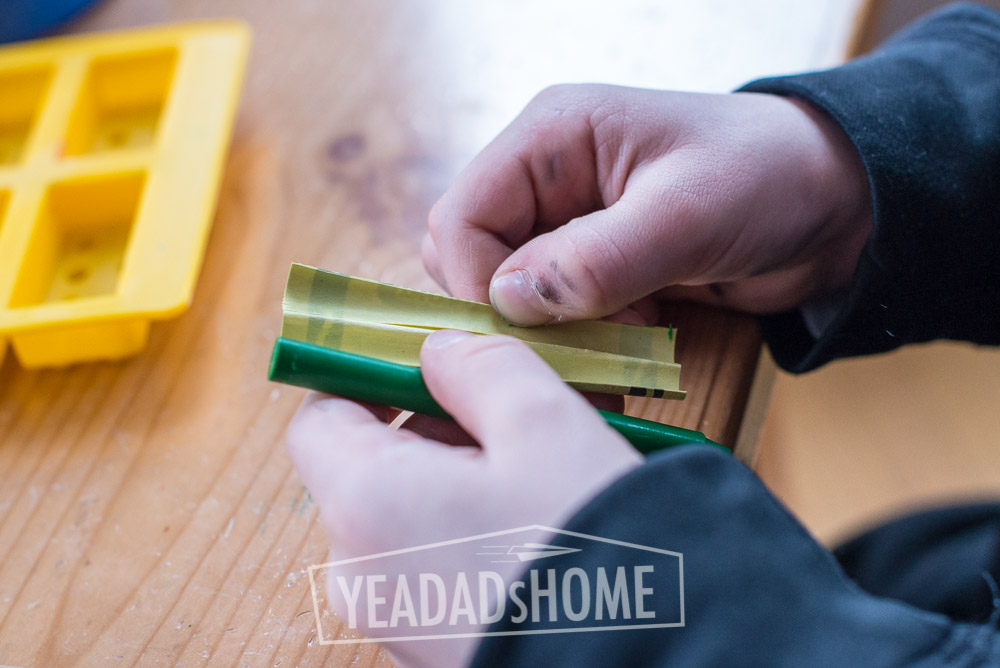
    The crayon paper does need to get cut all the way through. When we cut lightly it took way longer to pull the paper away. In our second batch, I cut deeper into the crayon, and the paper came away more quickly. I liked the quick paper removal. The project moved more quickly, and my son did all the paper removal. When I lightly cut the paper, he passed them back to me.


    This is How Crayon Paper Looks When Cut Through

    making crayon molds  |  yeadadshome.com


    Mistake 2 – Smashing the Pieces Isn’t Necessary

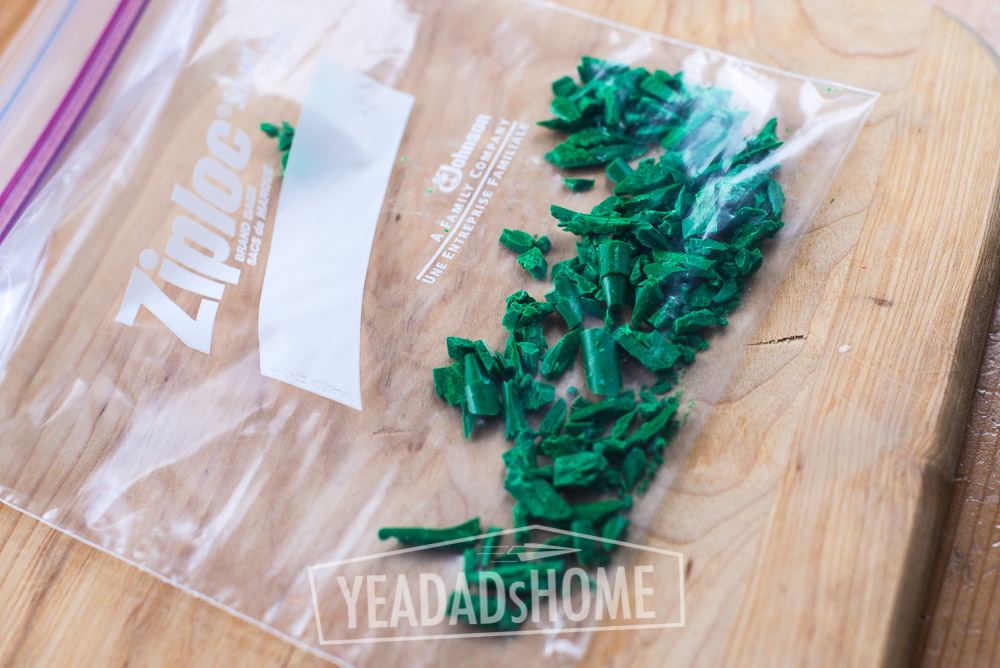
    In our first first attempt we got a bit carried away and smashed the crayons. A ziplock bag and a hammer did the trick. Pounding is fun. We enjoyed the method, but it wasn’t needed. Also smashing them in a ziplock makes really small flecks that are hard to control. We made a combination of solid color molds and used the extra pieces for multi-color molds. The flecks cause problems for both types. For the solid ones the flecks get stuck in the wrong molds and are really difficult to get out. In the multi-color ones the flecks just melt and the combination becomes one dominant color. In our case purple overwhelmed the other colors. Smashing the crayons into flecks works for other kinds of art projects, but it is much easier to snap them.


    Smashed Pieces

    smashing crayon pieces  |  yeadadshome.com

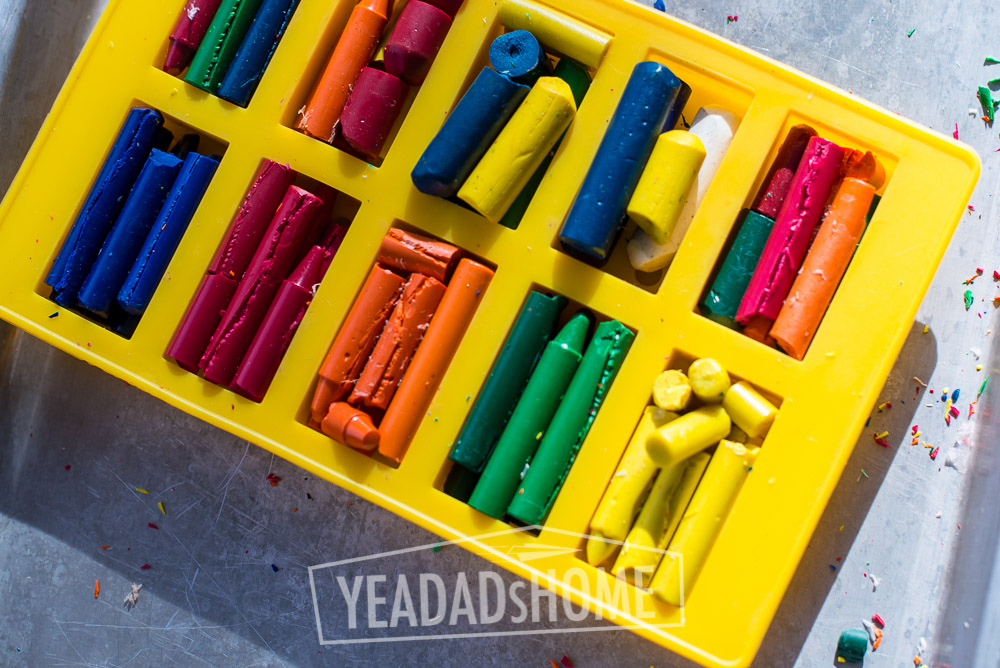
    For our molds, snapping the crayons into thirds was all that was necessary, and my son could do most of that. It isn’t as much fun as pounding them with a hammer, but it makes better molds. Just try to make the pieces a similar size if you can. The big chunky toddler crayons caused their own issues. They took longer to melt than the normal sized ones, and that can lead to the next issue.


    Snapped Pieces Work Better

    crayons snapped into chunks  |  yeadadshome.com


    Mistake 3 – Over Cooking Multiple Colors Makes One Color

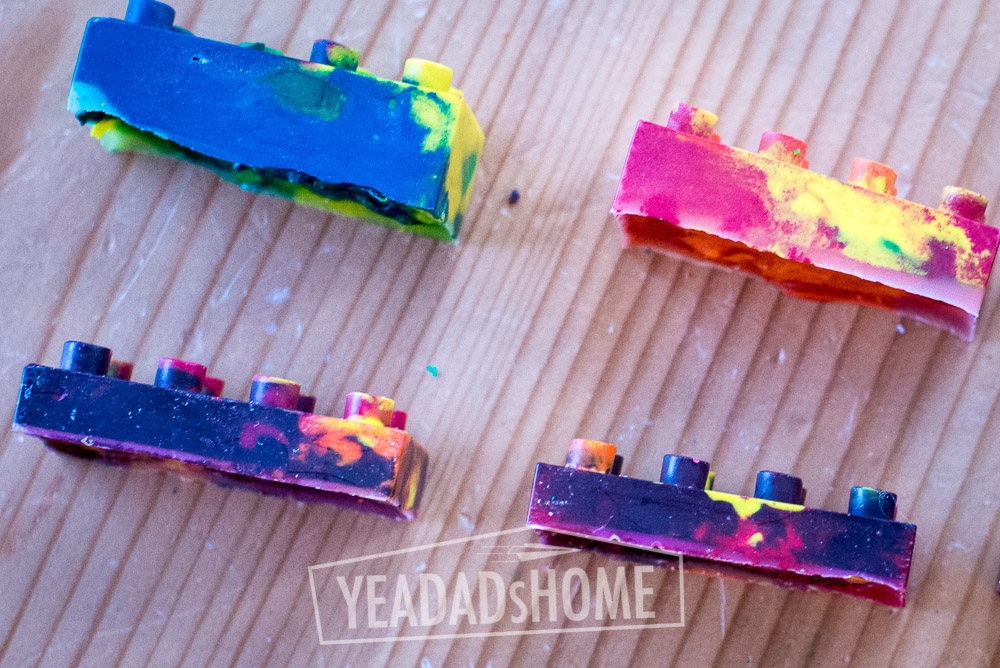
    On our first attempt we left the molds in the oven for 18 minutes. We had small pieces, and they were melted in about 15 minutes, but we wanted our molds to be really filled. Once the crayon flecks melted down there was a lot of extra space in our solid color molds, so we added chunks to fill them up. Anyway it took a few more minutes. By that time our multi-colored mold with purple flecks turned dark purple.

    In our second attempt we snapped the crayons by hand into chunks rather than using smashed pieces, and these bigger chunks melted in 15 minutes. I did use a wooden skewer to poke a few bubbles as I took them out of the oven. That combination of time (15 minutes), temperature (275F), and size of chunks made the marbling of colors we wanted in the multi-color molds.


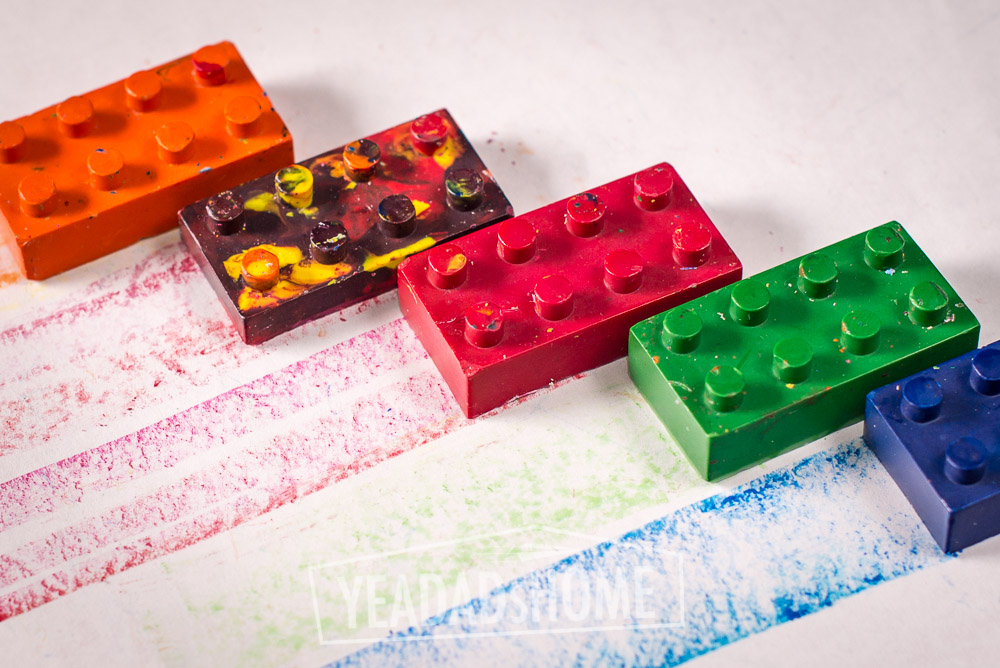
    Colors in Over Cooked Molds (Bottom) Were Overwhelmed by the Purple

    crayon molds  |  yeadadshome.com


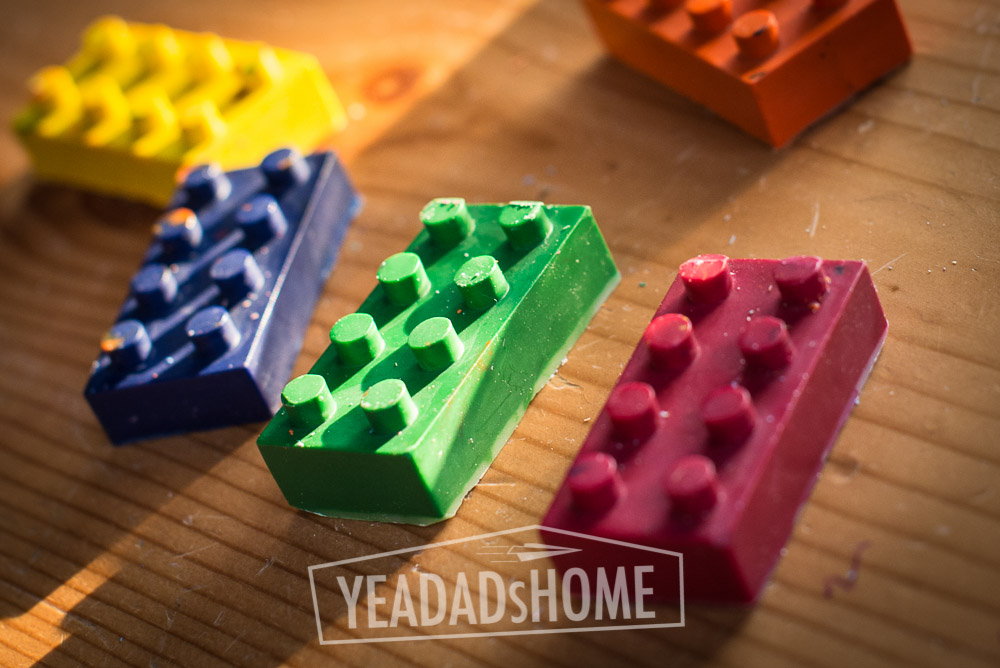
    The project was a lot of fun, and our pile of old crayons is a bit smaller. In total made 20 lego shaped crayons over the weekend. We might pull this out next time we plan a birthday party. They would make fun party favors.

    finished crayon molds  |  yeadadshome

    crayons molds | yeadadshome.com