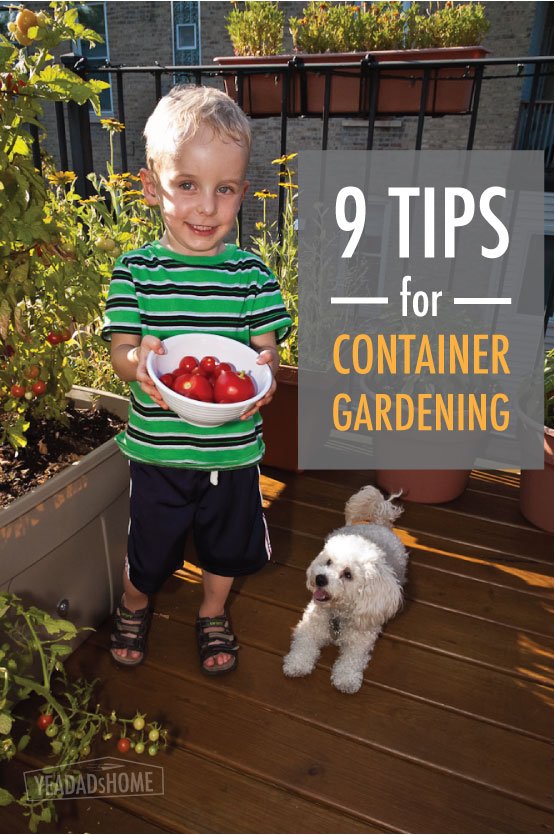
We have been growing a garden at our place in Chicago for several years. We don’t have a large yard. We do have some outdoor space that gets good sun, and we have found that container gardening works well for us. Over time we have adjusted a few things as we have learned what works and doesn’t work for us. Following are 9 tips for container gardening. FYI. We were not paid for any of this. We just wanted to document what we have learned.
Where to plant a container garden?
We checked around our house on a weekend to see when direct sun would hit in the morning and then when it got shady at the end of the day. It turns out that is was a spot on our deck that worked. About 8 hours per day is what most references recommend, and we were lucky to have a spot that got good sun. Bonus…it didn’t interfere with the space that we use for outdoor games, and that meant it wouldn’t get trampled. In all, we use a 6×8 ft space for the garden.
This site has some ideas on what growing tomatoes requires.
http://www.gardeningknowhow.com/edible/vegetables/tomato/how-much-sun-do-tomato-plants-need.htm
Tip 1 – Find a spot that gets 8 hours of daily sun

What to plant in a container garden?
Deciding what to put in garden focuses on two things. Obviously we we wanted things that we like to eat, but we also had to figure out what would grow in limited space. It was also important to find things that either better than we could get at our local grocery or that were a lot less expensive. For us the winners were herbs, tomatoes, and a few other vegetables.
Tip 2 – Herbs give you the biggest bang for the buck
We use all sorts of herbs in our cooking, and the are great to add variety to salads. Often we only need a bit for a recipe. Other times herbs come in handy when we have ingredients but haven’t decided how to use them yet. The options for how to cook the carrots or potatoes today are more interesting if you have fresh herbs. A pack costs us somewhere between $3-7 each time we buy one, so herbs of all sorts are at the top of our list. We plant lots of basil and mint. Our herb garden also includes chives, dill, rosemary, and tarragon.
Tip 3 – If you can only choose one type of tomato pick small ones. They grow quickly and produce for several weeks.
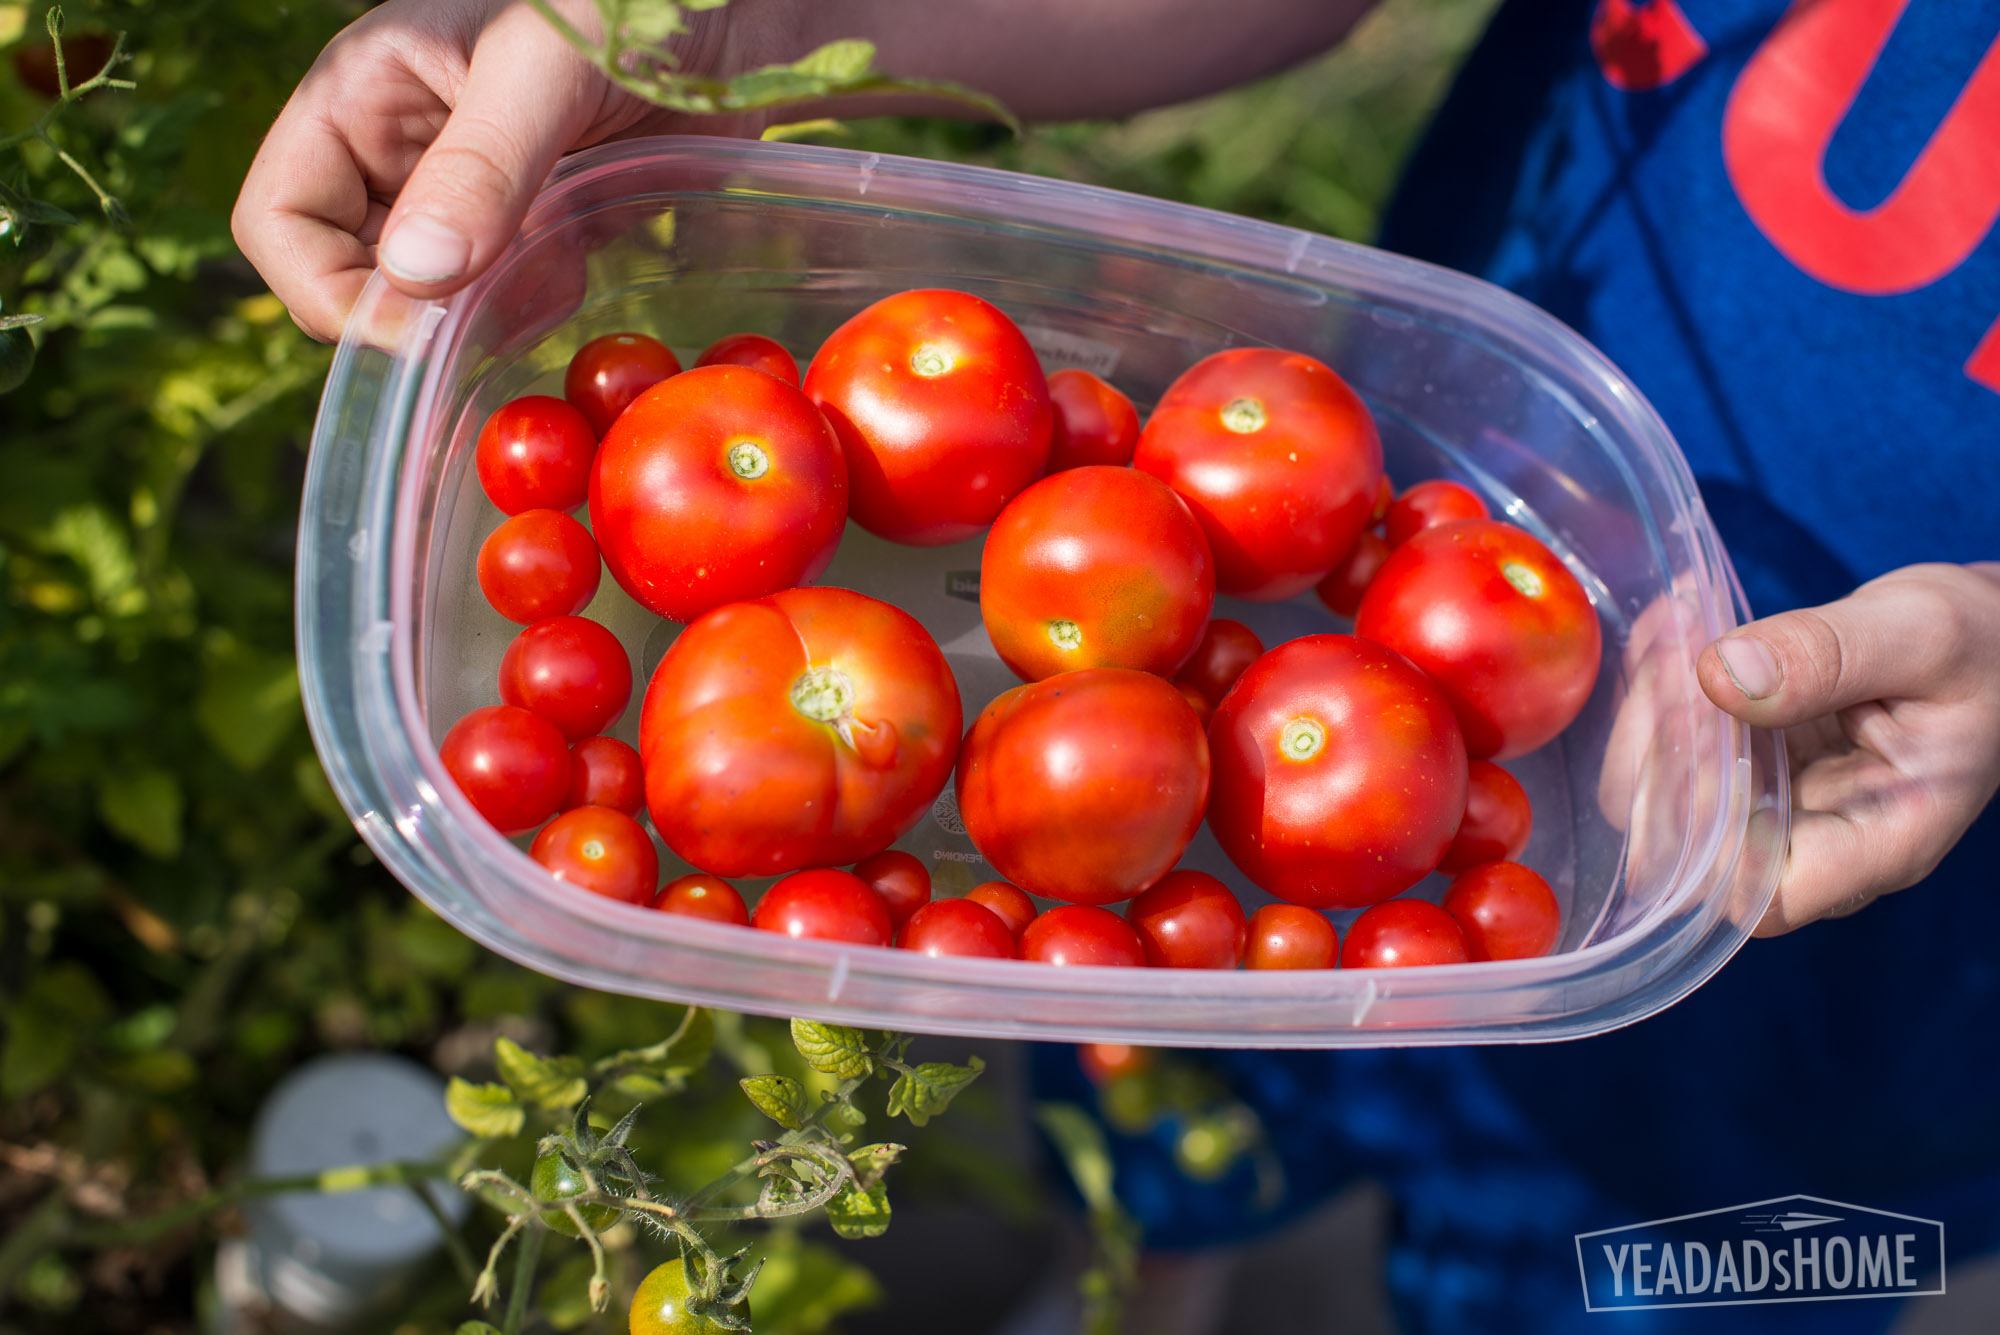
We love tomatoes, but good ones are not always easy to find in the store. They can be pricy too. For our garden we plant four types of tomatoes. The grape and cherry ones produce the most and seem to work through the hot and cold variations in temperature. For larger varieties we have had the best luck with the early producing kind like early girl. After that the heat resistant type works best for us. July is pretty hot here, and it slows the big tomato plants down. When we have planted large tomatoes that take 80-90 days to mature, they are just making fruit as Fall starts. Some didn’t really mature before we got cold Fall weather.
Here are our tomato picks for this year:
Bloody Butcher are early yield. They mature in 55 days and are indeterminate, meaning they produce fruit over a several weeks vs all at one time. Their fruit is about 2” in size.
Red Currants are grape tomatoes that mature in 60 days and are indeterminate.
Super Sweet 100 are heat tolerant cherry tomatoes. They mature in 70 days, and are indeterminate.
Matina are bigger, and should be about 3” when mature. They take 75 days to produce the first fruit, and are indeterminate after that.
Lettuce and arugula are kind of like herbs in that sometimes we need a bit for a recipe or for topping hamburgers. They both grow super fast too. We can get a good crop in a few weeks, and as that gets old and tough, we re–plant through the summer. Here are the varieties that we are planting this year:
Loose Leaf Lettuce works best in our garden. This pack of seeds has some variety of colors and textures. We just trim off the tops.
Arugula is great for salads and for hamburgers.
Peas and Beans are next on our list. They grow quickly and are fun to eat off the plant. After people graze around the plants, we usually don’t have enough for a side dish. Last year a local squirrel liked them more than we did. If we can figure out how to keep squirrels from eating them, we may have to figure out a way to plant more.
Tip 4 – Skip carrots and peppers
Carrots take up a bunch of space, and when we tried them they didn’t produce what we expected. Our carrots had really pretty tops, so they looked promising. Then we pulled them up to find that they were stubby, only about an inch long, and looked like a crazy fork. It seems they like sandy soil which is a lot different from what we use for everything else. We prefer to keep one type of soil and rotate plants around to different pots year over year.
It could be that we picked a bad type of peppers for our climate, but peppers didn’t work for us. They took too long to grow. When we finally got something, they were really small. It could be that the summer heat kept our plants from producing decent peppers. We may try these again sometime with a heat resistant variety, but they will have to beat out the things that we know will work for us.
How to start?
In previous years we would just buy seedlings from a friend who grows tomato seedlings or from a local nursery. The cost per plant was pretty high though. It seemed like it cost as much for a plant as it did for a pack of herbs at the grocery. Still it got the job done.
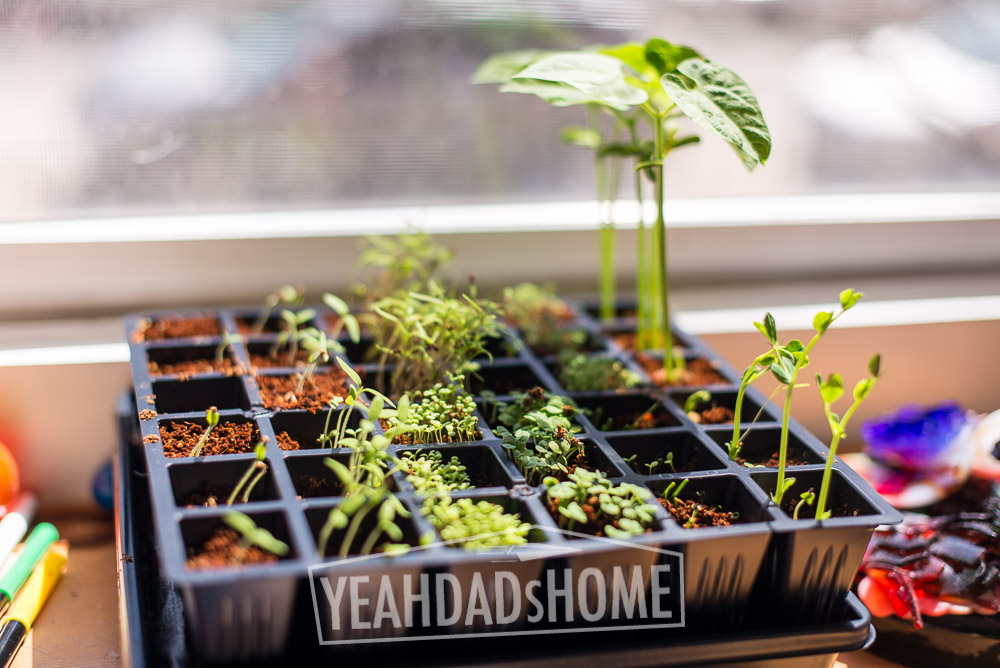
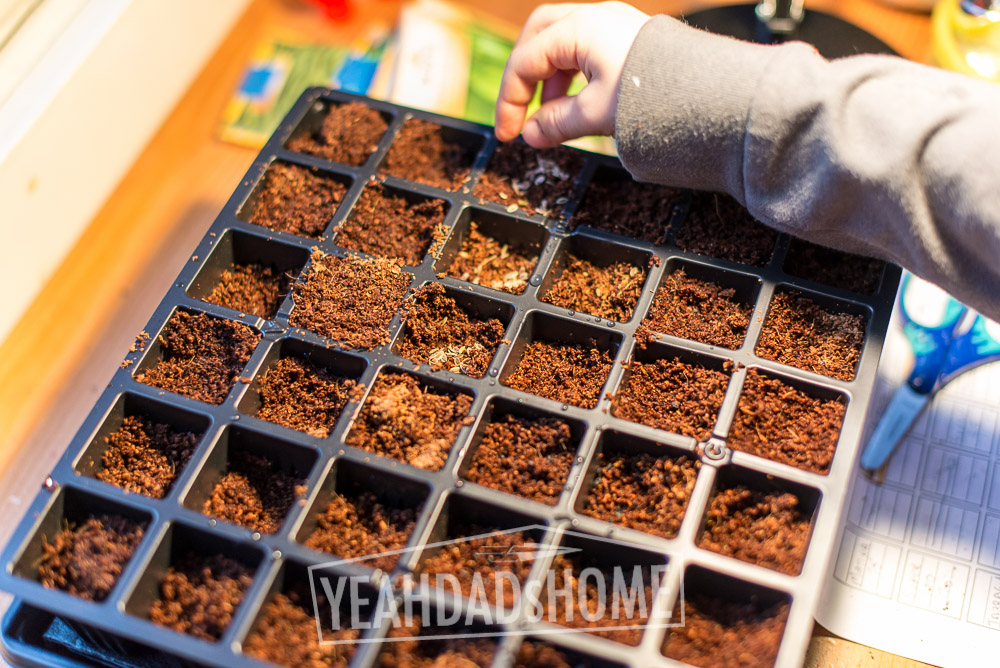
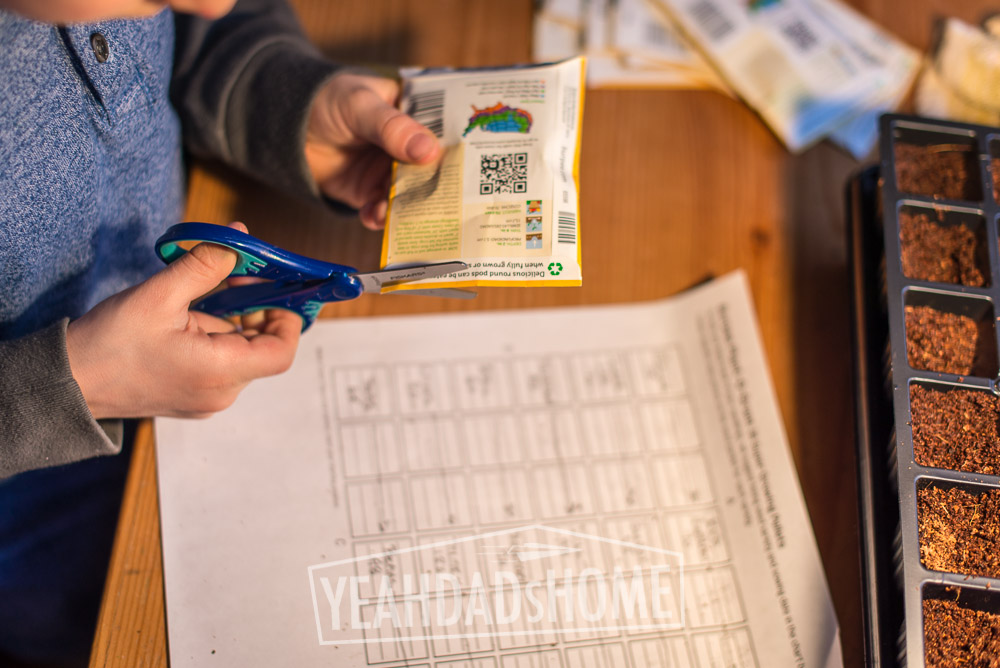
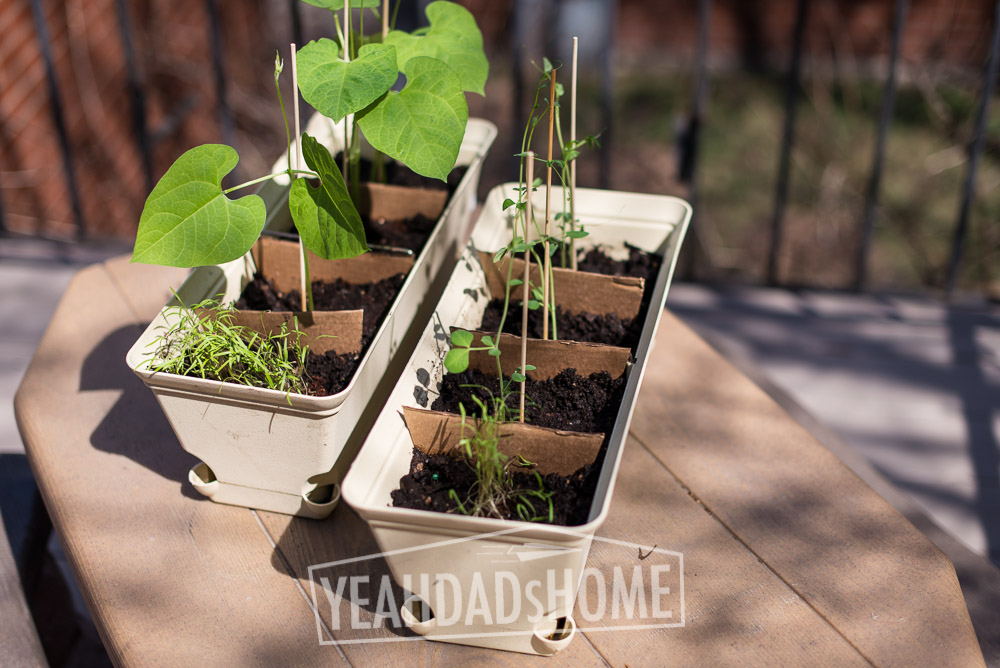
Starting from seeds is less expensive, between $1-$2 per packet of seeds. It is also fun for kids to see the whole process. We planted everything from seed this year. Lettuce, arugula, and mint are going to be planted outside, but we planted the tomatoes, and other herbs in a seed starter. We also planted the peas and beans in the starter, but they outgrew it in a week. They could have been planted in a larger container. The package says direct sow, meaning you can plant them outside, but if we plant them out too early when there aren’t a lot of other plants outside the squirrels gobble them up.
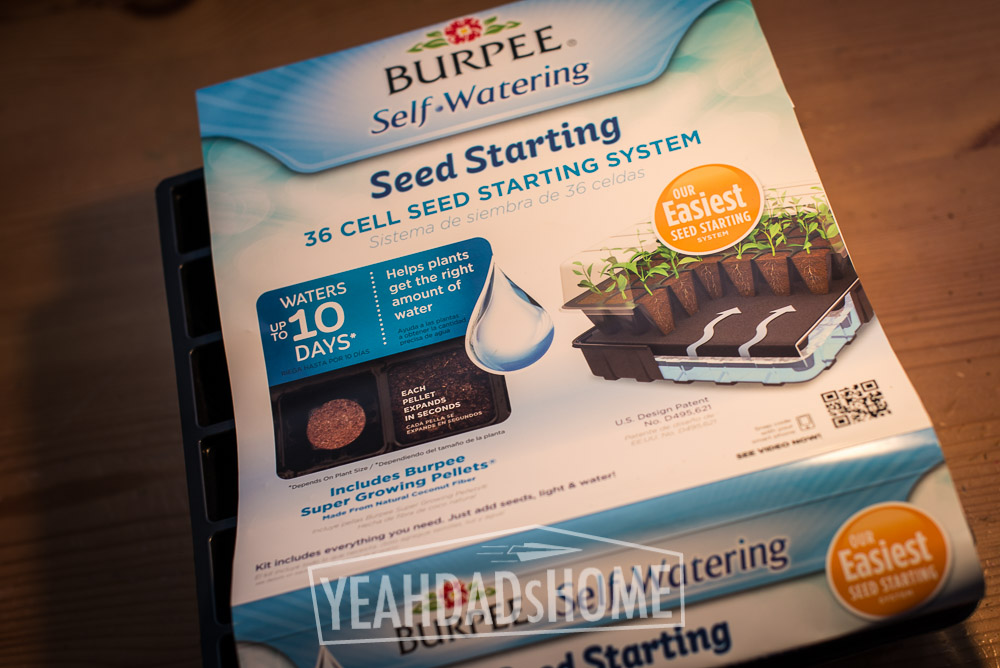
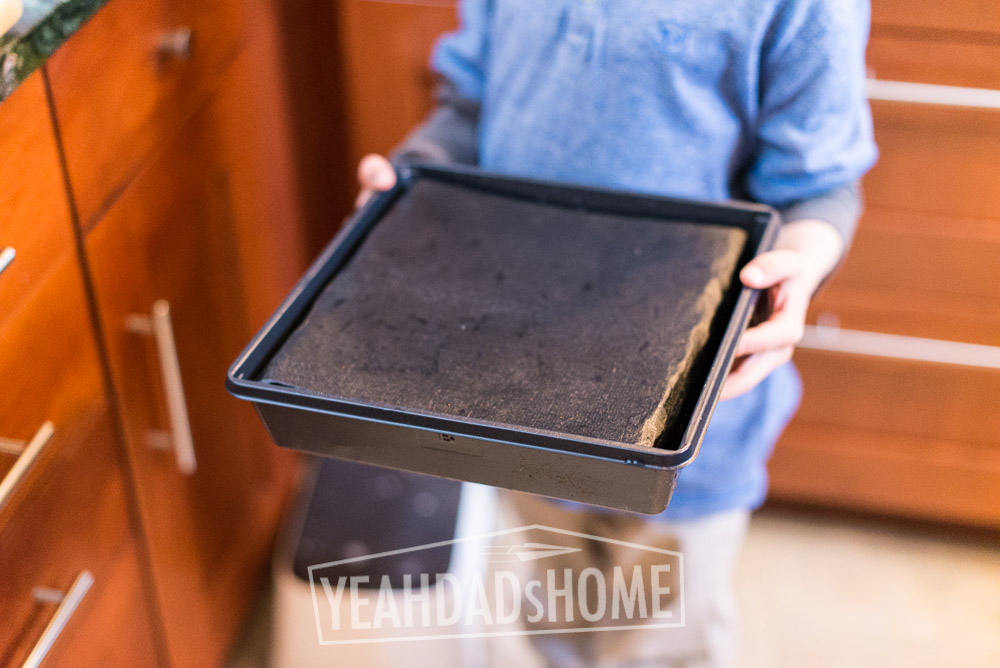
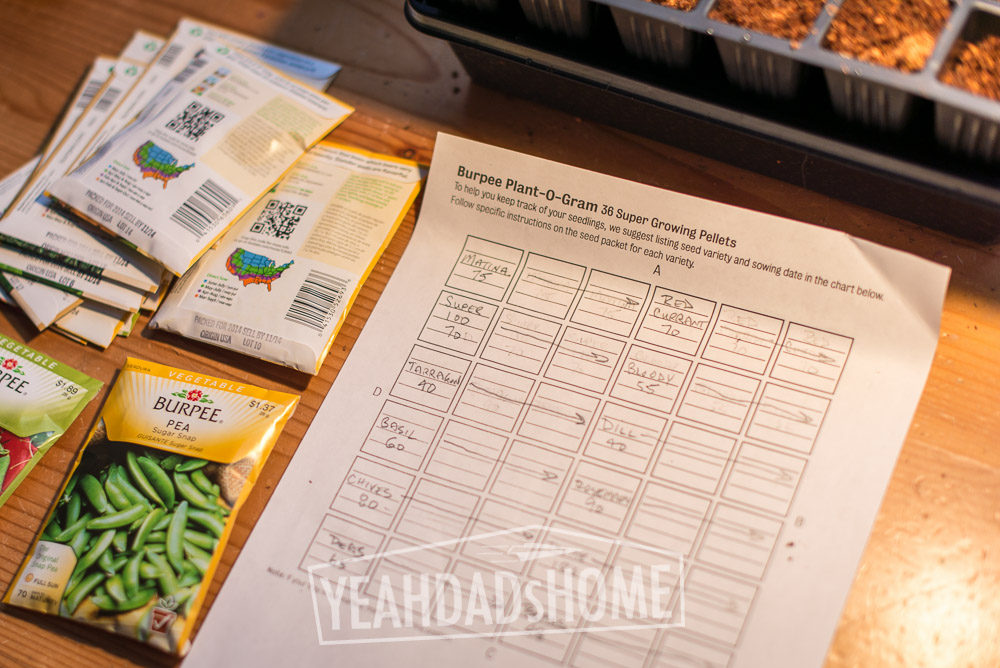
Tip 5 – This $12 seed starter really works
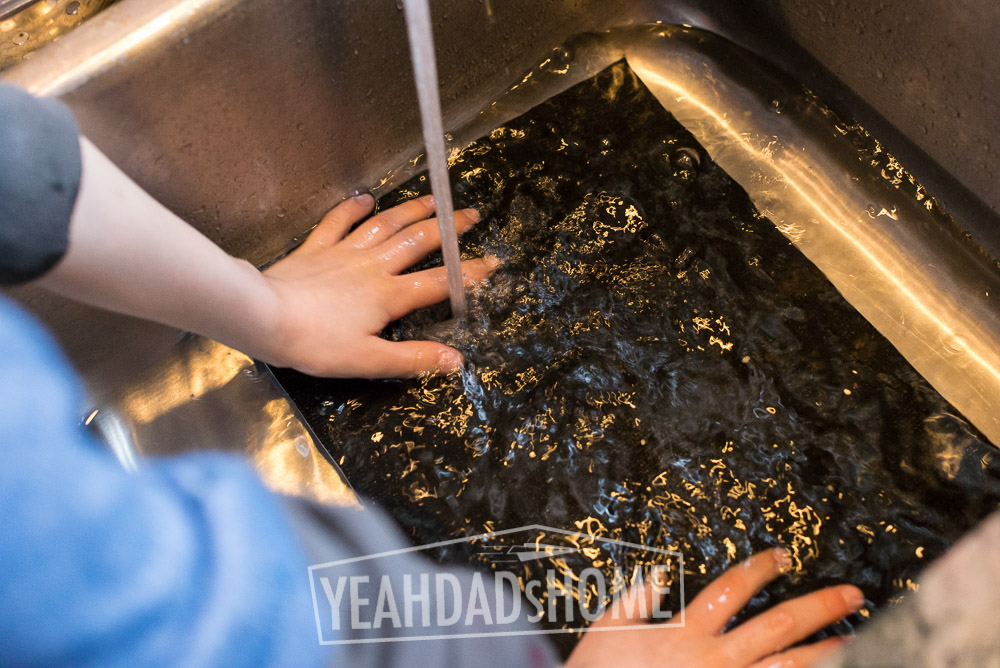
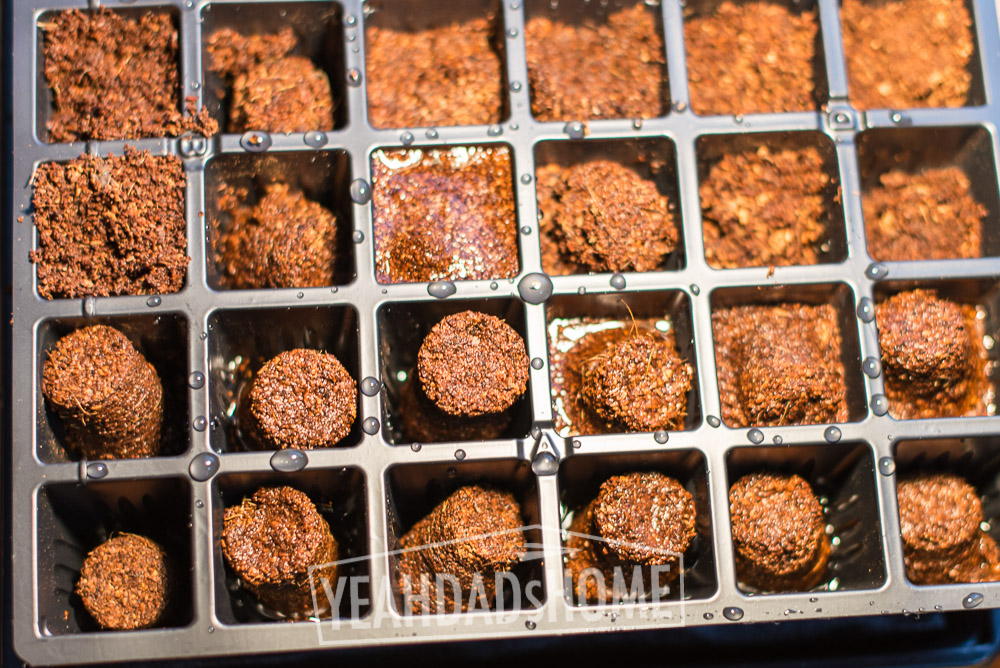
We found this Burpee seed starter at Home Depot. It is self watering and worked even as adults involved had to be away for a few days. The Burpee kit has a tray for water, and a mat that draws the water up to just under the seed compartments. You saturate the mat with water, stack up the sections, and put a pellets of special dirt in each one. We poured water over each of the pellets and made sure that each one expanded to fill it’s “cell” in the tray. Then we added a few seeds to each. The kit has a sheet you can use to keep track of what you plant. We set this up in a sunny window and rotated it every day.


When should you start a container garden?
Our target for getting everything planted outside is May 15. Based on how long our plants take to mature, we planted seeds in the first week of April or about 6-8 weeks before our target. These sites give some good advice on when to plant seed and when to move things outside.
http://www.burpee.com/vegetables/tomatoes/
http://faq.gardenweb.com/faq/lists/tomato/2005015135020413.html
http://gardenplanner.almanac.com/
What if it is still cold outside when seedlings outgrow the starter?
This season I uncovered the boxes and set them up, and then we got one more snow. Obviously seedlings wouldn’t survive this sort of thing. Outdoor planting isn’t really a good idea around us until mid May.
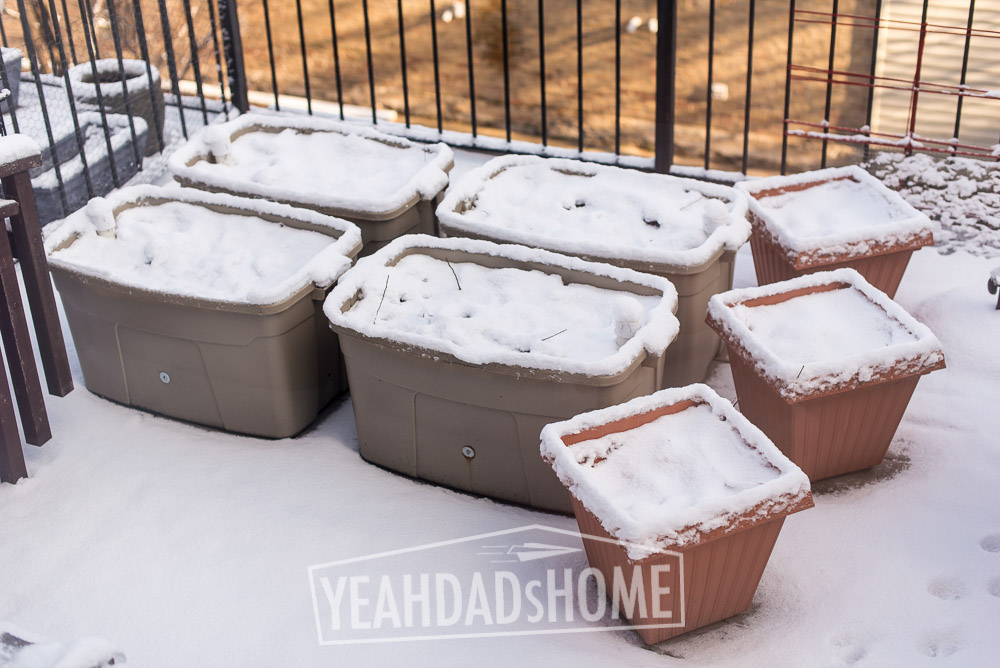
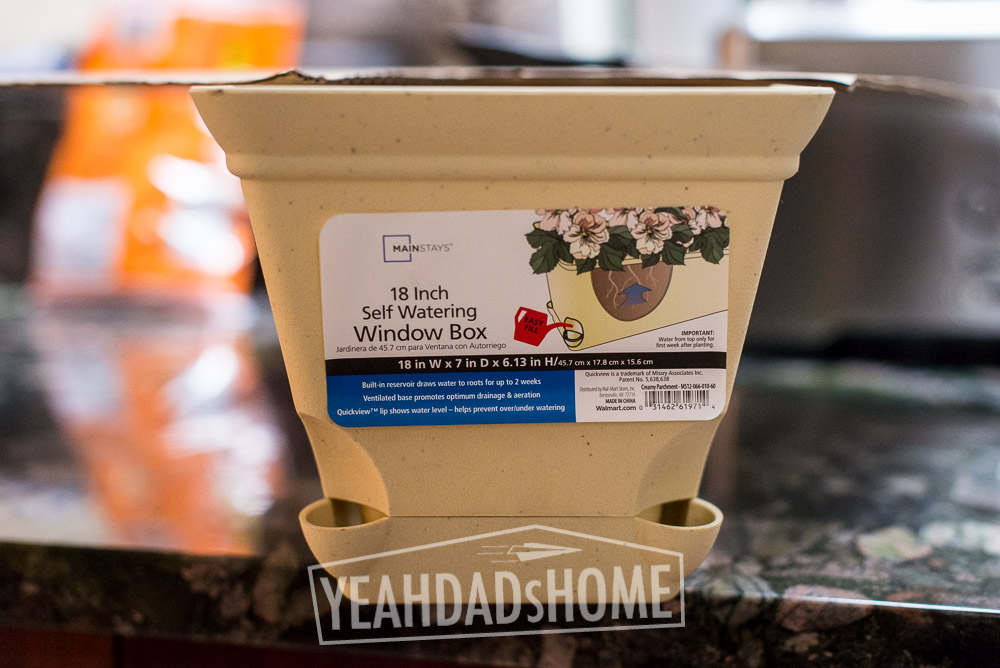
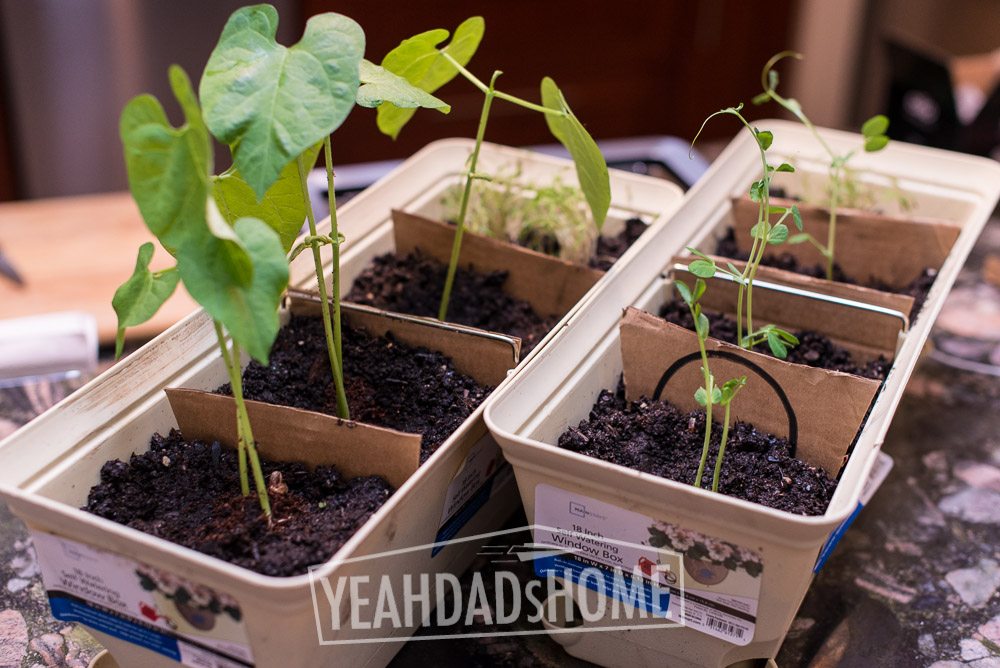
Tip 6 – Self watering flower boxes can move inside/outside in early season weather
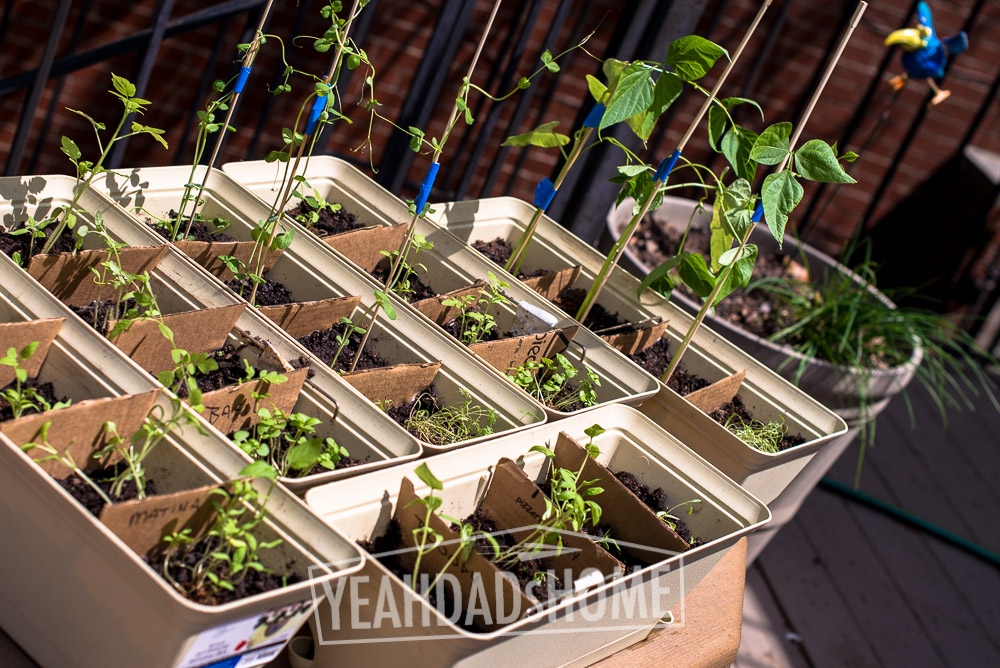
These 18 inch boxes worked well as a next stop for the seedlings. I cut cardboard dividers to keep the roots from getting tangled, and then we could fit four seedlings in each. Actually the peas and beans could have started in these. They each out grew the seed starter in about a week. It took about three weeks for the tomatoes to graduate to the bigger containers. We use these to move the plants outside for sunny days and then inside at night. So far we have found that squirrels don’t bother them during the day.
This site has some advice on when to transfer to bigger containers.
http://awaytogarden.com/tips-for-growing-better-tomatoes-from-seed/

Ourdoor planting
Ok so it is getting warm and the seedlings are ready to be outside full time. Here is how we set things up. Mint gets two 16 inch containers. We like Apple Mint which has big fuzzy leaves. I expect the plants we had last year will sprout up soon. It has lasted for a few seasons, but we had a really cold winter. We also have seeds for Spearmint this year. Once it is in place it grows like crazy and will consume any space you give it, especially if it gets lots of water. Two containers produce enough mint for our drinks and desserts through the summer.
Tip 7 – Plant mint in it’s own container. It can really take over your garden otherwise.
Basil gets two 16 inch planters. That is enough space for each plant, and it allows the basil to be moved around. We find that it grows best in full sun early in the season, and then likes a bit of shade as it gets really hot in July. Make sure to pinch off the flowers as the emerge so that the plant grows more leaves. It is also good to put a reminder on your calendar to make pesto before the cold weather returns in the Fall. Check your frost date calendars, but I am setting October 15 as our make pesto date.
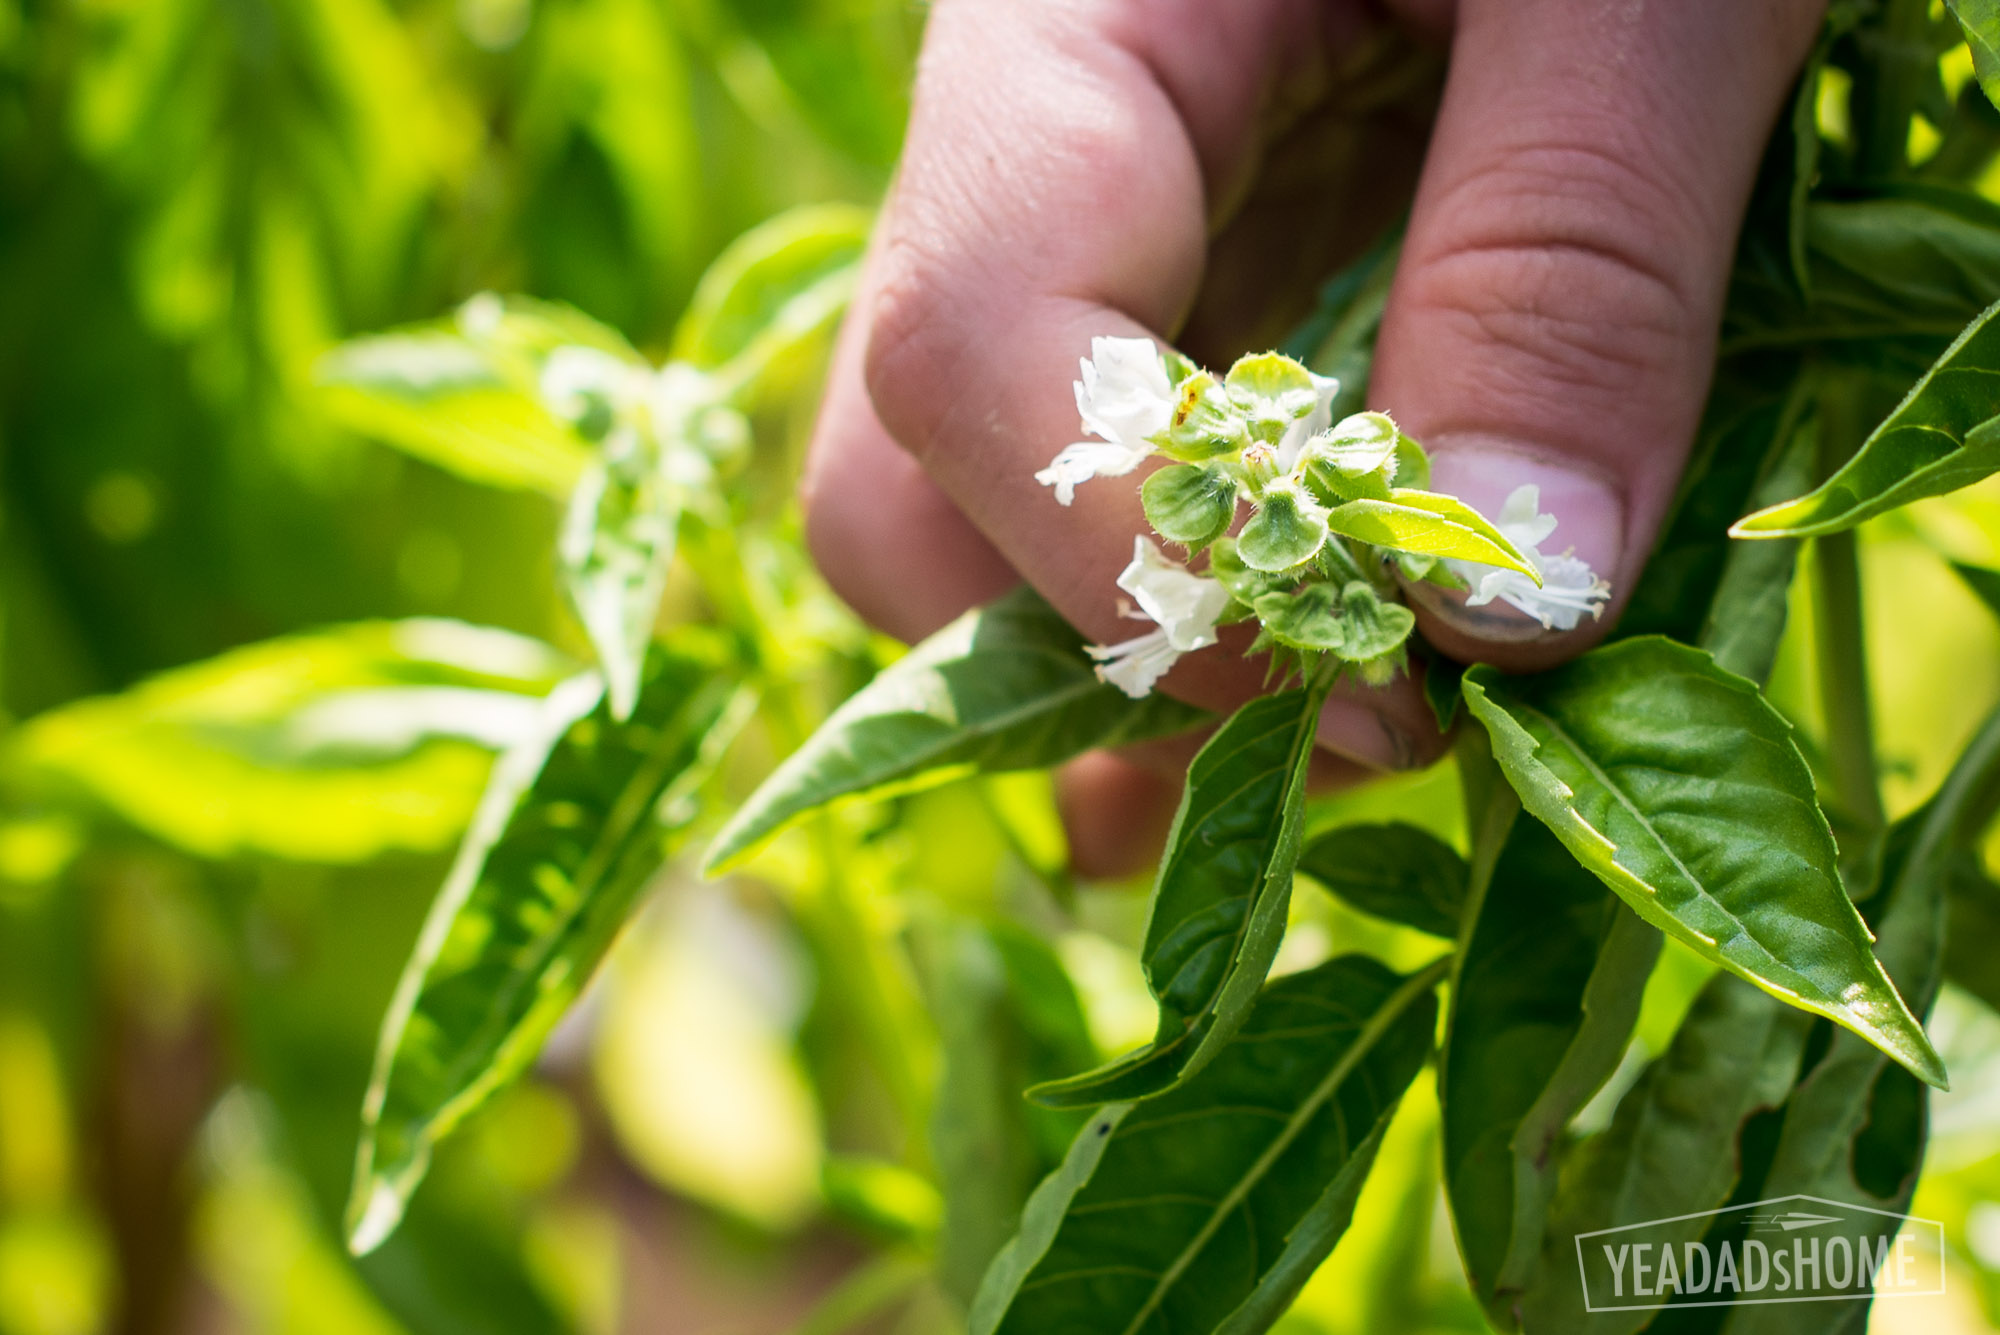
Tip 8 – Pinch the flowers from basil as it grows to you get more leaves.
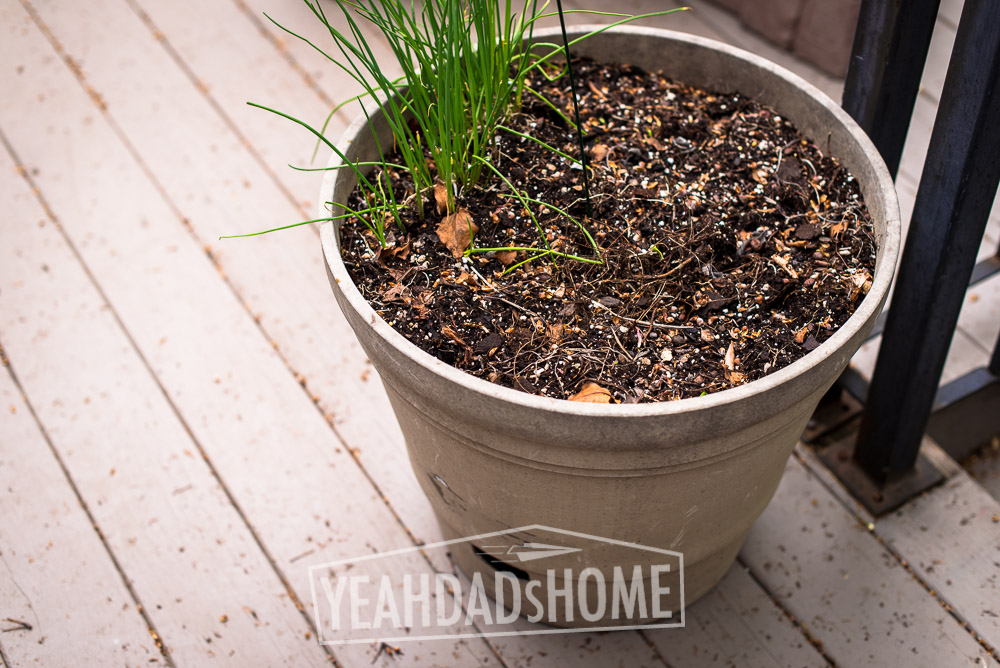
The herb garden is a 20 inch planter that is really close to the kitchen. Chives survived our winter and are already getting things started.
Tip 9 – Earthtainers work really well for tomatoes
Then we have some really cool homemade self watering planters for the rest. These are called Earthtainers. We get really good results from these. I also made these for my Mom and sister, and plants in these did a lot better than the ones they grew in the ground.By self watering they keep the tomatoes from cracking as we get heat and rain through the summer. The instructions also have a great recipe for mixing up the soil to suit tomatoes.
http://earthtainer.tomatofest.com/
These planters are made from 32 gallon storage containers. One is the planter. A second container is cut up to make a shelf that creates a water reservoir. They hold about 10 gallons of water when full. I put about 2.5 bags of potting soil in each. Set them up where you want them to stay for a while because each weighs about 120 lbs when filled with soil and water.

Garden fabric keeps the roots from getting down into the water, and the PVC tube is what lets you fill the reservoir without saturating the plants.
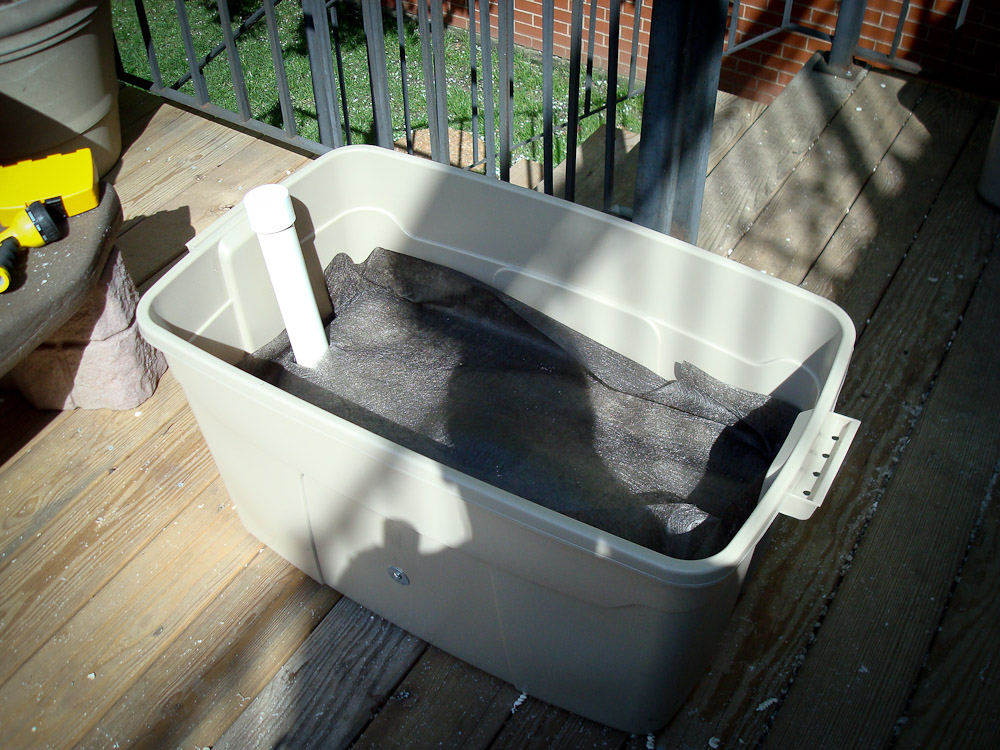
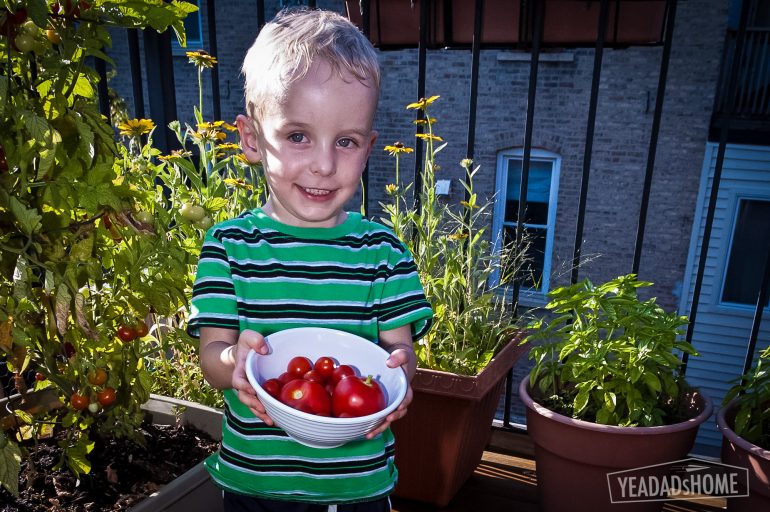
So far we have four made four Earthtainers for our garden, and we use two for tomatoes, one for lettuce, and one for the other veggies. This year peas and beans are in container number four. My son really enjoys watering and harvesting.

As we get our outdoor planting done, and then when we start to harvest, I will add a few more photos. Please let me know if you have questions.
Here is a recap of our advice:
9 Tips for Container Gardening
- Find a spot that gets 8 hours of daily sun
- Herbs give you the biggest bang for the buck
- If you can only choose one type of tomato pick small ones because they grow quickly and produce for several weeks
- Skip carrots and peppers
- The Burpee self watering seed starter works really well
- Self watering flower boxes can move inside/outside in early season weather
- Plant mint in it’s own container
- Pinch flowers off of basil to grow a bigger plant
- Earthtainers work really well for tomatoes and other veggies
